PreSonus StudioLive
™
24.4.2
98
Quick Start:
Level
Setting
Overview Controls Scenes,
Presets &
System
Menu
Technical
Information
Tutorials Trouble-
shooting
& Warranty
Connecting
to a
Computer
Owner’s Manual
99
Quick Start:
Level
Setting
OverviewControlsScenes,
Presets &
System
Menu
TutorialsTechnical
Information
Trouble-
shooting
& Warranty
Software
Universal Control,
Capture, and
Studio One Artist
Hookup
Hookup
Software
Universal Control,
Capture, and
Studio One Artist
Connecting
to a
Computer
7.3 Capture
SOFTWARE: Universal Control, Capture, and Studio One Artist 7
Capture 7.3
7 SOFTWARE: Universal Control, Capture, and Studio One Artist
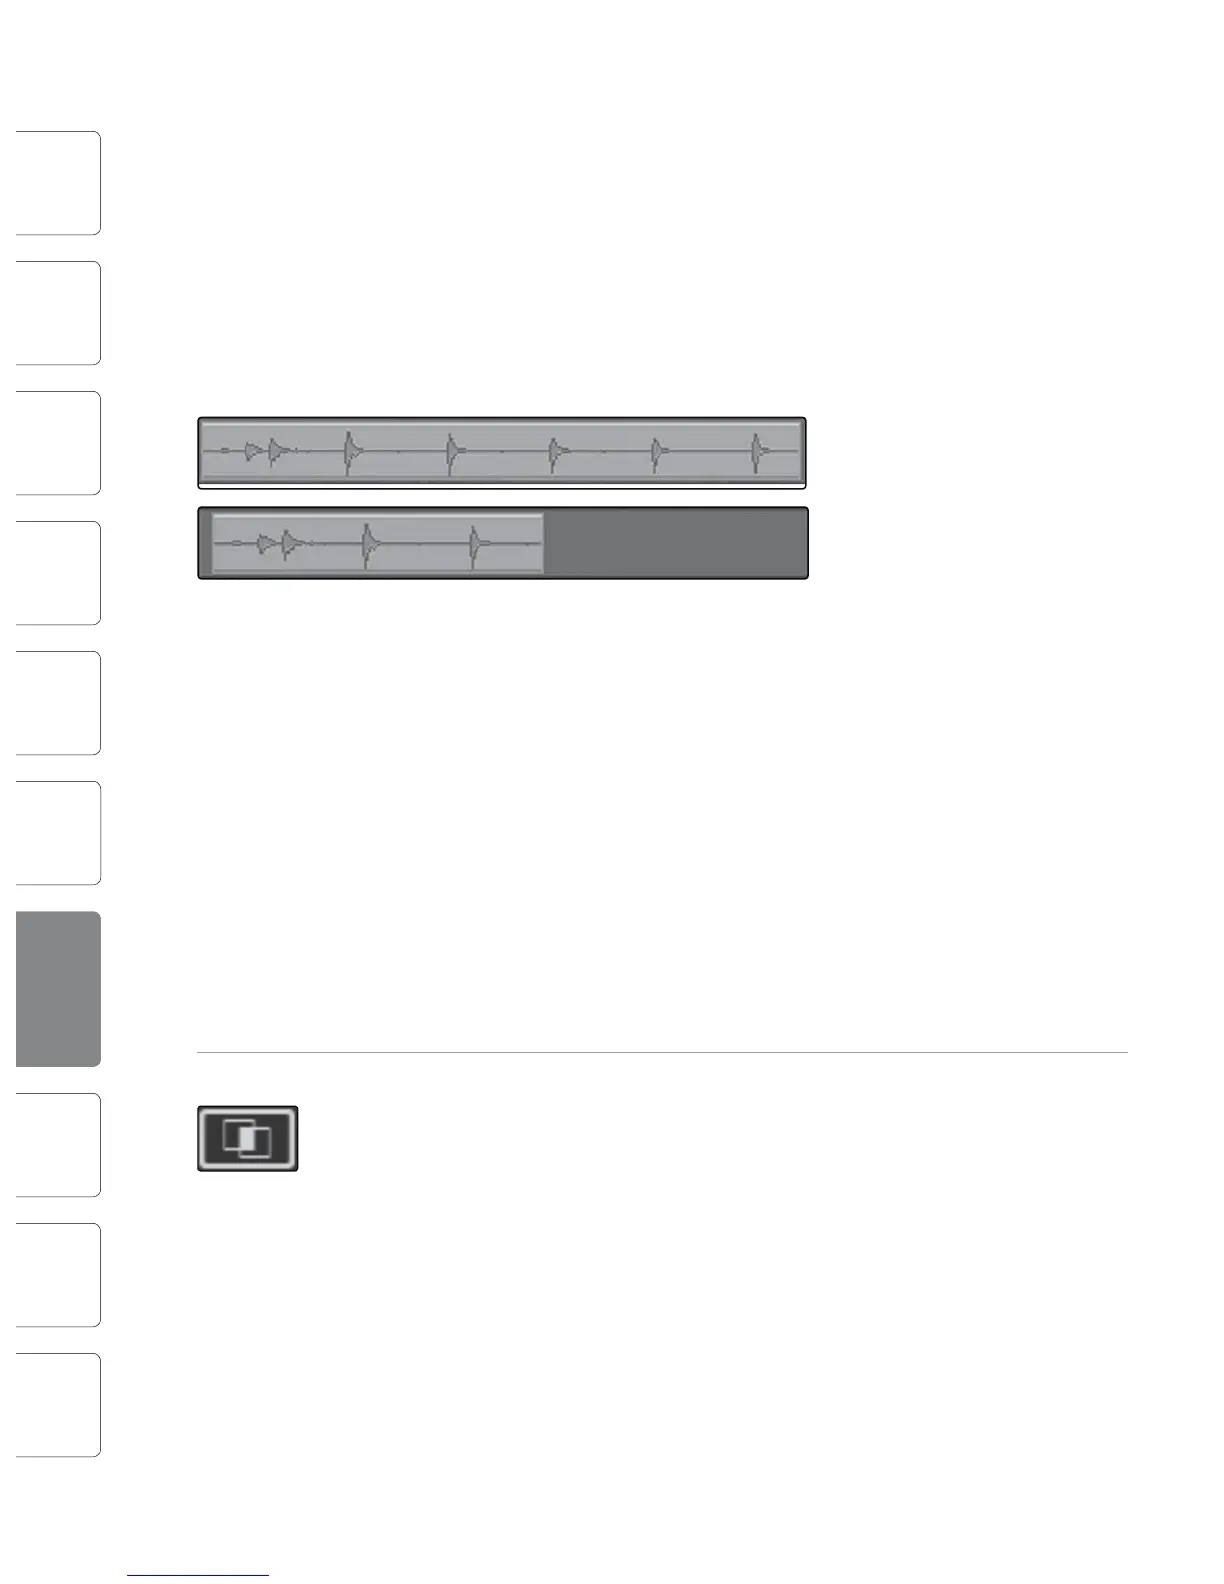
Size an Audio Event
Events can be thought of as windows into audio les, where what
you see is what you will hear. Sizing is a fundamental technique
wherein Audio Events are made shorter or longer, so that only a
portion of the audio they contain is seen, and therefore heard.
To size any Audio Event using the Arrow Tool, oat the mouse to the
left or right edge of the event to reveal the Sizing Tool. When this tool
appears, click and drag left or right to size the event. Audio Events
can be sized and resized nondestructively any number of times.
The pictures above illustrate an Audio Event before and after it is sized.
Select Multiple Audio Events
Multiple Audio Events can be selected at once in order to edit
them all at once with a single action. To select multiple Audio
Events with the Arrow Tool, do one of the following:
t Click outside of the range of an Audio Event, and then drag
over any other event(s); a gray box will be drawn while you
drag over the target selection area. Release the click once the
box is drawn over all of the events you wish to select, and these
events will now all be selected and can be edited at once.
t Click on any event, and then while holding [Ctrl]/[Cmd] on the
keyboard click on any other event(s) to select them. This allows
you to select multiple events that are not close in proximity to
each other. All selected events can now be edited at once.
Range Tool
The Range Tool is used to select a range, or area, within Audio Events.
Click on the Range Tool button or press [NumPad 3] on the keyboard to
select the Range Tool.
To select a range within events, using the Range Tool, click and
drag over the area to be selected; a gray box will be drawn over the
target selection area. Release the click once the box is drawn over
the range of the events you wish to select. The range of the events
you have selected is now treated as a single consolidated event.
t A common use of the Range Tool is to quickly select and delete
a range of audio within events, rather than using the Split Tool
to make two splits, then selecting and deleting the section with
the Arrow Tool. This process is shown in the pictures below.
t Once a range has been selected, the Range Tool will
automatically become the Arrow Tool when the mouse
cursor is oated over the selected range. This makes quickly
selecting and editing any range of an event very simple.
t The Range Tool can be temporarily toggled when the Arrow Tool is
selected by pressing and holding [Ctrl]\[Cmd] on the keyboard.
Splice Tool
Using the Splice Tool, single Audio Events can be split into multiple Audio
Events. Click on the Split Tool button, or press [NumPad 4] on the
keyboard to select the Split Tool.
Click on any Audio Event with the Split Tool to split the event at that
position.
Notice that the split will occur at the leftmost edge of the
Split tool icon (the scissors). By splitting a single event, you
essentially create two events that can be edited independently.
If multiple events are selected across multiple tracks, the Split
Tool will aect all of the selected events in the same way.
Eraser Tool
The Eraser Tool is used to delete an Audio Event. Click on the Eraser Tool
button or press [NumPad 5] on the keyboard to select the Eraser Tool.
t To delete any event using the Eraser Tool, simply click on the
event. The Eraser Tool is unaected by the current selection
and will only aect the event that is directly clicked on.
Common Editing Actions
As with most other software applications, Capture supports basic
Cut, Copy, and Paste actions. Once a selection of events, or a range of
events, has been made, these actions can be performed as follows:
t Cut: Press [Ctrl]/[Cmd]+X on the keyboard to cut the current selection.
t Copy: Press [Ctrl]/[Cmd]+C on the keyboard to copy the current selection.
t Paste: Once a selection is cut or copied, press [Ctrl]/[Cmd]+V
on the keyboard to paste the selection. The selection will
be pasted to the current Playback Cursor position, or to the
beginning of the track from which the selection originated
if the Playback Cursor is not currently set anywhere.