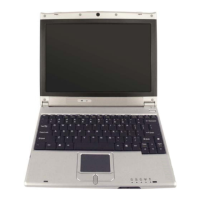
2.Disassembly
To remove the LCD Panel:
1. Remove the battery page 2 - 7
2. Remove the HDD page 2 - 8
3. Remove the system memory page 2 - 10
4. Remove the optical device page 2 - 11
5. Remove the WLAN module page 2 - 12
6. Remove the processor page 2 - 13
7. Remove the keyboard & shielding plate page 2 - 15
8. Separate the top & bottom cases page 2 - 17
9. Remove the modem/Bluetooth modem page 2 - 19
10. Remove the LCD front panel module page 2 - 21
11. Remove the inverter page 2 - 22
12. Remove the LCD panel page 2 - 23
To remove the Mainboard:
1. Remove the battery page 2 - 7
2. Remove the HDD page 2 - 8
3. Remove the system memory page 2 - 10
4. Remove the optical device page 2 - 11
5. Remove the WLAN module page 2 - 12
6. Remove the processor page 2 - 13
7. Remove the keyboard & shielding plate page 2 - 15
8. Separate the top & bottom cases page 2 - 17
9. Remove the modem/Bluetooth modem page 2 - 19
10. Remove the LCD front panel module page 2 - 21
11. Remove the inverter page 2 - 22
12. Remove the LCD panel page 2 - 23
13. Remove the mainboard page 2 - 25
To remove the Audio & DC /DC Boards:
1. Remove the battery page 2 - 7
2. Remove the HDD page 2 - 8
3. Remove the system memory page 2 - 10
4. Remove the optical device page 2 - 11
5. Remove the WLAN module page 2 - 12
6. Remove the processor page 2 - 13
7. Remove the keyboard & shielding plate page 2 - 15
8. Separate the top & bottom cases page 2 - 17
9. Remove the modem/Bluetooth modem page 2 - 19
10. Remove the LCD front panel module page 2 - 21
11. Remove the inverter page 2 - 22
12. Remove the LCD panel page 2 - 23
13. Remove the mainboard page 2 - 25
14. Remove the audio & DC / DC boards page 2 - 26
To remove the PCMCIA Module:
1. Remove the battery page 2 - 7
2. Remove the HDD page 2 - 8
3. Remove the system memory page 2 - 10
4. Remove the optical device page 2 - 11
5. Remove the WLAN module page 2 - 12
6. Remove the processor page 2 - 13
7. Remove the keyboard & shielding plate page 2 - 15
8. Separate the top & bottom cases page 2 - 17
9. Remove the modem/Bluetooth modem page 2 - 19
10. Remove the LCD front panel module page 2 - 21
11. Remove the inverter page 2 - 22
12. Remove the LCD panel page 2 - 23
13. Remove the mainboard page 2 - 25
14. Remove the audio & DC / DC boards page 2 - 26
15. Remove the PCMCIA module page 2 - 27
TECHNICAL SERVICE MANUAL Prestigio Visconte 125W
6