4–29Troubleshooting
Printer Confidence Check
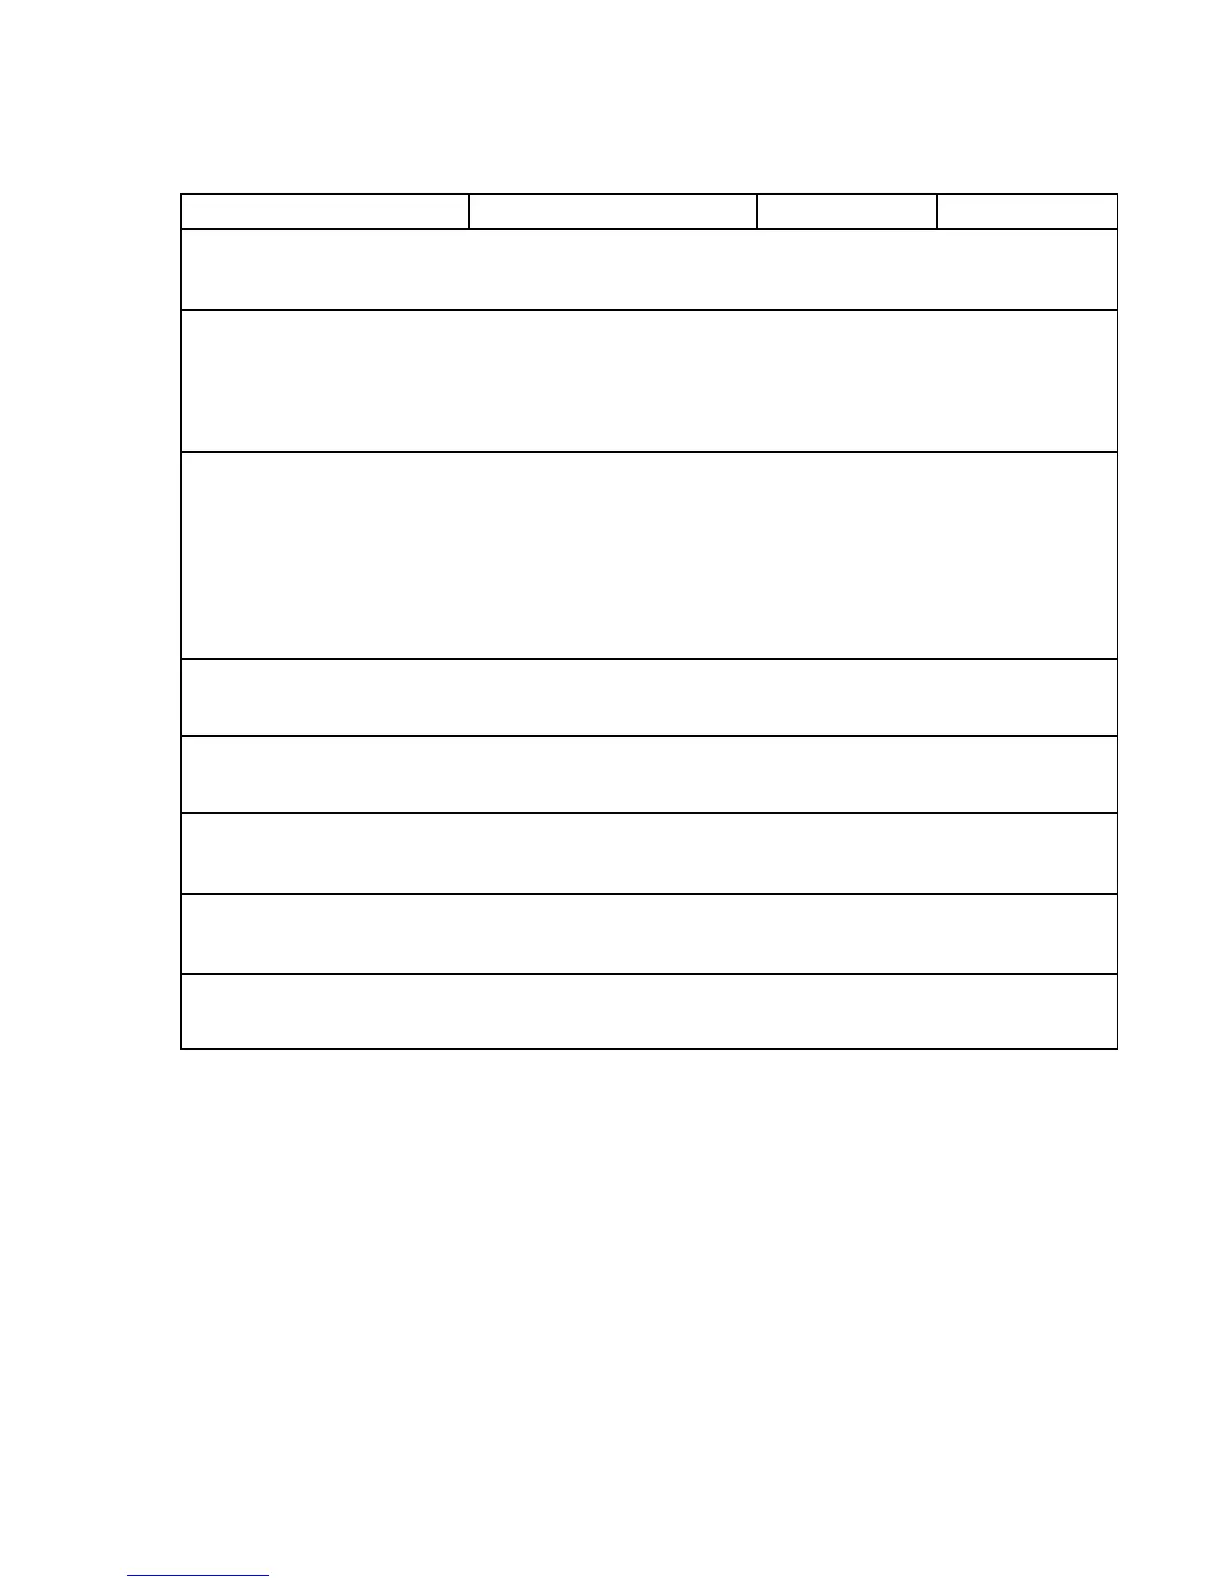
Instruction Indication Yes No
1. Check that printer is plugged
into correct power source.
(Refer to Setup Guide.)
Power cable installed correctly
to proper source.
Go to step 2. Connect printer to
correct power
source.
2. Disconnect the interface
(data) cable from the host
computer to isolate the
printer, then run a diagnostic
self–test (page 4–37.)
Printer operates correctly. Fault is not in the
printer. Check
host computer,
applications
software, cabling,
etc.
Go to step 3
3. Connect the interface (data)
cable to host and printer.
Turn the printer on. Make a
configuration printout. (Refer
to
Setup Guide.)
Make sure that:
a) The configuration is correct
for the user’s application.
b) Host computer and printer
are using the same protocol
(emulation).
c) Configuration has not been
inadvertently changed by the
user.
Go to step 4. Reconfigure the
printer to conform
to host computer
and user’s
application
requirements.
(Refer to Setup
Guide.)
4. Check alignments and
adjustments. (Chapter 5.)
Assemblies and components
are adjusted in accordance with
Chapter 5.
Go to step 5. Adjust all
assemblies that
are out of spec.
5. Check all electrical
connectors.
Connections are clean and tight,
wires are not broken, stripped,
frayed, or out of connectors.
Go to step 6. Replace stripped,
frayed, or broken
wires.
6. Check that all circuit boards
are seated correctly in the
card cage.
Boards are seated correctly in
card cage.
Go to step 7. Reseat all boards.
Connections must
be clean and tight.
7. Inspect for debris that could
cause short circuits (loose
fasteners, foil, etc.).
Metallic debris. Remove debris.
Clean the printer
(page 3–2).
Go to step 8.
8. Set power switch to on.
Printer powers up and initializes
correctly.
Return printer to
normal operation.
Troubleshoot the
fault message
(page 4–3).
 Loading...


