Beta Draft Confidential
2-10 Professional Series Network Thermostat Configuration Guide, Release 3.0
Part No. 600-01000-200, Rev. 2
CHAPTER 2: Configuring the Thermostat Using the TDI
Status & Control Screen
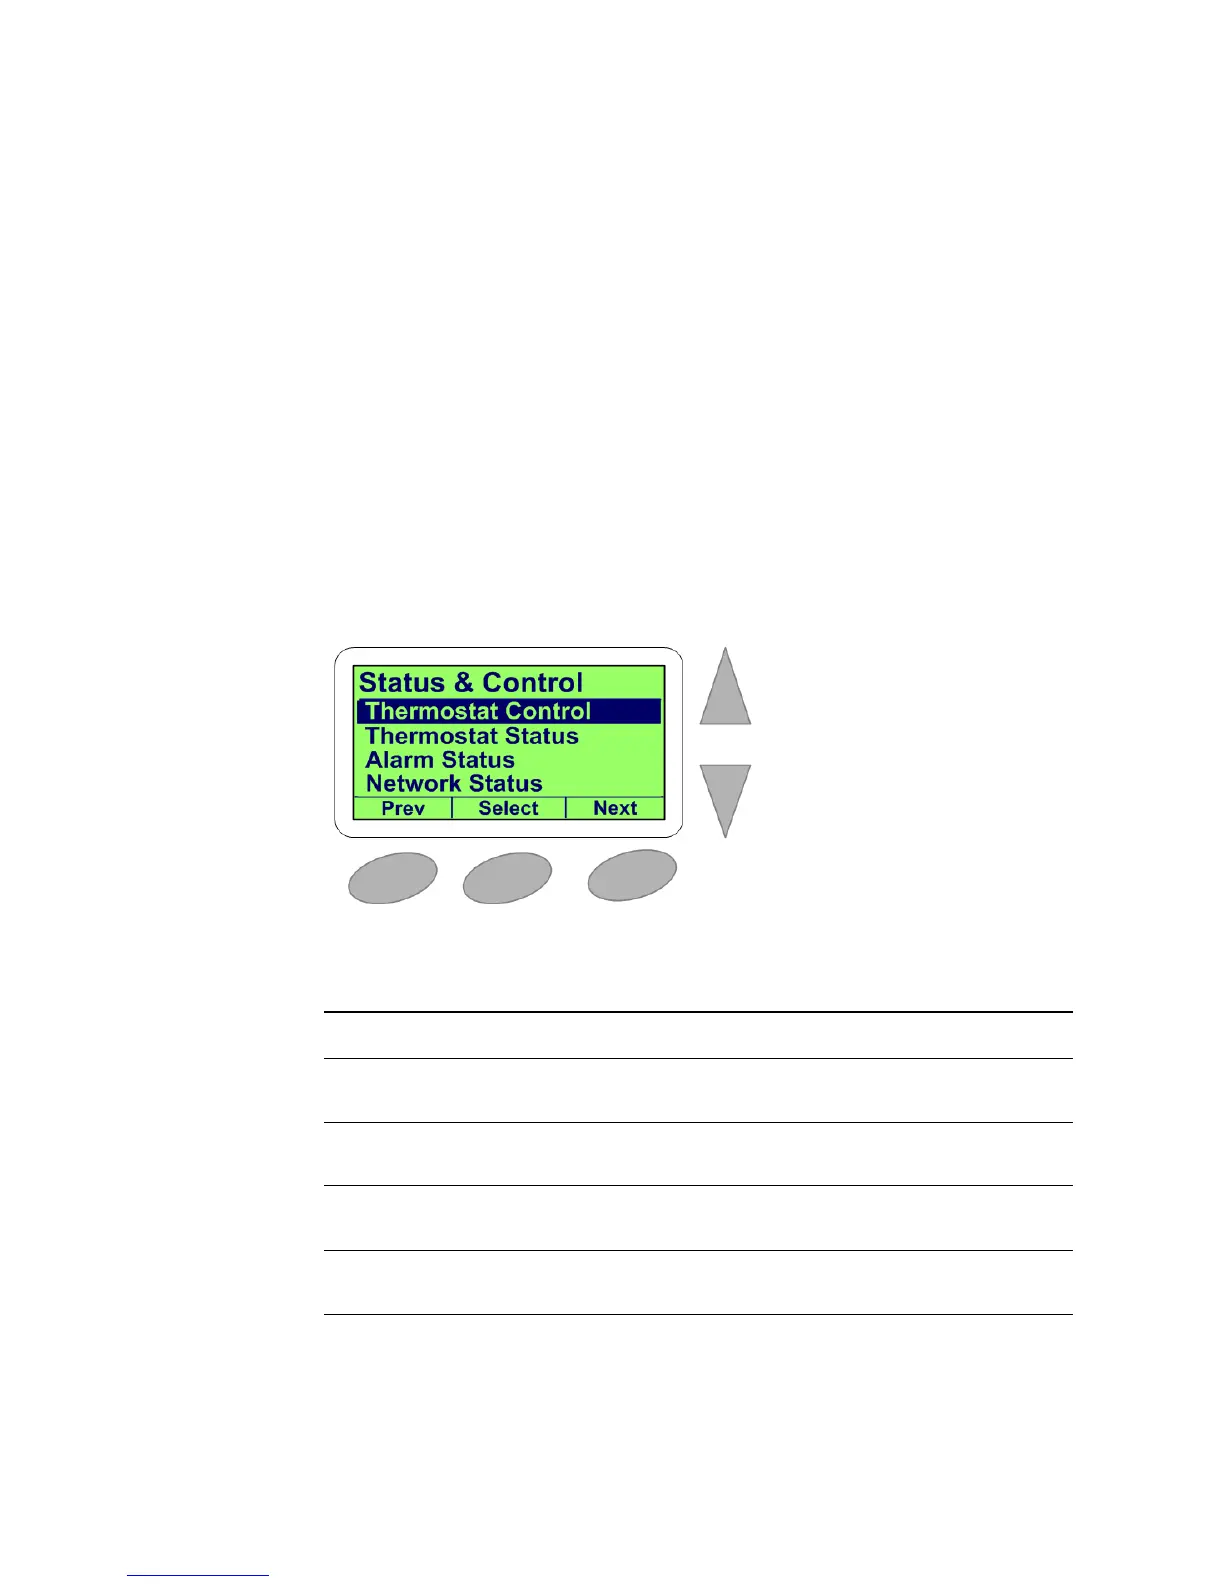
The Status & Control screen is the third primary screen. (This is the second primary
screen on the Professional Series thermostats if remote sensors are disabled.) You can
highlight each status field by pressing the Up or Down arrows on the thermostat. Press
Select to choose the desired status field.
You can access the following four secondary screens from the Status & Control
screen:
Thermostat Control Screen (page 2-11)
Thermostat Status Screen (page 2-13)
Alarm Status Screen (page 2-14)
Network Status Screen (page 2-15)
Figure 2-8 Status & Control Screen
Table 2-5 lists the Status & Control screen options.
Table 2-5 Status & Control Screen Options
Option Description
Thermostat Control When highlighted and selected, opens the Thermostat Control
Screen (page 2-11).
Thermostat Status When highlighted and selected, opens the Thermostat Status
Screen (page 2-13).
Alarm Status When highlighted and selected, opens the NT150e/h and
NT160e/h Alarm Status Screen (page 2-14).
Network Status When highlighted and selected, opens the Network Status Screen
(page 2-15).


 To Next Page