Page 44
The third parameter for each relay determines the alarm ID for the relay
you wish to set.
P212, 222 - Relay Alarm ID
When P211, P221 = 3 (Loss of Echo) or 4 (Loss of Clock)
This parameter has no function and will not be displayed.
When P211, P221 = 1 or 2
This parameter defines which alarm type, the relay should respond to, as
follows.
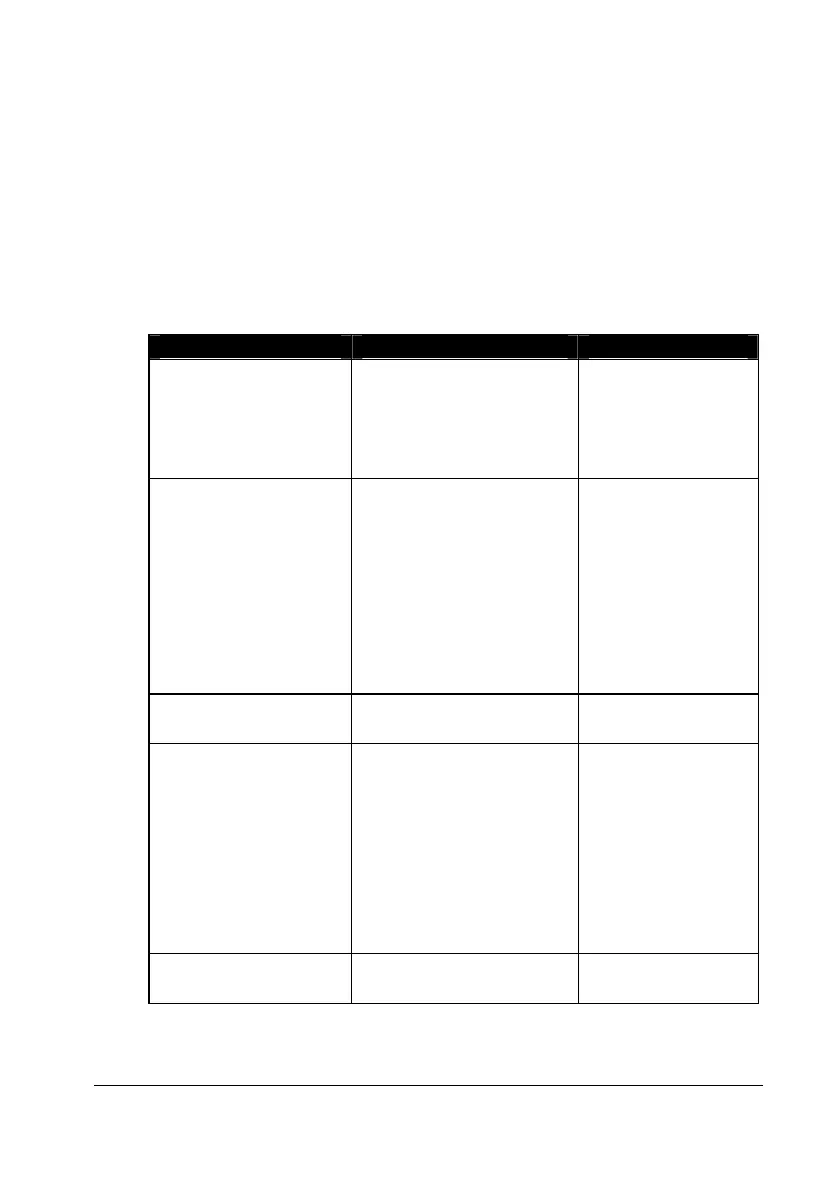
Alarm ID Description Setpoints
1=General (Default)
Relay goes “ON” when
the value reaches the ON
setpoint and goes “OFF”
when the value reaches
the OFF setpoint.
P213, 223 is ON
Setpoint;
P214, 224 is OFF
Setpoint
2= High
Relay goes “ON” when
the value rises to the ON
setpoint and goes “OFF”
when the value lowers to
the OFF setpoint.
ON> OFF
Relay Setpoints
P213, 223 and
P214, 224
Setpoints, can be
set in any order as
the unit ‘knows’
that you are setting
a high level alarm.
3= Hi-Hi
Same as 2 = High, but
different identifier.
4= Low
Relay goes “ON” when
the value lowers to the
ON setpoint and goes
“OFF” when the value
rises to the OFF setpoint.
ON<OFF Relay
Setpoints
P213, 223 and
P214, 224.
Setpoints, can be
set in any order as
the unit ‘knows’
that you are setting
a low level alarm.
5= LoLo
Same as 4=Lo, but
different identifier.