Page 45
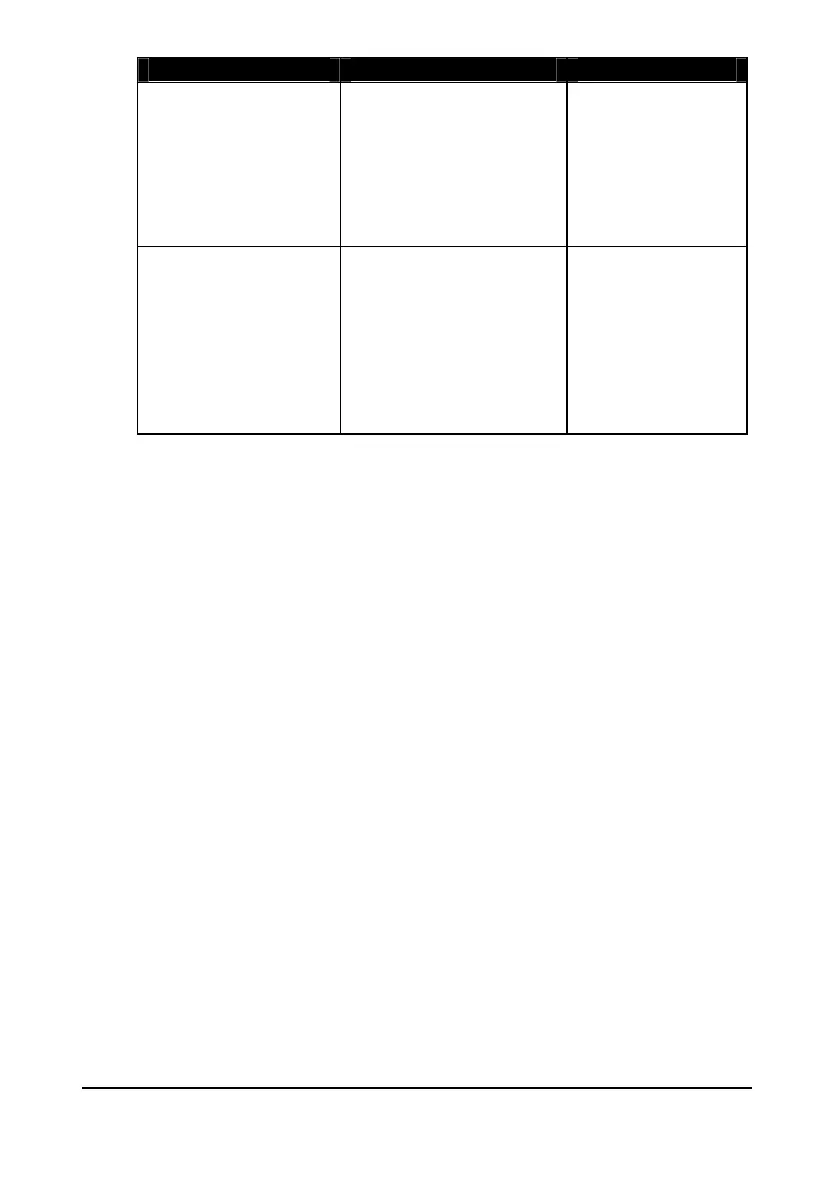
Alarm ID Description Setpoints
6= In bounds
Relay goes “ON” if
value is inside the zone
between the two
setpoints.
Relay Setpoints,
P213, 223 and
P214, 224 can be
set in any order as
the unit ‘knows’
that you are setting
an in bounds alarm.
7= Out of bounds
Relay goes “ON” if
value is outside the zone
between the two
setpoints.
Relay Setpoints
P213, 223 and
P214, 224 can be
set in any order as
the unit ‘knows’
that you are setting
an out of bounds
alarm.
The fourth parameter and the fifth parameter for each relay set the
Alarm “ON” and “OFF” points. For a high alarm the “ON” is set higher
than “OFF”. For low alarm then “ON” is set lower than “OFF”. See the
appropriate alarm ID, table (P212, 222) for further information.
When P211, P221 = 3 (Loss of Echo) or 4 (Loss of Clock)
This parameter has no function and will not be displayed.
When P211, P221 = 1 or 2
P213, P223 - Relay Setpoint 1
Determines the “ON” or “OFF” point for the alarm according to the ID
selected.
P214, P224 - Relay Setpoint 2
Determines the “ON” or “OFF” point for the alarm according to the ID
selected.