16
PICTURE 2-9
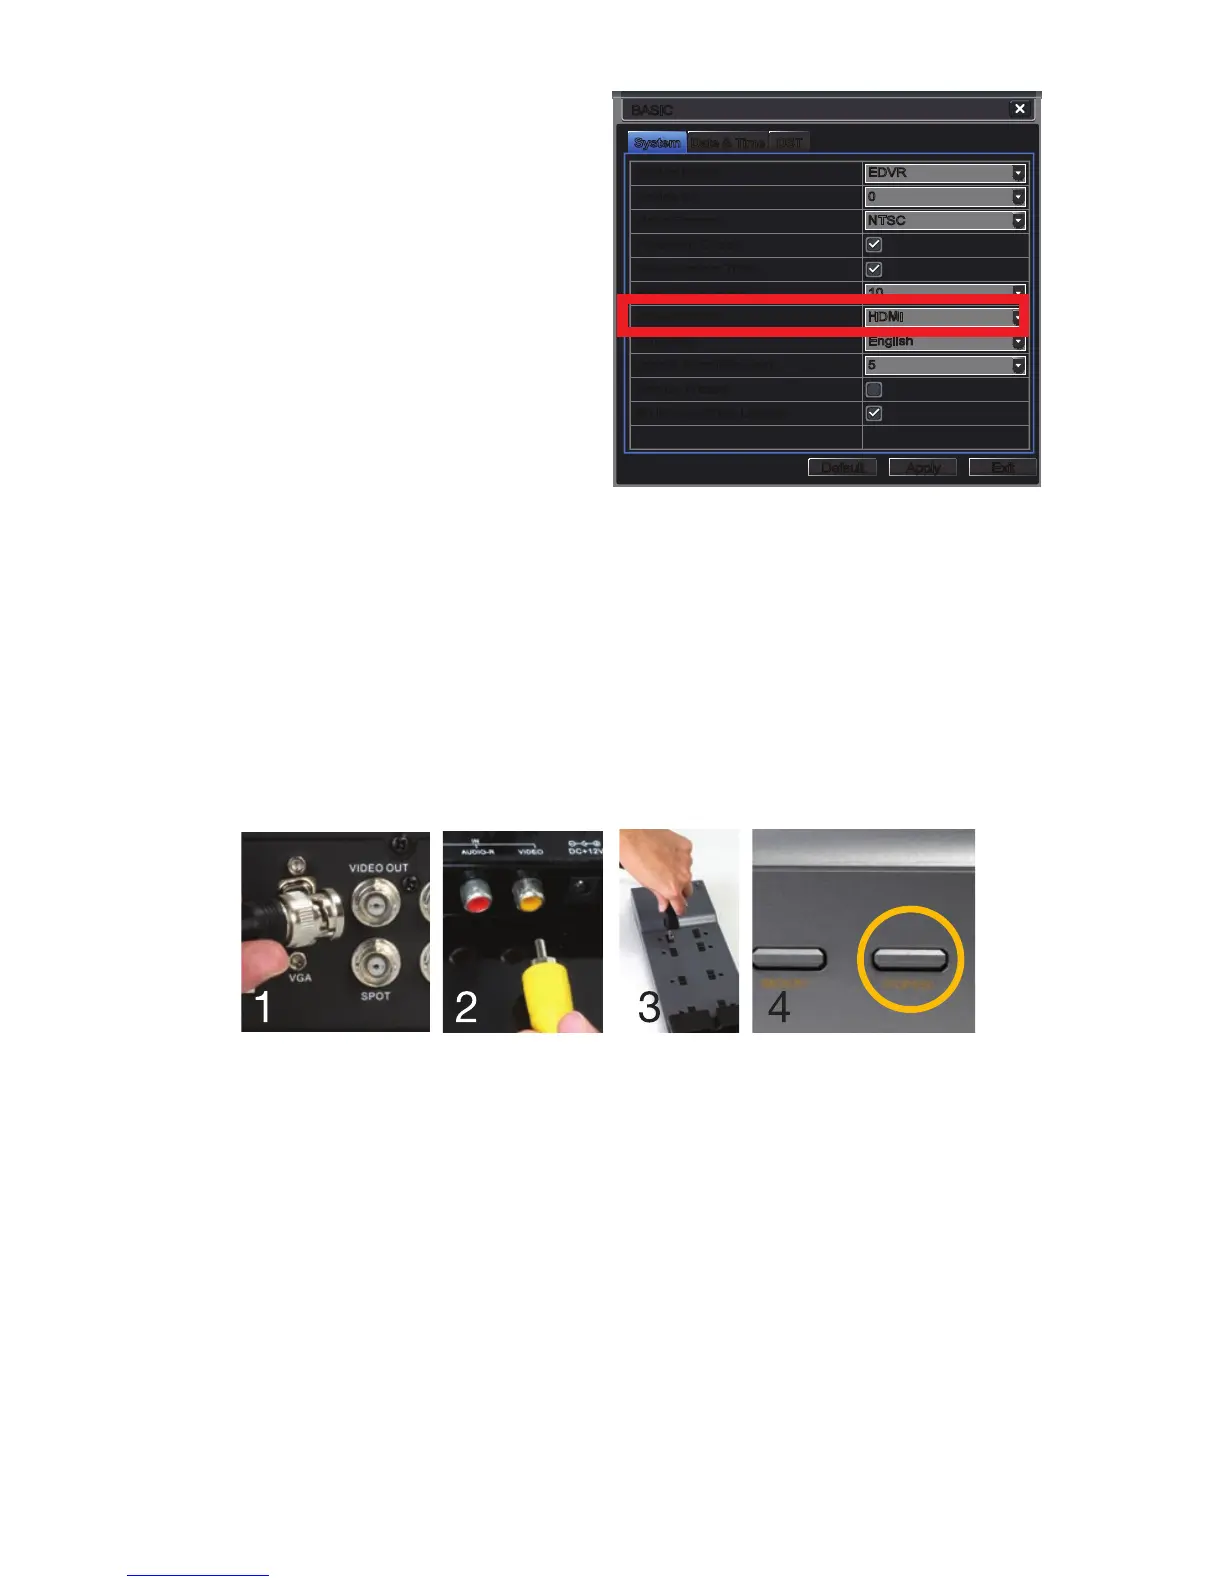
Changing Display Resolution
You can adjust the DVR to optimize its output
to best match the capabilities of your monitor
or HD display through the following steps:
STEP 1. Open the Basic window in the
Setup window which is located in the
Main Menu.
STEP 2. Click on the System tab.
STEP 3. Use the Video Output pull-down to
select your desired resolution.
STEP 4. Click on Apply to save your settings
and then click Exit.
STEP 5. Your system will restart. You will
have to re-log in afterwards.
STEP 1. Connect a BNC-to-RCA cable to the “Video Out” port on the back of the DVR.
STEP 2. Plug the RCA end into the “Video In” port on the television.
STEP 3. Plug the television’s power cable into a surge protector.
STEP 4. Press and hold the STOP, STOP/ESC, EXIT, n/ESC or
VGA/TV
(depending on model)
button on the front of the DVR for 10 seconds or until you hear a beep to indicate that the video
mode has been changed.
Television
A third option for a video display is any television with an RCA video input. The DVR’s Video
Out port uses a BNC (British Naval Connector) type for coaxial cable. Depending on model,
your DVR may include a BNC-to-RCA cable or adapter. The latter converts the BNC jack to
an RCA port allowing you to connect the DVR to the television using a readily available RCA
cable. If you use a television as your video display, you will need to switch the DVR to use that
as a primary output by following Step 4, below:
PICTURE 2-8
SystemSystem Date & TimeDate & Time DSTDST
BASICBASIC
DefaultDefault
ApplyApply ExitExit
EDVR
0
NTSC
10
HDMI
English
5
EDVR
0
NTSC
10
HDMI
English
5
Device Name
Device ID
Video Format
Password Check
Show System Time
Max Online Users
Video Output
Language
Logout After [Minutes]
Startup Wizard
No Image When Logout
Device Name
Device ID
Video Format
Password Check
Show System Time
Max Online Users
Video Output
Language
Logout After [Minutes]
Startup Wizard
No Image When Logout

 Loading...