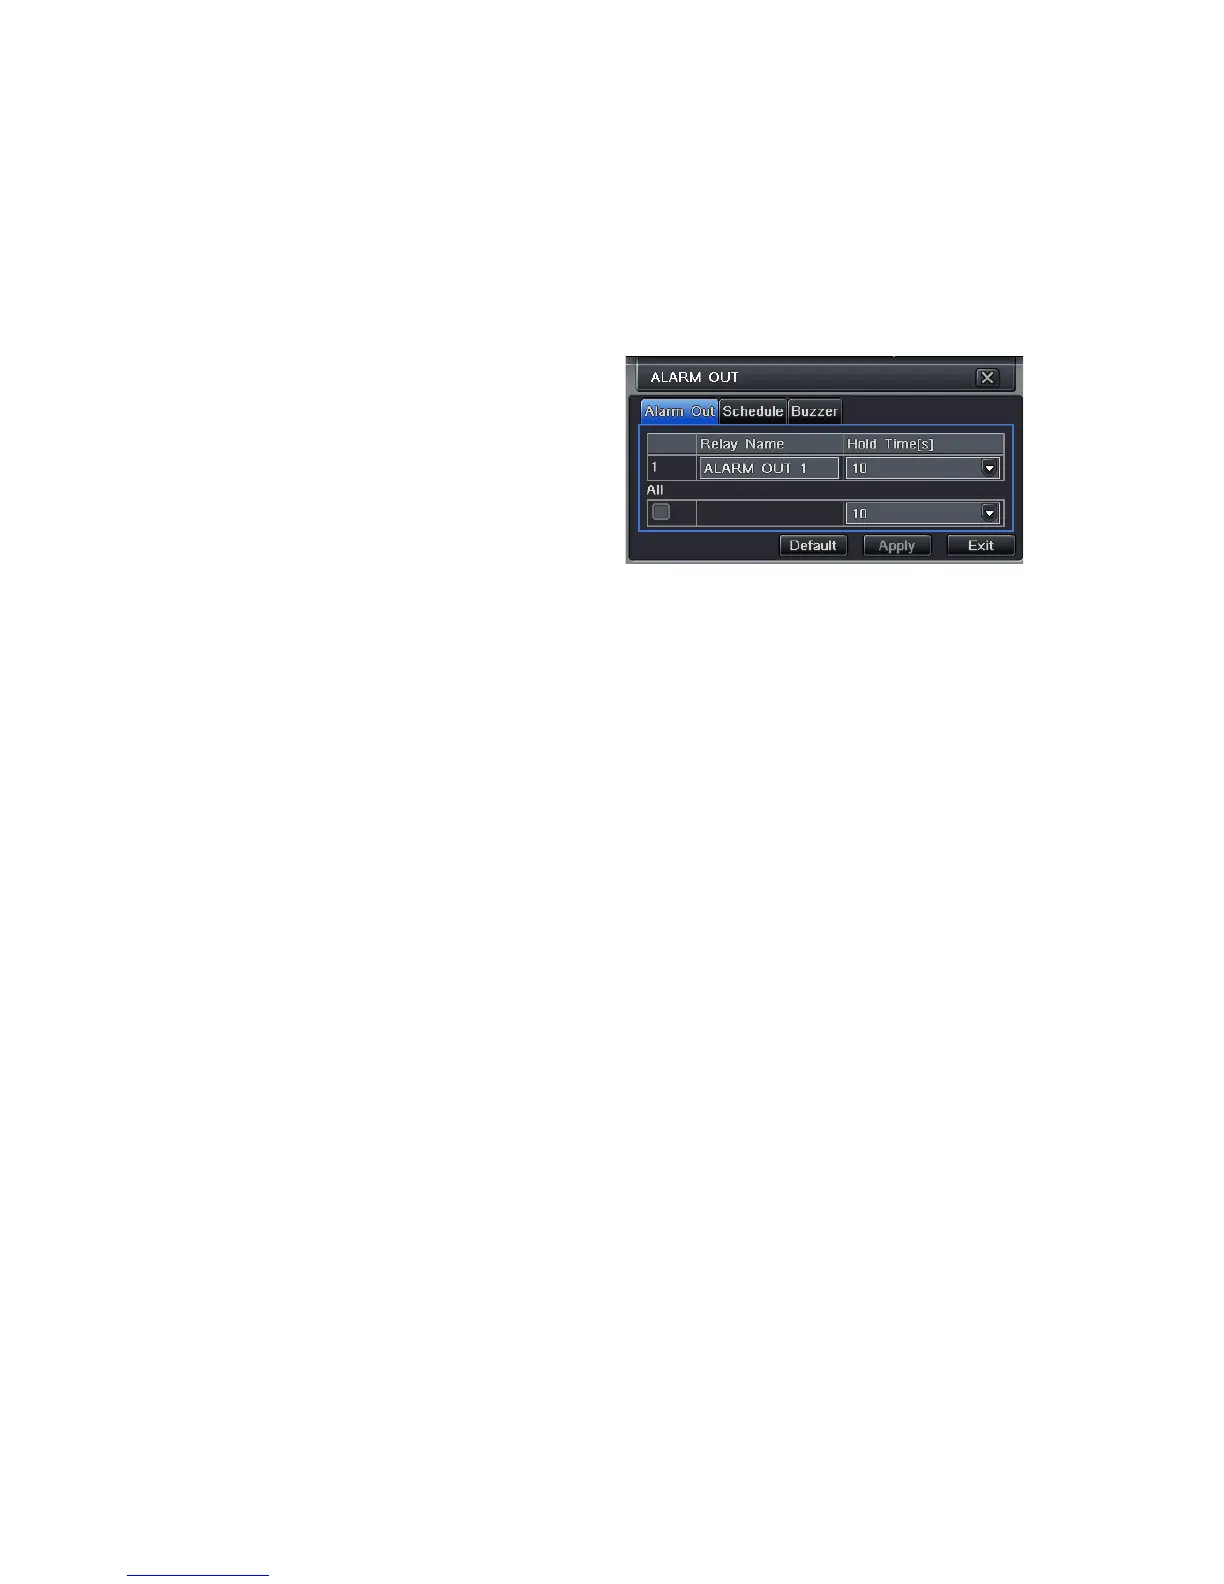
EasyManua.ls Logo

Q-See QT SERIES User Manual

Q-See QT SERIES
89 pages
To Next Page IconTo Next Page
To Previous Page IconTo Previous Page
Page #66 background image
66
ALARM OUT
Set how the alarms are handled and transmitted in this window. This controls any device
attached to the ALARM OUT port on the back of the DVR. There are three tabs; Alarm Out,
Schedule and Buzzer.
Alarm Out Tab
You can set the relay alarm out name as well as the hold time. Hold time is the interval
between consecutive alarm activations so multiple events within the interval will not cause the
alarm to sound again.
Schedule Tab
The default setting is for the ALARM OUT to be active all the time, but this can be changed
to meet your particular requirements in a similar manner to Schedule in SECTION 4.4.
Buzzer Tab
As with the Alarm Out hold time, the internal buzzer can be enabled and given a hold time.
PICTURE 8-13

Table of Contents

Other manuals for Q-See QT SERIES

Question and Answer IconNeed help?

Do you have a question about the Q-See QT SERIES and is the answer not in the manual?

Q-See QT SERIES Specifications

General IconGeneral
SeriesQT Series
Video CompressionH.264
Remote ViewingYes
HDMI OutputYes
VGA OutputYes
Motion DetectionYes
Channels4, 8, 16
Recording Resolution1080p, 720p
Hard Drive CapacityUp to 6TB
Mobile App SupportYes
Network ConnectivityEthernet

Summary

Introduction

For Your Safety

Essential safety precautions for preventing damage and injury before installing or using the equipment.

Features

Network

Configuration options for network connectivity, remote viewing, and internet access.

Connections and Controls

2.1 Mouse

Detailed instructions on using the USB mouse for navigating menus and controlling DVR functions.

2.2 Remote Control

Overview of the remote control functions for operating the DVR from a distance.

2.3 Video Display

Instructions for connecting monitors and televisions to the DVR for video output.

2.4 Cameras

Guidance on connecting analog and SDI cameras to the DVR, including BNC and power connections.

Basic Functions

3.1 Power On/Off

Step-by-step guide for powering the DVR on, logging in, and safely shutting it down.

3.2 The Control Bar

Overview of the control bar functions for live viewing and playback, including menu access and display modes.

3.3 Live Viewing and Recording

Details on switching video output, viewing live camera feeds, and understanding status symbols.

3.4 Quick Playback

How to use the Quick Playback feature to review recent recordings and set playback time periods.

Playback Control Bar

Explanation of playback controls, including fast forward/rewind, zoom, and color adjustment.

Main Menu Setup

4.1 Basic Configuration

Guide to initial setup, including menu navigation, system settings, and basic configuration.

System Tab

Configuring device name, video format, language, and other system-wide settings.

Date & Time Tab

Setting the correct date, time, and time format, including Daylight Savings Time adjustments.

4.2 Live Configuration

4.3 Record Configuration

Record Bitrate Tab

Configuring resolution, frame rate, encoding, quality, and maximum bitrate for video streams.

4.4 Schedule Configuration

4.5 Network Configuration

Network

Setting up IP addresses, ports, and network protocols for remote access and monitoring.

4.6 User Management

User Accounts and Passwords

Creating and managing user accounts with specific permissions for system access.

4.8 File Search, Playback and Management

Time Search

Searching for recorded events within a specified range of dates and times.

Event Search

Listing and playing back recorded events, filterable by date, time, type, and channel.

File Management

Locking, unlocking, or deleting recorded events from the DVR's storage.

Backup

Backing Up a File

Steps to select files, set times, and perform the backup process to external storage.

DVR Management

6.1 Information

Monitoring system status, network connection, online users, history, and events.

6.4 Firmware Upgrade

Pan/Tilt/Zoom Cameras

7.1 Connecting a PTZ Camera

Steps for connecting PTZ cameras, including RS485 block connections and protocol considerations.

7.2 Pan-Tilt-Zoom (PTZ) Configuration

Configuring PTZ camera settings, including serial port, advanced tabs, presets, and cruise.

Preset

Setting up and saving specific camera positions and movements as presets.

Cruise

Configuring automated camera movement patterns between preset points.

Alarms

8.1 Alarm Input

Criteria for attaching external alarms, including grounding and connection types.

8.2 Alarm Output

Information on alarm output ports, relay specifications, and connection precautions.

8.3 Alarm Configuration

Setting up external sensors, defining alarm types, and handling actions upon activation.

Hard Disk Drive

9.1 Installation/Removal

Step-by-step instructions for installing or removing the DVR's hard disk drive, including safety precautions.

Troubleshooting

Common DVR Issues

Addresses common problems like no power, no output, no images, HDD detection, recording failures, and mouse issues.

Upgrading Firmware

Instructions for downloading and installing new firmware onto the DVR.

Related product manuals