41
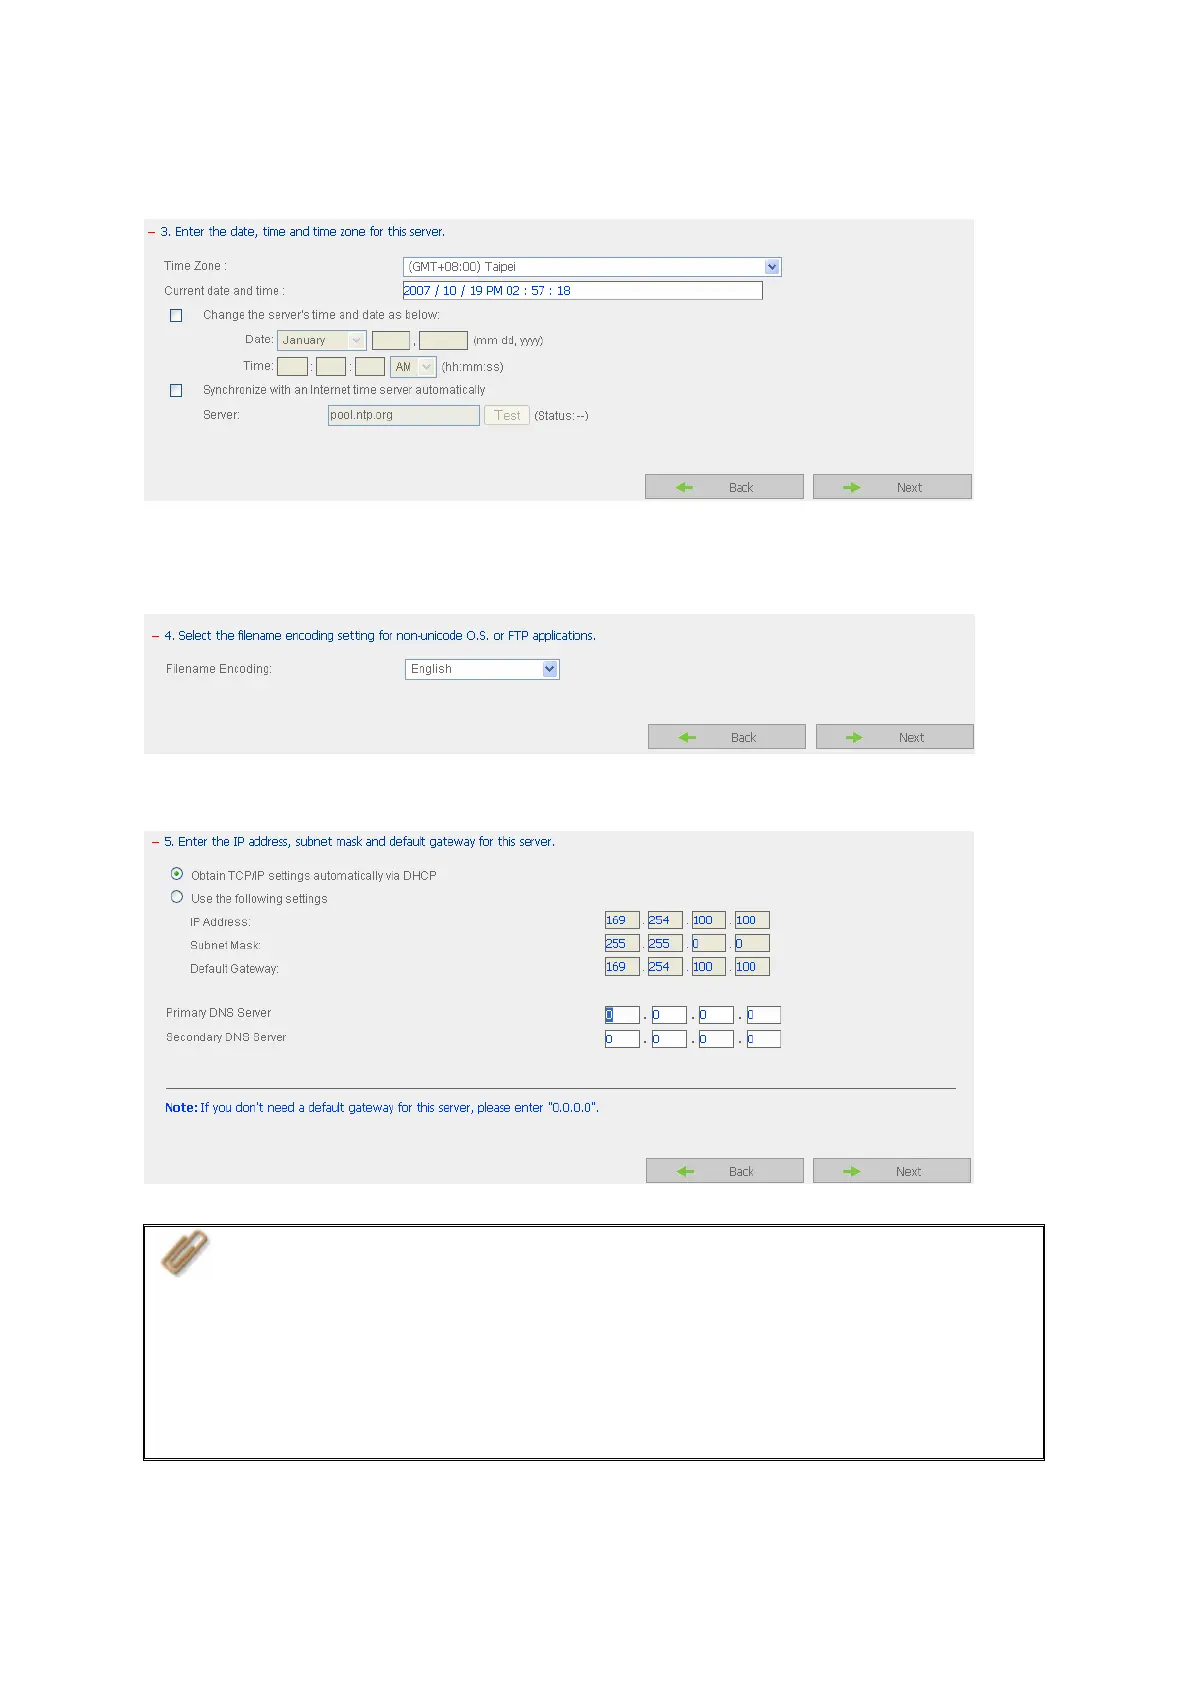
Step 3. Enter the date, time and select the time zone for the server.
Step 4. Select the language the server uses to display files and directories. The default
setting is English.
Step 5. Enter the IP address, subnet mask and default gateway for the server.
Note:
1. Please contact your ISP or network administrator for the IP address of
primary and secondary DNS servers. When the NAS plays the role as a
terminal and needs to perform independent connection, e.g. BT download,
you must enter at least one DNS server IP for proper URL connection.
Otherwise, the function may not work properly.
2. If you select to obtain IP address via DHCP, there is no need to configure
the primary and secondary DNS servers. You can enter “0.0.0.0” in the
settings.
 Loading...