7. After you click “Save”, the system will again ask you if you are sure to change the setting. If so, click
“OK”. If you do not want to change, click “Cancel”.
8. Setting is completed. Once the system is reset, it will jump back to the beginning screen. To change
other servers, repeat the above procedures. If you have nished setting, click “Exit”. It takes about 2
minutes to start SL3610/3620-2S-LB2 after power on. Before the startup is completed, the system
will be unable to nd SL3610/3620-2S-LB2. In case multiple SL3610/3620-2S-LB2s are installed
over the network, the blank on the left will display all devices detected.
Notice : When SL3610/3620-2S-LB2 is connected to the network, the system will obtain the IP address
automatically through the DHCP server. In case that the IP address cannot be obtained through the
DHCP server, SL3610/3620-2S-LB2 will initiate its own DHCP function to become the DHCP server.
Conrm the IP address of SL3610/3620-2S-LB2 (by default, 192.168.1.1) rst and then set the PC to the
same LAN to enter the system login screen.
3.8.2 Firmware Update Process
1. In order to prevent from data loss caused by software update please backup data to other storage
before starting update process.
2. Start to update software rmware after backup. Related update process please refer to the following
description.
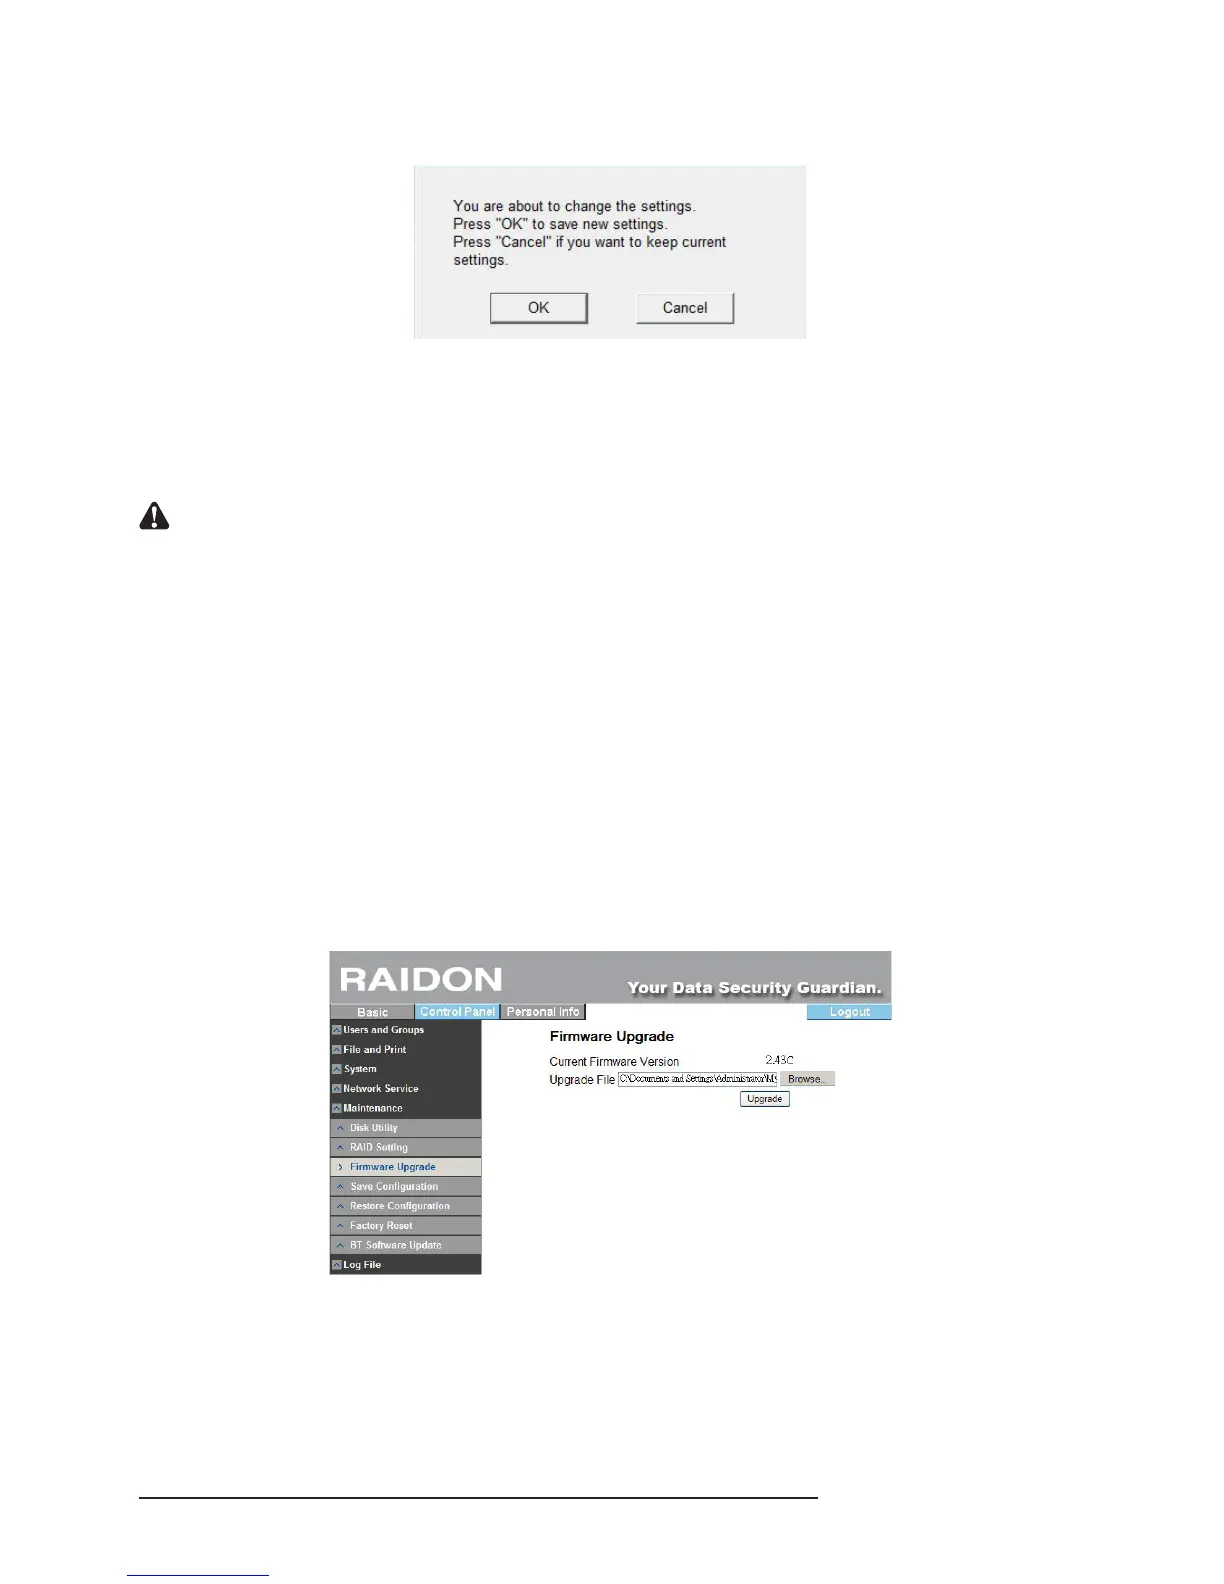
1) First, please follow the process to update rmware: click “Control Panel”, ”Maintenance”, ”Software
Update”, the following image will appear. Then upload rmware (please download the latest
rmware for update).
2) Following is the image of update process. Once the update process is completed, the system will
reboot and ask for username and password to login the system.