The red-light module in the laser works by means of communication, so there is a time delay of
at least 10ms when the red light is turned on and off.
When the red light is on, the laser cannot be set to Ready. Only after the red light is turned off
the laser can be set to “Ready”. (This limit can be changed, please contact Raycus Engineer).
5.6.4 Programming Mode
When A1 of XP1 is set high and A8-A14 is not 0, the laser is in “Programming Mode”. At this
time, the laser emission is controlled by A2 of XP1, and the laser emission waveform is determined
by the edited waveform.
6 Laser Wiring Diagram and Operation Steps
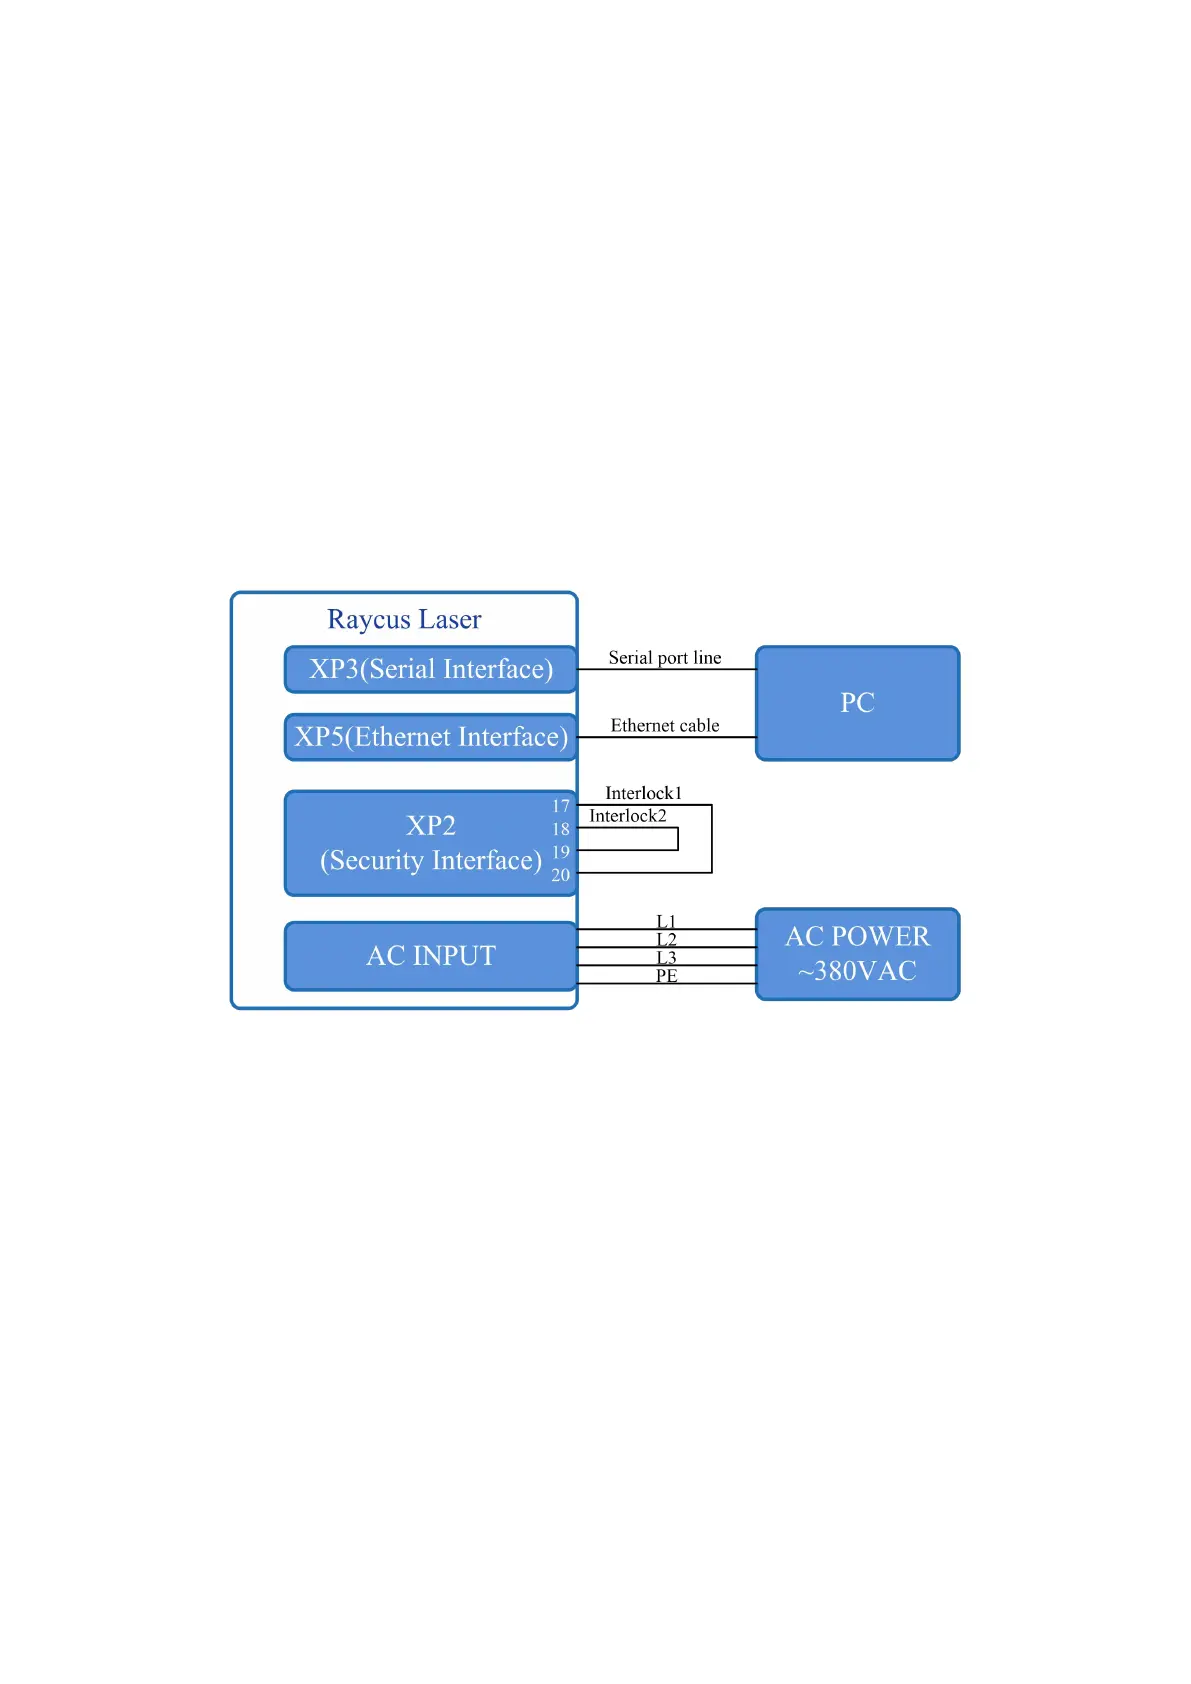
6.1 Internal Control in ON Mode
Figure 15 Software mode wiring diagram when key switch at “ON” position
Operations Steps
a) Turn the knob switch on the rear panel to“ON”
b) Turn the key switch to“ON”
c) Open the Raycus software
d) Click the guide laser “ON” button to view the guide laser
e) Turn off “AD” mode and turn off external control mode (this mode can be memorized when
power off)
f) Click the main power “ON”
g) Waiting for “Ready”
h) Set laser emission parameters


 To Next Page