17
Using the Playback Features
Auto Play Feature
This feature allows the VCR to automatically begin playing a tape that is inserted
with the safety tab removed.
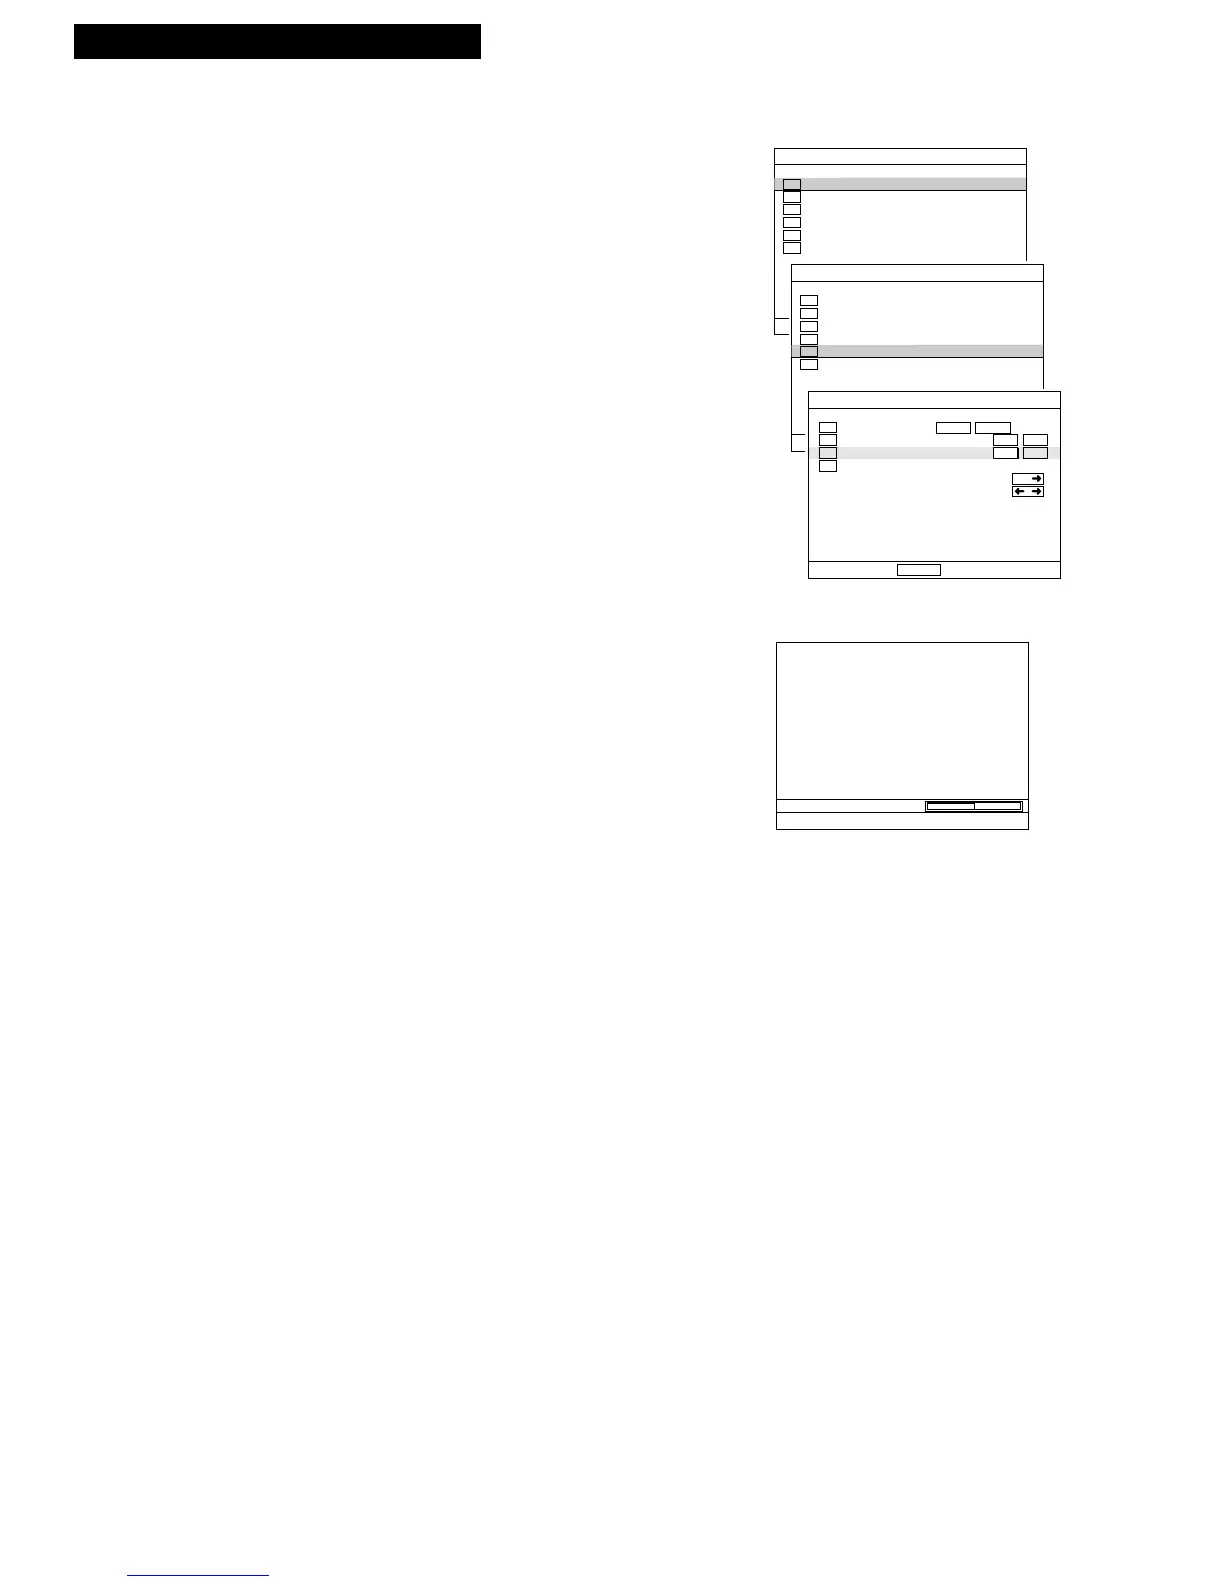
1. Press MENU to see the MAIN MENU on the TV
screen.
2. Press the DOWN ARROW to highlight the “VCR
function setup,” then press ENTER.
3. Press the DOWN ARROW to highlight the “Auto
play.”
4. Press the RIGHT or LEFT ARROW to toggle Auto
Play: ON or OFF.
• Select ON to have a tape with the safety tab
removed play automatically.
• Select OFF if you do not want the tape to play
automatically.
Tracking
The VCR automatically adjusts the picture every time a tape is inserted and begins
play. During tracking the sound is delayed for a few seconds. Occasionally, you
may need to manually adjust tracking on a tape recorded on a different VCR or
camcorder. Use the TRACKING buttons on the remote when playing a tape.
Tracking has no effect during recording.
When streaks or snow appear, press TRACKING UP or DOWN for the best possible
picture. Press TRACKING UP or DOWN during stop-action pause to reduce
picture jitter.
Pause for Stop Action
This feature stops the tape in playback or slow motion to allow you to examine the
details of the scene. Stop action works best for tapes recorded in the SP and SLP
speed.
1. Press PAUSE during playback to stop the action.
2. Press TRACKING UP or DOWN to reduce any
jittering of the picture.
3. Press PAUSE or PLAY to return to playback.
The VCR will automatically switch from stop-action
playback to stop after a few minutes.
Slow Motion
You can view the picture in slow motion during play. SLOW – and + allow you to
change the speed. Sound is turned off during slow-motion playback. Slow motion
works best in the SP or SLP speed.
1. Press SLOW + or – to increase or decrease the
speed.
2. Use TRACKING UP or DOWN to remove any
streaks from the picture.
3. Press PLAY to return to playback.
The VCR will automatically switch from slow-
motion playback to stop after a few minutes.
Playing a Tape