24
Recording a Program
Recording While You’re Away (Timer Recording)
The timer program features let you program the VCR to record up to eight different
programs within a one-year period. The VCR can be programmed to record a
single, daily (Monday through Friday), or weekly program. Daily and weekly
programs remain in the timer until erased, but a single program is erased after the
program records. Before setting the timer, make sure that:
• The clock is set correctly.
• A tape with safety tab in place has been inserted with enough tape to record
the programs.
• The remote is set to control the VCR — using SELECT VCR.
• If you receive all channels through a cable box select a cable box viewing
channel
on page 11.
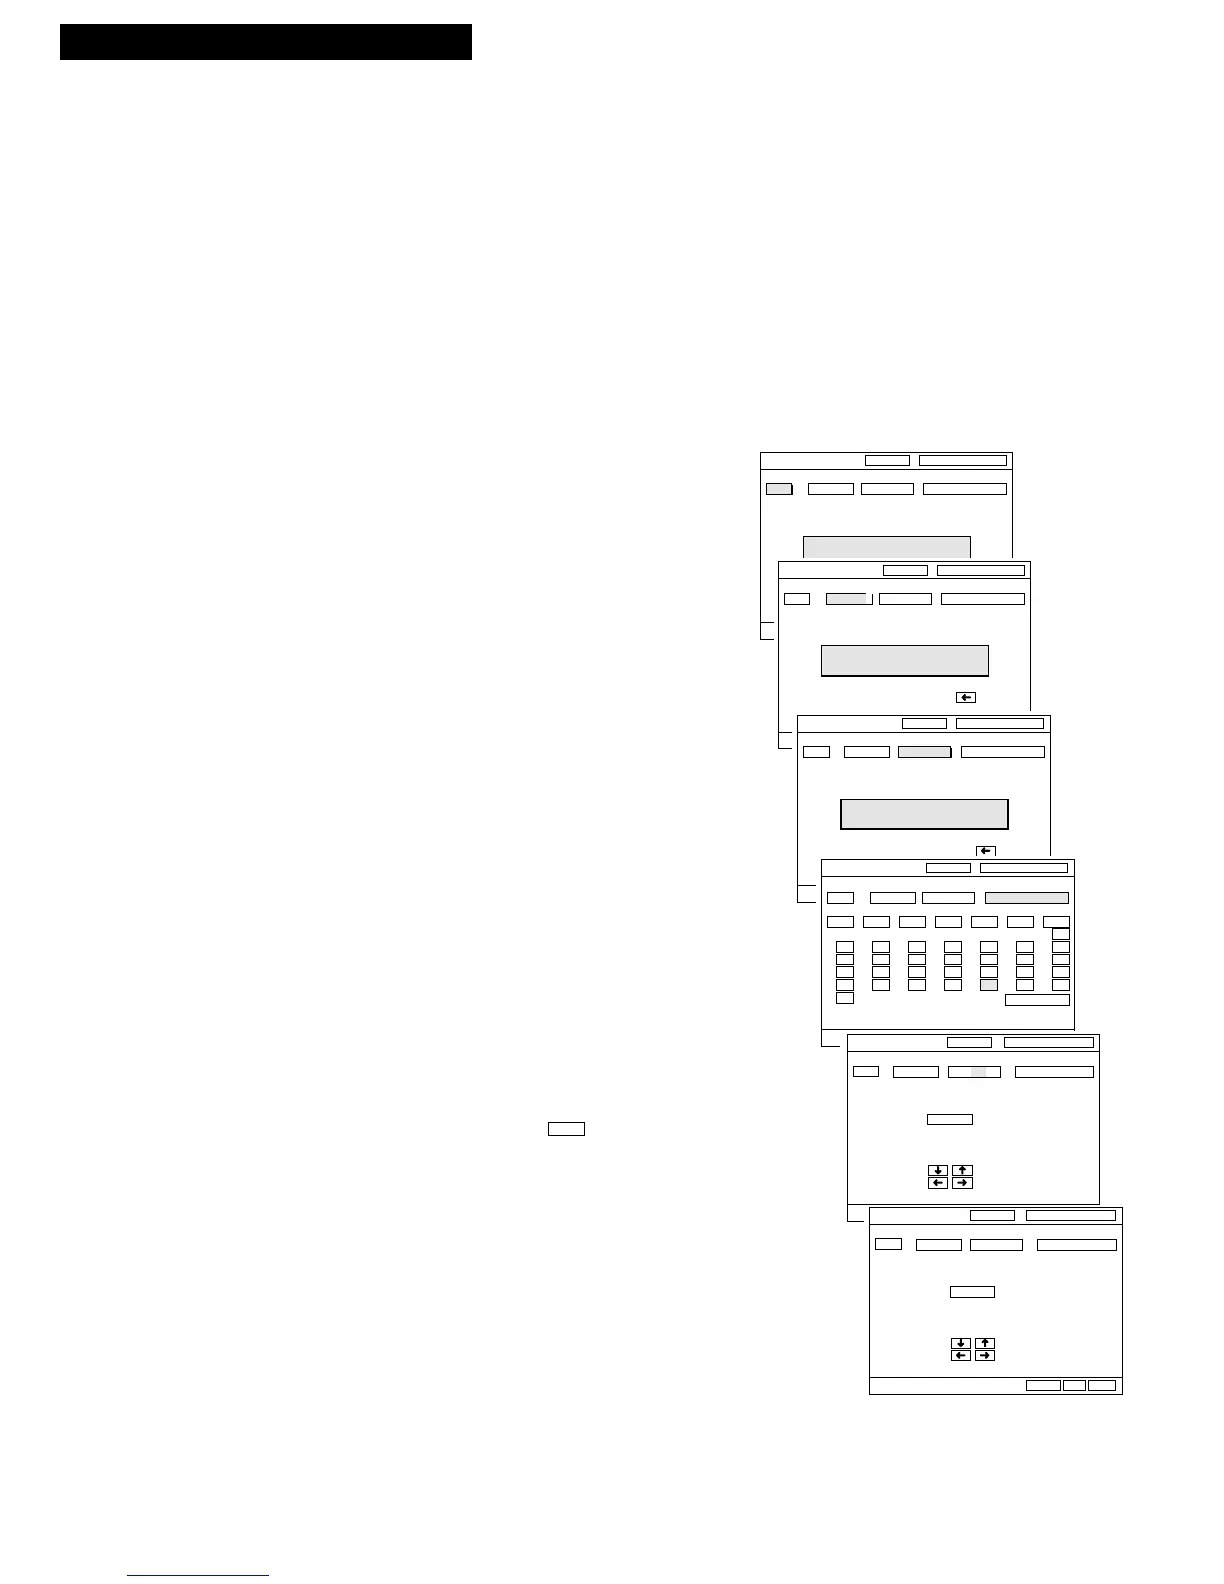
Setting a Timer Recording
1. Press PROG LIST on remote to display the TIMER
PROG screen.
2. Press number buttons on the remote to enter the
channel number (or INPUT to select line input),
start time including AM or PM, and end time of the
recording. Just follow the on-screen prompts.
3. Change the record date by by using the arrow
buttons and pressing ENTER.
A default date is automatically selected after the
recording information is entered, but you may
change by following step 3.
Always enter a 0 before a single digit.
Noon is 12:00 PM and midnight is 12:00 AM.
4. Select recording speed using SP•SLP on the
remote.
The tape speed may be changed at any time during
the process of setting the timer recording. When
AUTO is selected, the VCR will use the best tape
speed for the length of the timer recording.
5. Press ENTER to enter the program.
Check the tape for enough time remaining to record
the program. Press the DISP button three times for
time remaining.
6.
Turn off the VCR before recording begins.
TIMER appears briefly and appears in the
VCR’s display panel when the timer has been
programmed.
If using a cable box, leave it turned on and tuned to
the channel you want to record.