Ellipse INSTALLATION GUIDELINES
70-00159-01-09 Proprietary Redline Communications © 2015 Page 40 of 52 April 29, 2015
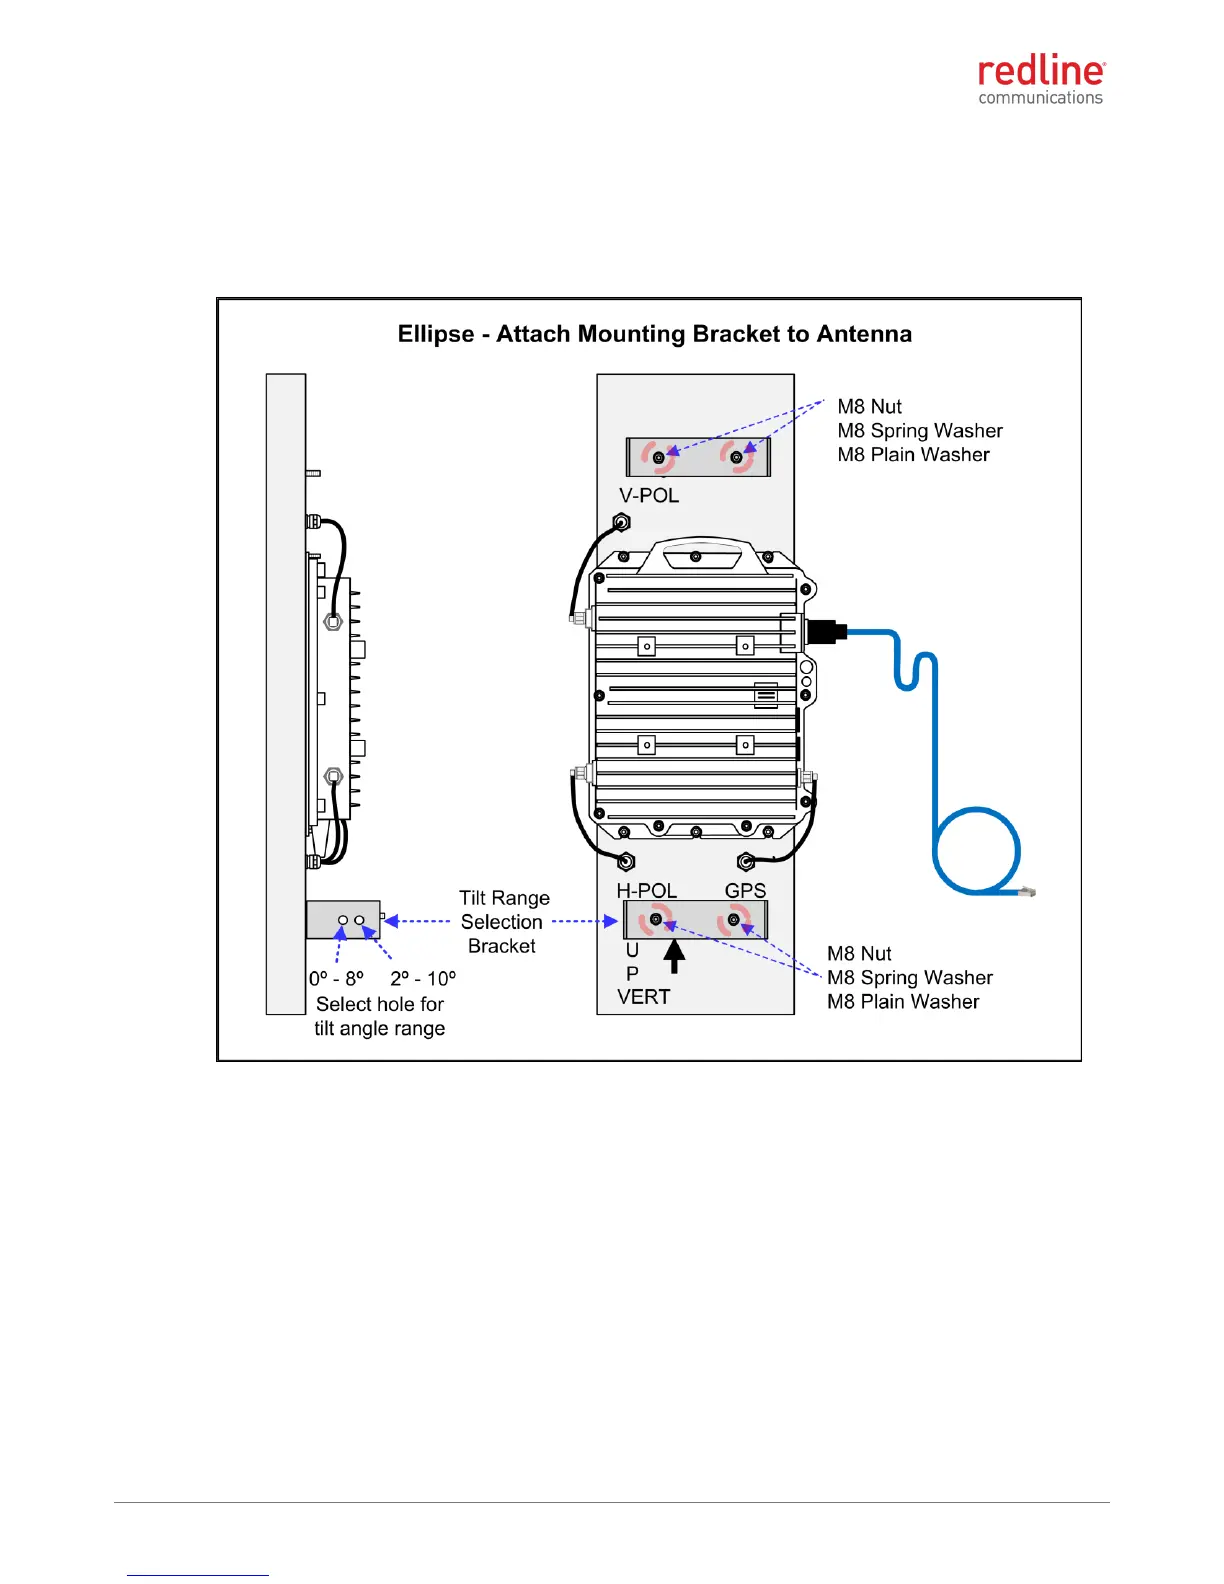
4.3.3 Step 3: : Assemble Antenna Mounting Bracket
1. Place the antenna face down on a working surface that will not damage the radome.
2. Attach the Tilt Adjustment Bracket (top) and the Tilt Range Selection Bracket
(bottom) to the antenna using M8 plain washers, spring washers, and plain nuts.
Tighten the nuts to a torque rating of 17 N-m (12.5 ft-lb).
Figure 26: Installation - Integrated Sector Antenna - Tilt Brackets
3. Attach the main clamp to the slider adjustment bracket (upper). Insert the M8
setscrew with plain washer from the outside and secure with an M8 Nyloc. Hand
tighten only.
4. When attaching the main clamp to the tilt selection bracket (lower). Insert the M8
setscrew with plain washer from the outside and secure with an M8 Nyloc. Select the
hole based on the required tilt range (0-8º or 2-10º). Hand tighten only.
 Loading...