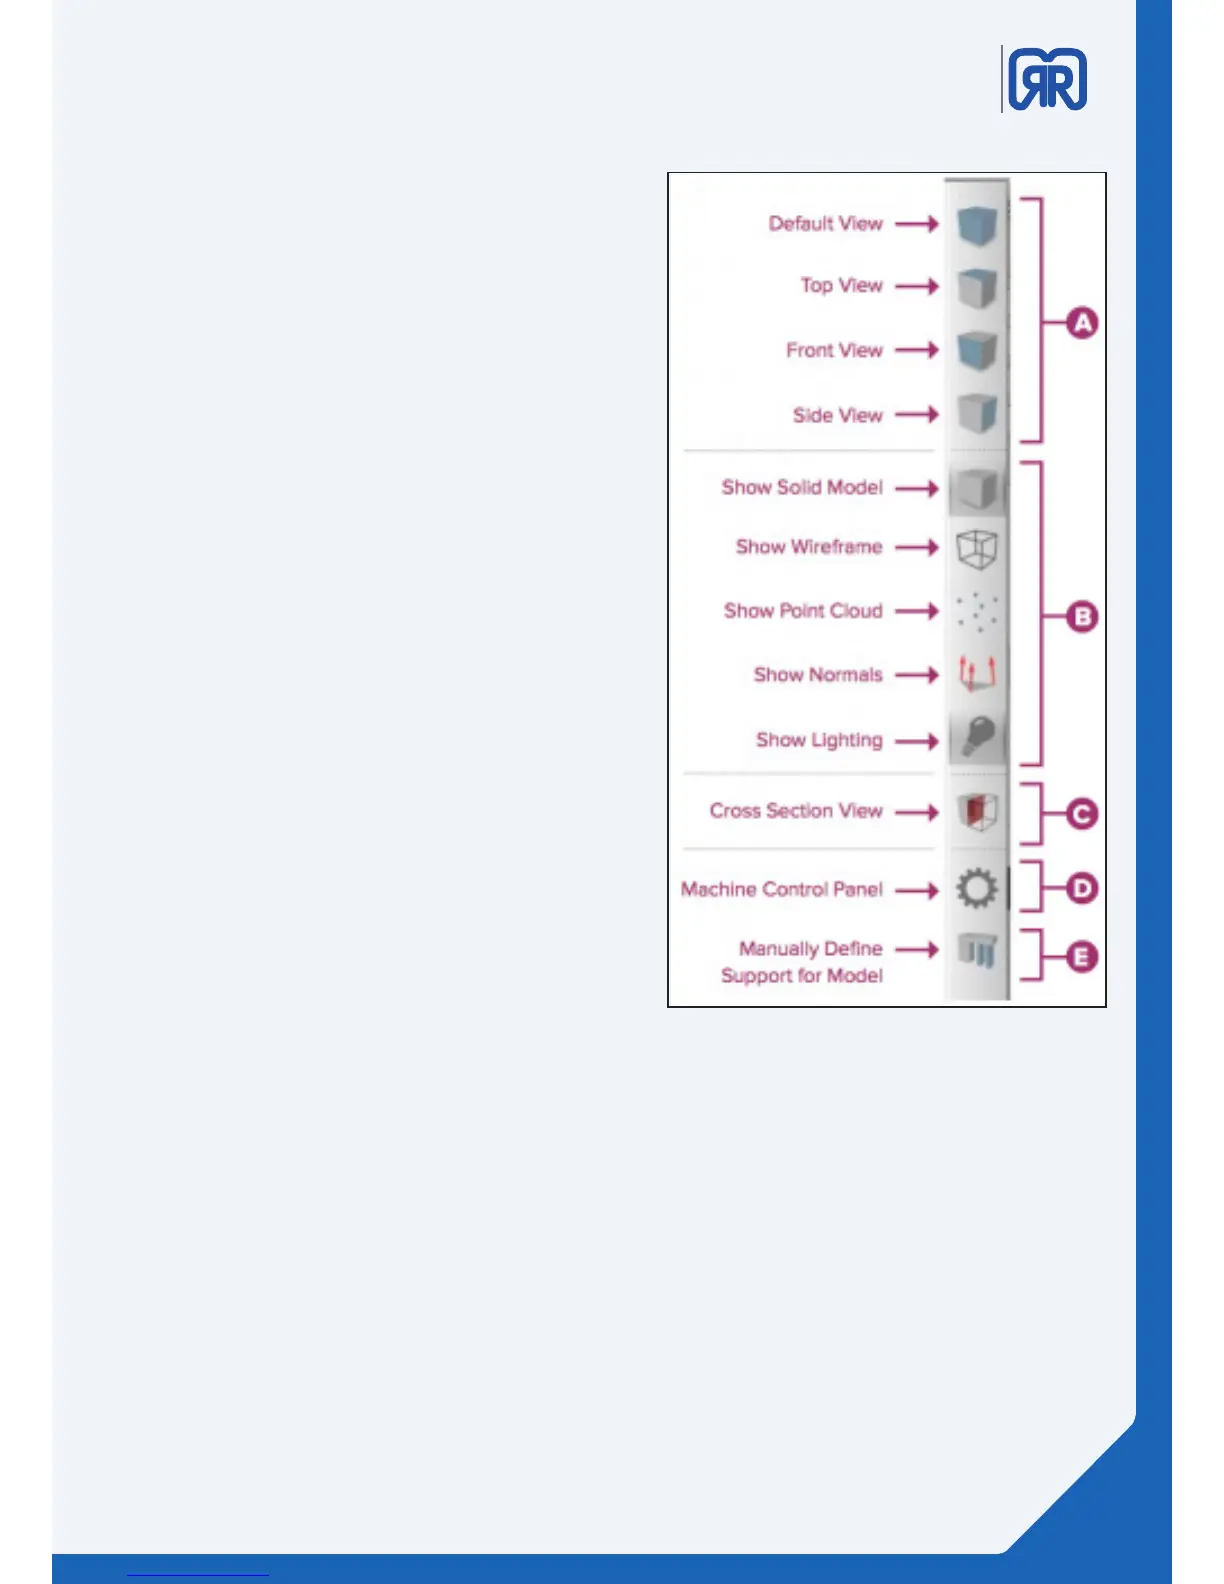
Toolbar
A. View
The first four buttons are preset viewing positions,
allowing you to quickly change to the default, top,
front, or side view.
B. Model Render
These tools control how you view the attributes of
your 3D models. You can add a wireframe or a point
cloud to your model, enable or disable the lighting
and the solid rendering of the model, or display the
surface normals of the model.
C. Cross Section Tool
The Cross Section tool gives you the ability to cut a
model in half to look inside it. The tool allows you to
cut your model from all three axes and can also be
accessed in the Preview Mode.
D. Maschine Control Panel - Maschinensteuerung
Simplify3D™ Software can connect to virtually any
printer through the Machine Control Panel (MCP).
Another way to access the MCP is through the top
menu bar under Tools > Machine Control Panel. The
MCP allows you to view your extruder and build
plate temperatures, preheat your nozzles, jog your
machine’s motors, and access the software-printer
communication log.
E. Support
The Manually Define Support tool provides the
freedom to customize your support structure under
or inside any part of a model.
Toolbar Simplify3D
3D Printing Workflow
The first step in the 3D printing process is to import the model you want to build. Save the 3D model file on
your computer or storage device as an .stl or .obj file.
Helpful mouse and keyboard shortcuts to move, scale, or rotate your model:
• Move Model – Ctrl-left-click and drag (or Command-left-click on Mac)
• Scale Model – Ctrl-right-click and drag up or down (or Command-right-click on Mac)
• Rotate Model – Alt-left-click and drag right or left (or Option-Left Click on Mac)
19/45