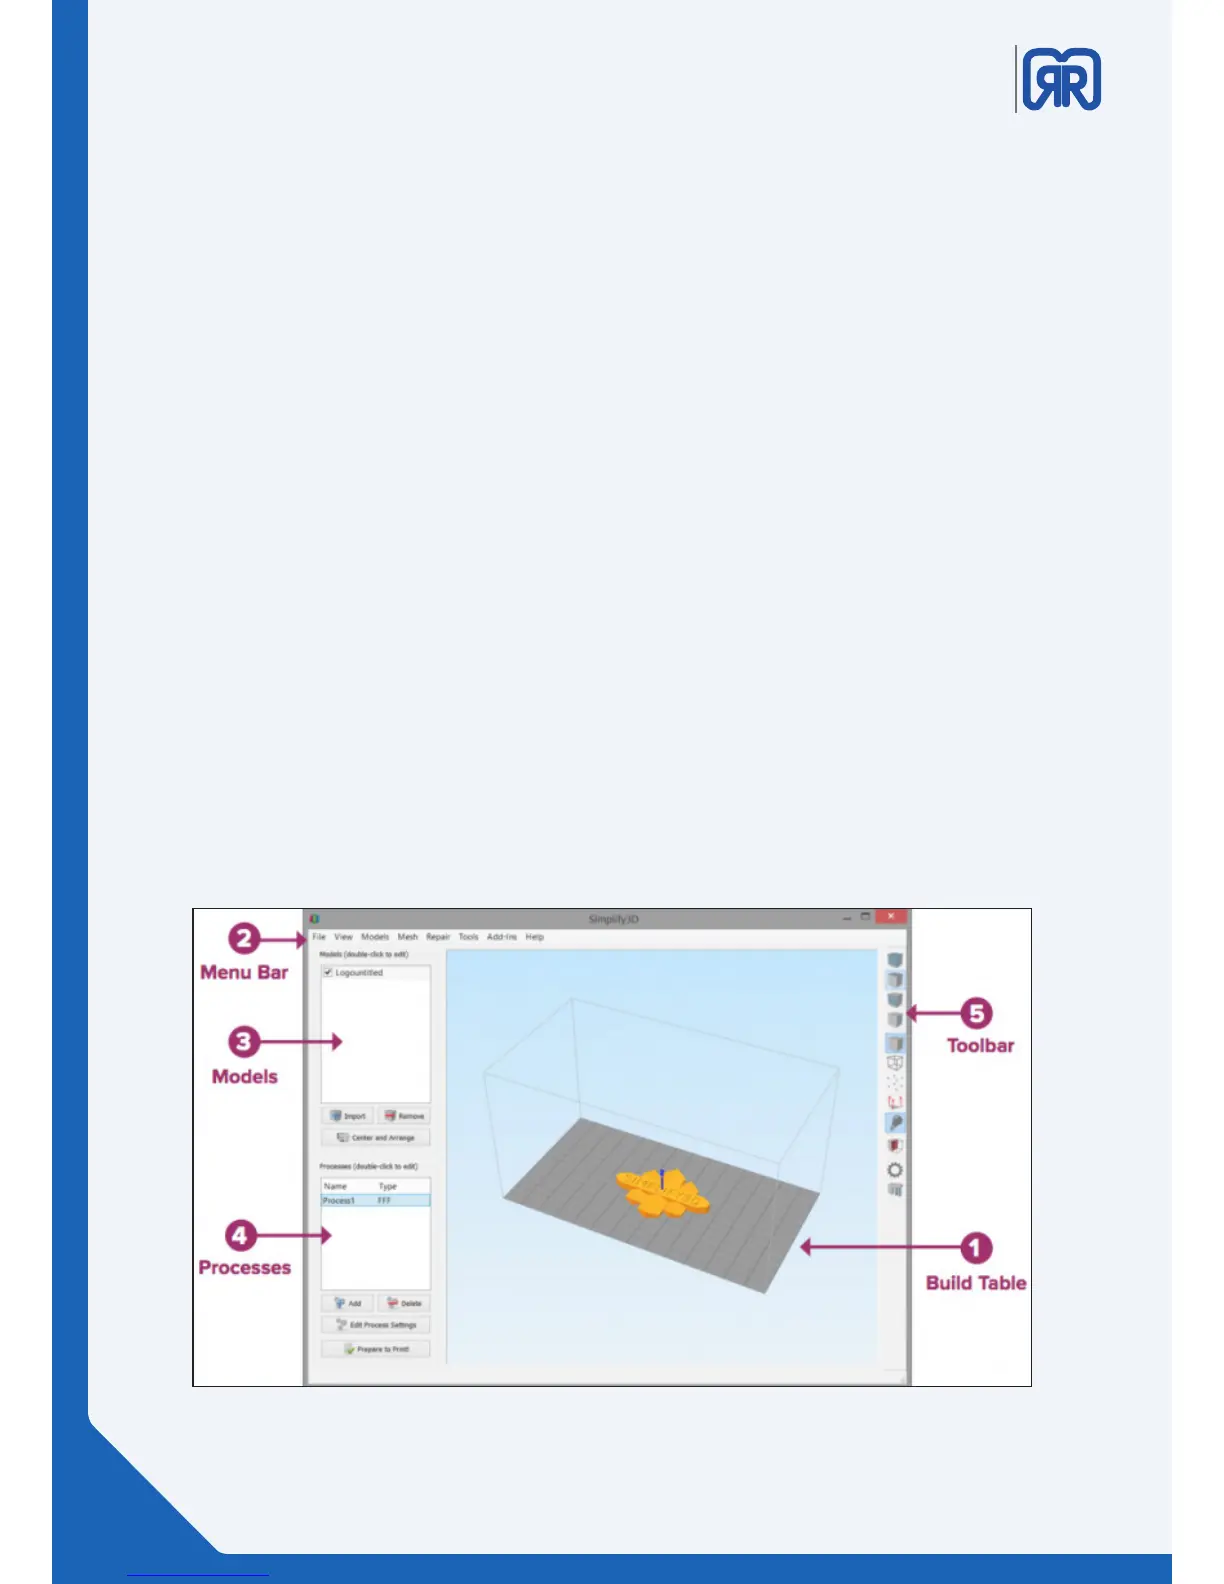
4.4 The Interface Layout
1. Build Table
This is the interactive 3D environment where you will be viewing and working with your 3D content before
printing. This is the “main stage” and primary viewing area. The gray grid is scaled proportionally to the size
of your build volume and is determined based on your printer selection with the Configuration Assistant.
Use these mouse shortcuts for dierent views:
• Rotate View – Left-click and drag
• Pan View – Right-click and drag
• Zoom – Scrolling or gesture zoom (or Shift-left-click and drag up and down)
2. Menu Bar
• Primary navigation to all aspects of Simplify3D™ Software.
3. Models
• When you import 3D models, they are listed in this section above the buttons/commands that enable
you to work with your models.
4. Processes
• The build operations to create your 3D print are listed here, along with buttons/commands enabling
you to work with process functions.
5. Toolbar
• This toolbar contains quick access buttons for frequently used tools. You can move the toolbar
anywhere you wish by clicking and dragging the top dotted line.
Interface Layout
18/45