ASMxxxx Series User’s Manual
Asia Pacific | EMEA | Americas 134
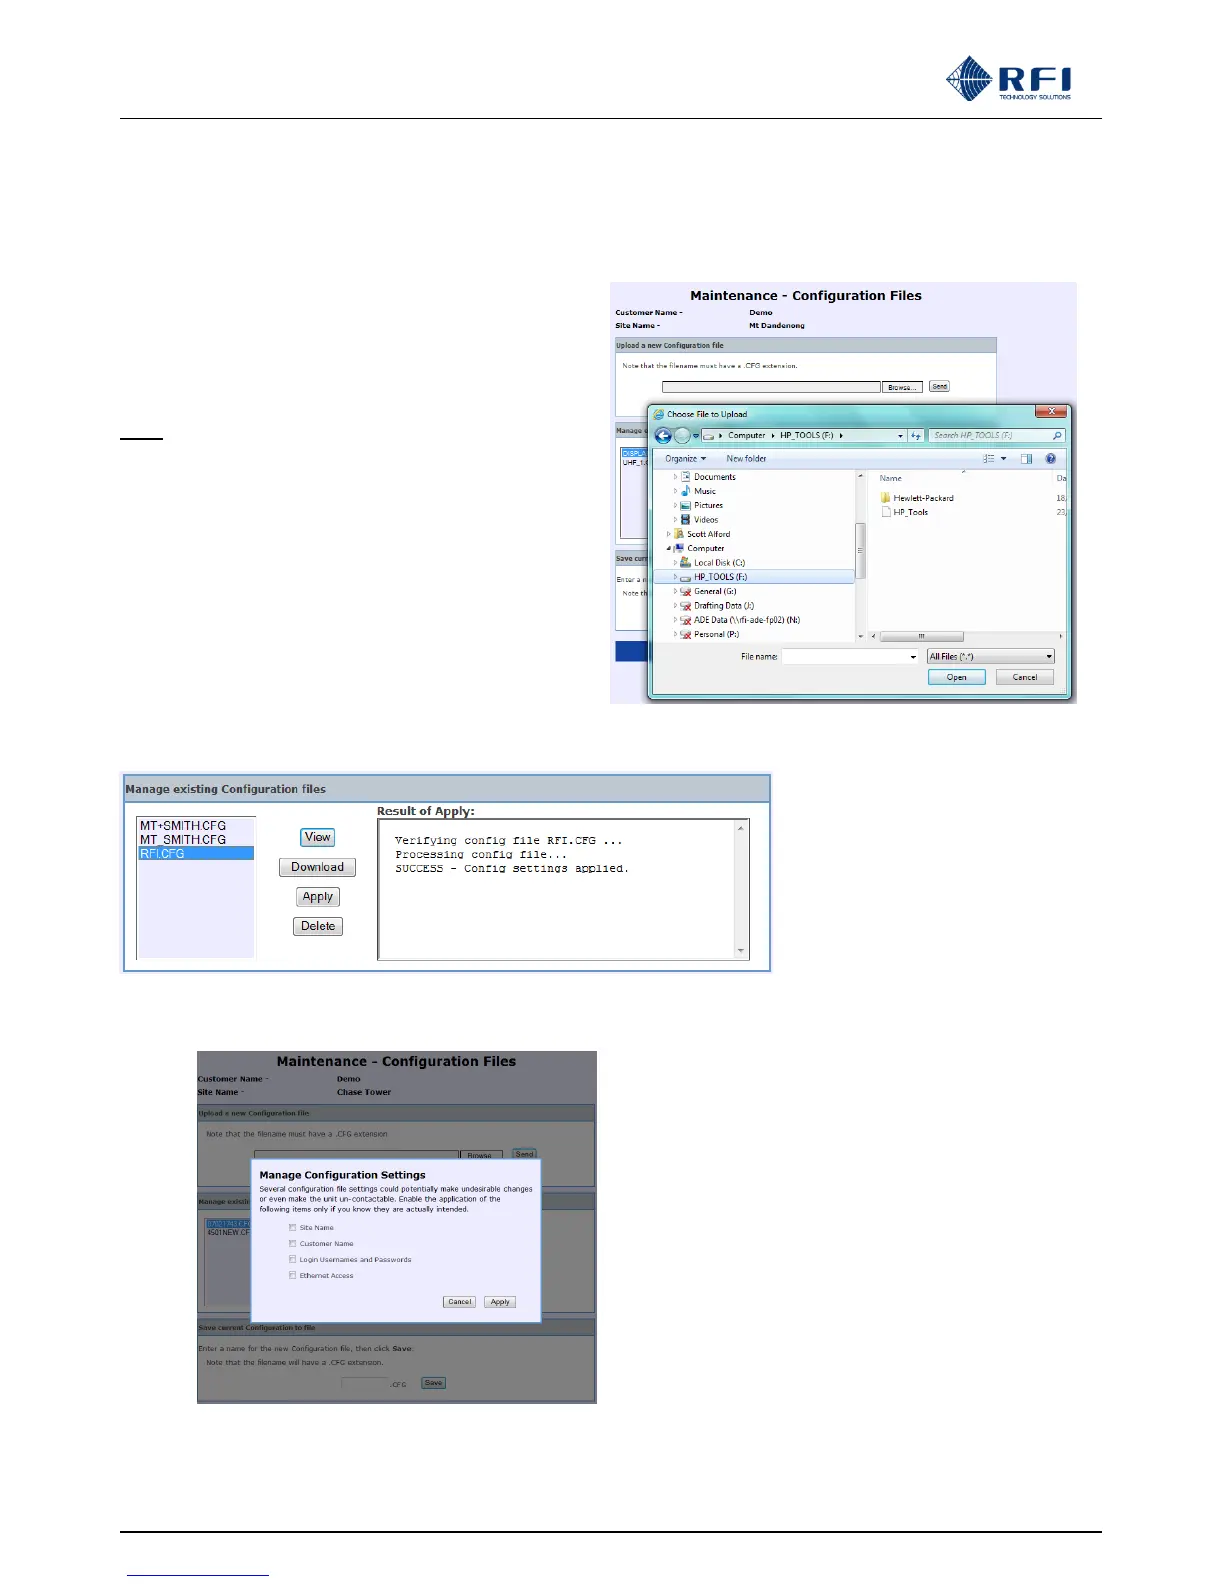
Upload a new Configuration file:
Click “Browse” to locate the desired ASM Configuration file
from a chosen drive/directory location. Once the desired
drive/directory/name has been selected from the popup box,
click “Send” to upload the nominated Configuration file to the
list of existing Configuration files.
Note: This Configuration file must be highlighted in the
Configuration list and the “Apply” button clicked to
activate this uploaded Configuration in the ASM.
Manage existing Configuration files:
VIEW: To view the text contents of highlighted Configuration
in the web browser.
DOWNLOAD: To save the highlighted Configuration file to a
nominated computer drive/directory.
APPLY: Activates the highlighted Configuration in the ASM.
A progress and completion message will appear in a “Results of Apply” text box (refer above example).
When the Apply button is clicked, the screen
at left will appear. Select any of the site-
specific fields from the configuration file that
you do want to have applied to the ASM,
and then click Apply.
Follow the prompts and the selected
configuration file, with the selected site-
specific data fields’ contents, will be applied
into the ASM. In this manner, one common
configuration file can be applied to multiple
ASMs, with the site-specific data fields not
used from the configuration file contents, but
then edited individually.
This new feature can save significant
programming configuration time across an
ASM fleet.