3.Replacement
80
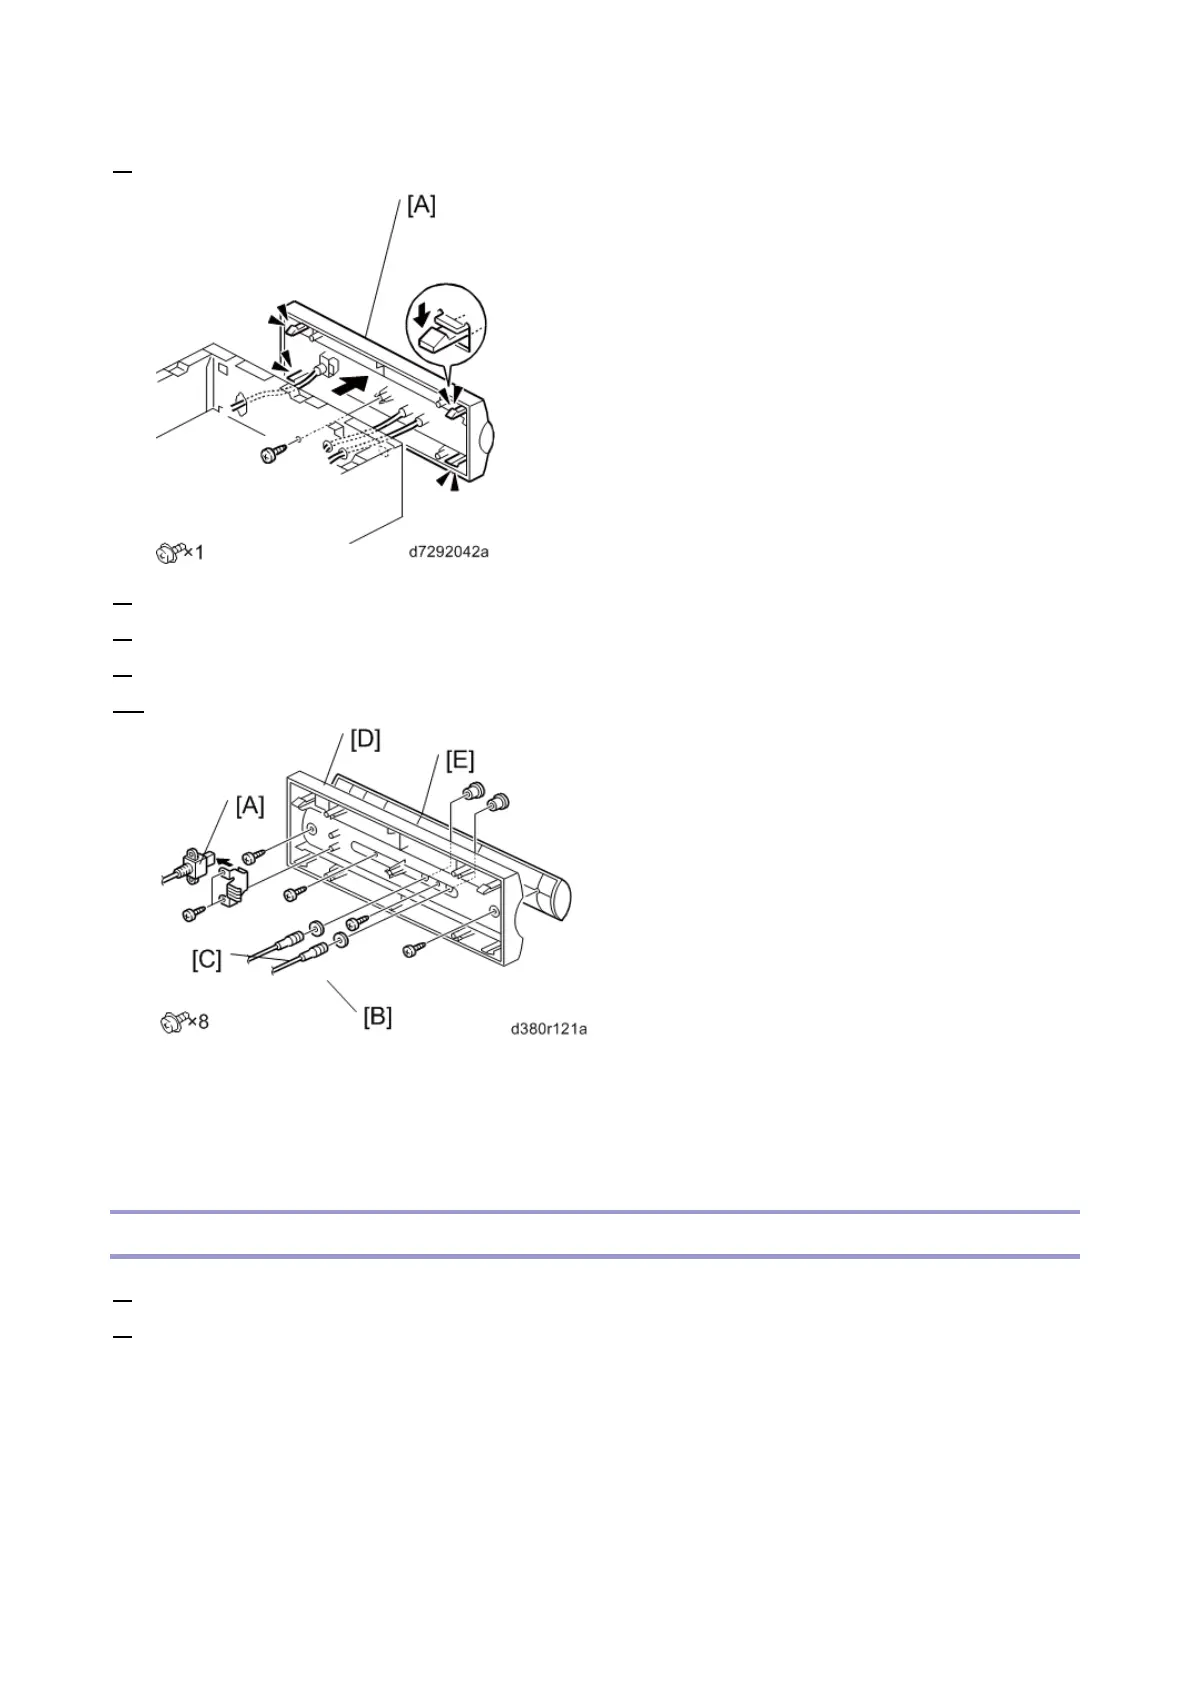
6. Remove the front panel [A].
7. Remove the front panel USB port cable [A] from front panel.
8. Remove the HDD LED cable [B] from front panel.
9. Remove the Power LED cable [C] from front panel.
10. Remove the center panel [E] from the front panel [D].
For Re-assembling:
Make sure of where to connect the connectors for each cable.
Make sure that all connectors are inserted firmly in the sockets. Also, do not put the connectors in
the sockets the wrong way around.
Soft Power Push Button
1. Remove the side cover.
2. Remove the video board [Link to Video Board]