5 Unpacking and Installation
202208081959/V0.1
24 xMate ER7Hardware Installation Manual
x 25
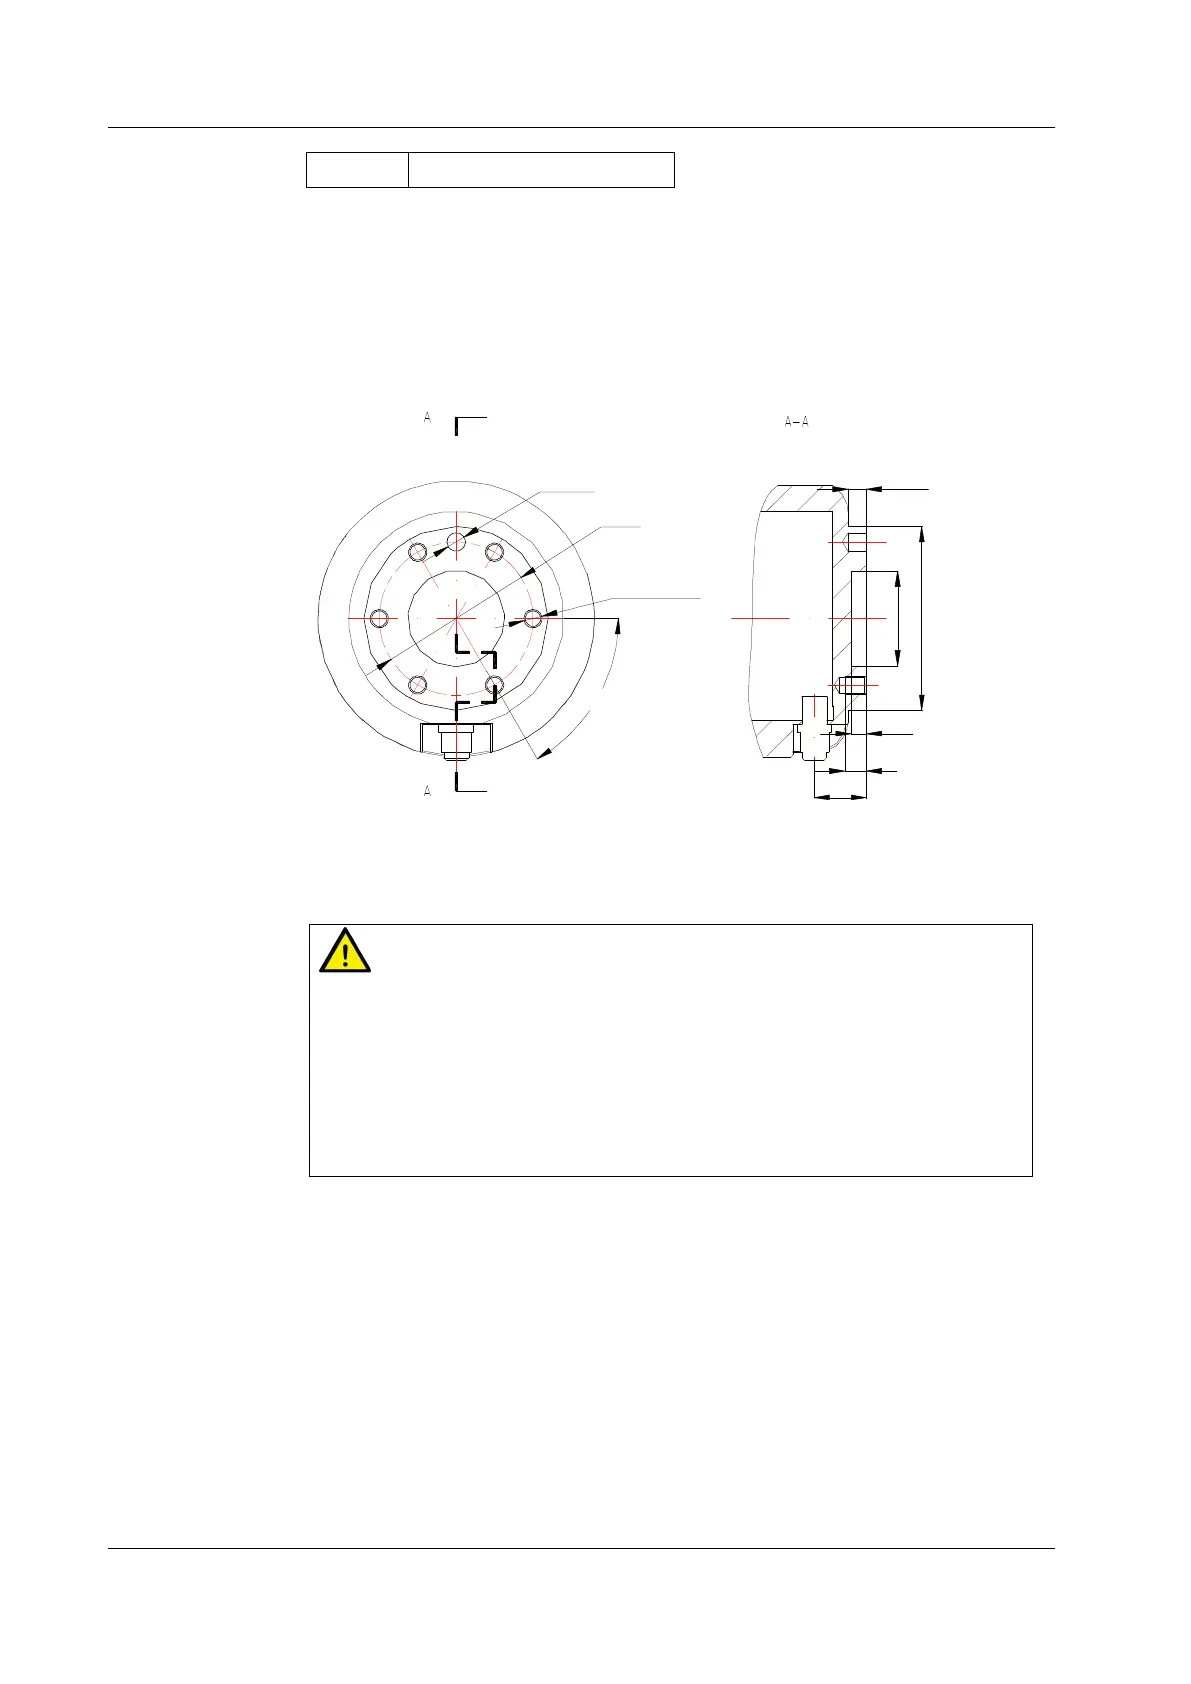
5.5.3 Flange
To ensure the accurate positioning of the tool, the reserved Φ6 pin holes should be used.
There are six M6 threaded holes on the wrist flange of the robot to attach the tool to the
flange. The M6 bolts must be tightened with a torque of 8 Nm. See the figure below for the
detailed dimensions.
17
Φ50
Φ6H7
6-M6均布
60°
Φ31.5H7
Φ60
6.5
7
5
Figure 14. Tool flange installation
Warning
Make sure the tools are properly secured in place. Check if the tool's range of
motion overlaps with the robot's working space.
Make sure that the length of the M6 screws on the installed tool does not exceed
the length of thread indicated in the figure to avoid any irreparable damage.
Make sure that the tool operates safely without any detached parts to cause
dangers.
5.5.4 Power adapter
The power adapter has no additional mechanical interface for installation. It can be put in
a designated location as needed at the site. The location must meet the following
conditions:
1. With good ventilation and heat dissipation conditions;
2. Outside the range of motions of xMate ER7;
3. The power switch is easy to access for operators.
 Loading...