27
You can install World Expansion and other tone les that you’ve downloaded on the XPS-60, and add them as expansion tones.
Sound les are available via Roland Cloud. See the “Roland Cloud User’s Guide” (Roland website) for details on how to get tone les.
* Please be aware that in some countries or regions, it might not be possible to use Roland Cloud at this time.
Adding more tones to the XPS-60 (EXPANSION)
Using Roland Cloud Manager
Use Roland Cloud Manager to download the tone les from Roland
Cloud to your computer.
Next, use a USB ash drive to import the tone les that you
downloaded to your computer into the XPS-60.
¹ Click here for more information on Roland Cloud.
¹ Click here to download Roland Cloud Manager.
¹ Click here to download the Roland Cloud Manager Owner’s
Manual.
¹ Click here for the latest support information on Roland Cloud.
Installing a World Expansion
1. Save the tone data you downloaded (EXZ les) to
the root directory (the topmost level) of your USB
ash drive.
2. Turn o the XPS-60, and connect the USB ash drive
to the USB MEMORY port.
3. Turn the power on while holding down the [ENTER]
button.
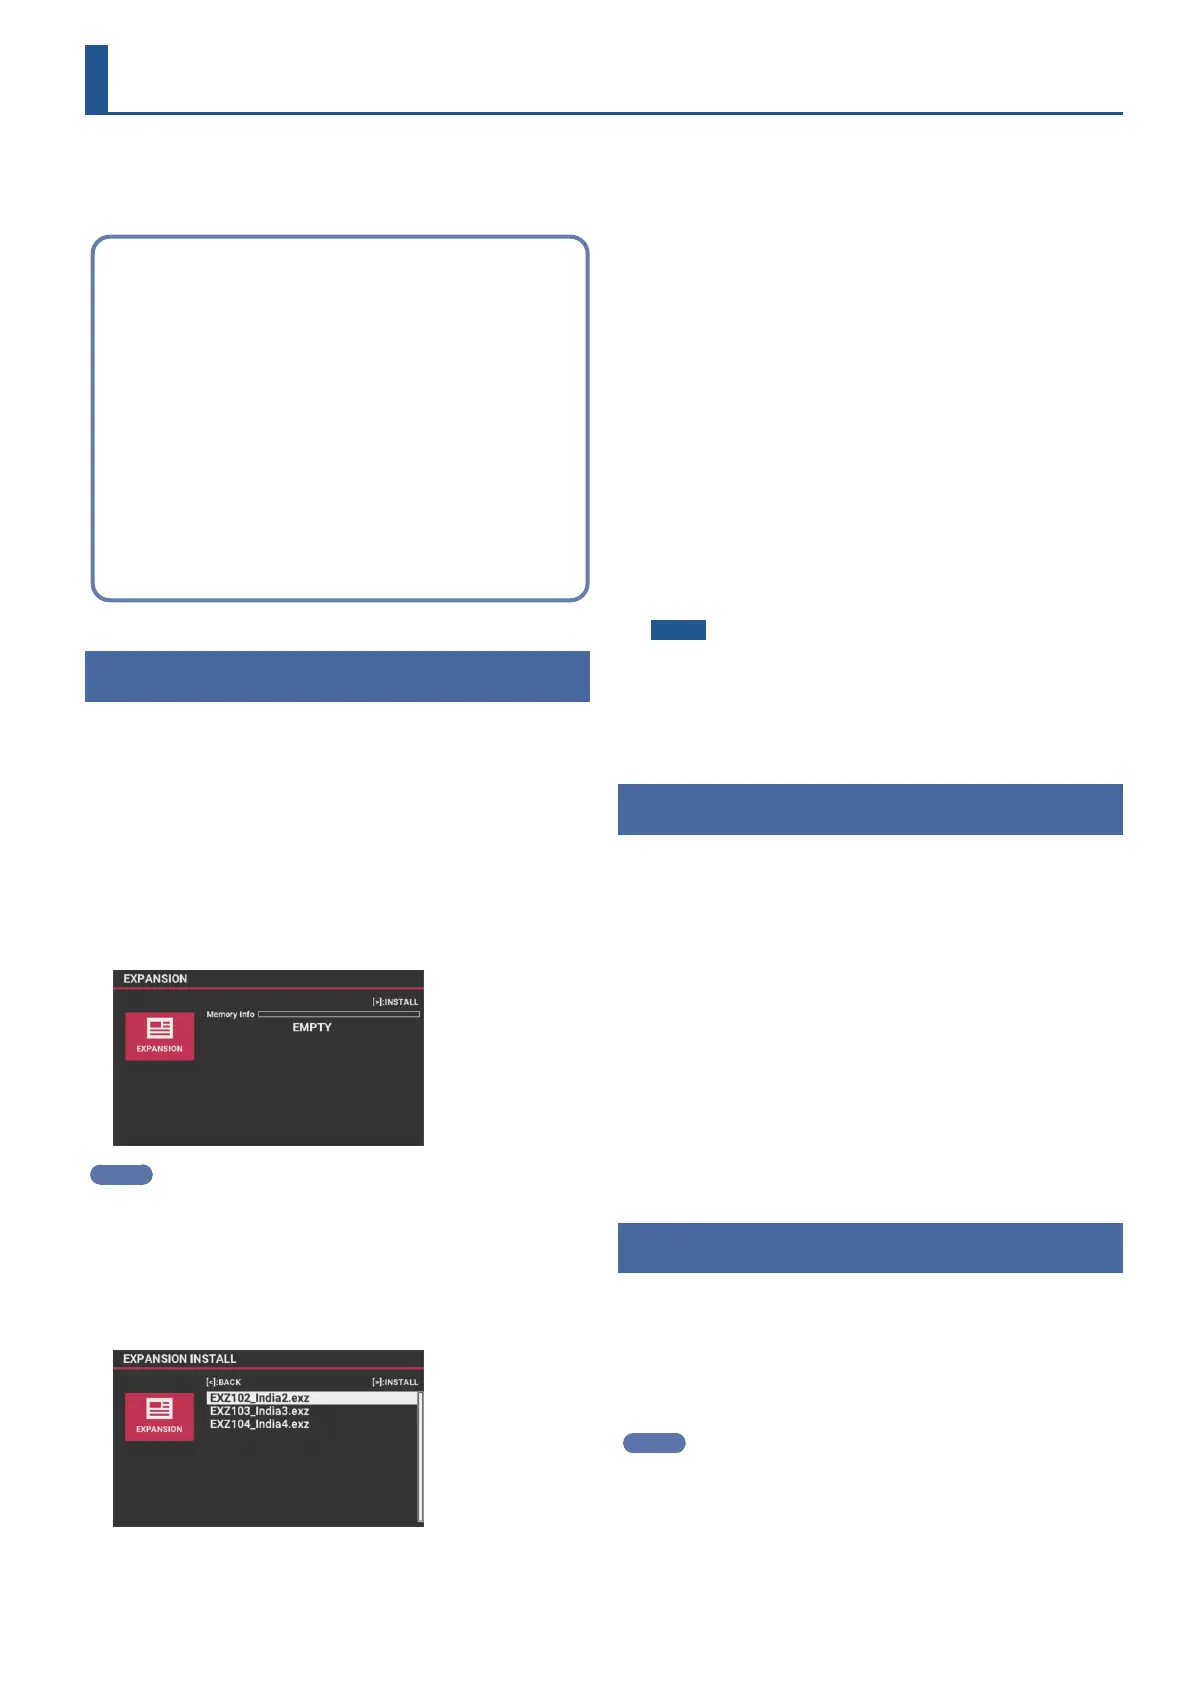
The EXPANSION screen appears.
MEMO
The World Expansions you’ve installed are shown on this screen.
4. Press the [Ë] (INSTALL) button.
The tone data saved on the USB ash drive is shown.
5. Select the tone data you want to install with the [É]
[Ç] buttons.
6. Press the [Ë] (INSTALL) button.
The message “Install License? Are you sure? ” is shown.
If you decide to cancel, press the [EXIT] button.
* When you select a le that’s not supported by this instrument or is
corrupted, the message “Incorrect File!” appears and the le can’t
be installed.
7. Move the cursor to “OK” and press the [ENTER]
button.
The message “Expansion install Are you sure? ” is shown.
If you decide to cancel, press the [EXIT] button.
8. Move the cursor to “OK” and press the [ENTER]
button.
Once installation is nished, the EXPANSION screen is shown. To
install more tone data, repeat steps 4–8.
NOTE
Never turn o the power or remove the USB ash drives while the
screen indicates “Processing...”.
9. Turn the power back on once the tone data has been
installed.
Uninstalling a World Expansion
If there isn’t enough memory available, you can uninstall a World
Expansion that’s already been installed to make room for new World
Expansions.
1. Turn the power on while holding down the [ENTER]
button.
The EXPANSION screen appears.
2. Use the [É] [Ç] buttons to select the le to uninstall,
and press the [Í] (UNINSTALL) button.
A conrmation message appears.
If you decide to cancel, press the [EXIT] button.
3. Move the cursor to “OK” and press the [ENTER]
button.
Selecting tones you’ve added
1. On the top screen, move the cursor to the tone name
of the part you want to change, and press the [EXP]
button.
2. Use the value dial to select a tone.
MEMO
You can also press the [ENTER] button to select from the TONE LIST
screen.