26
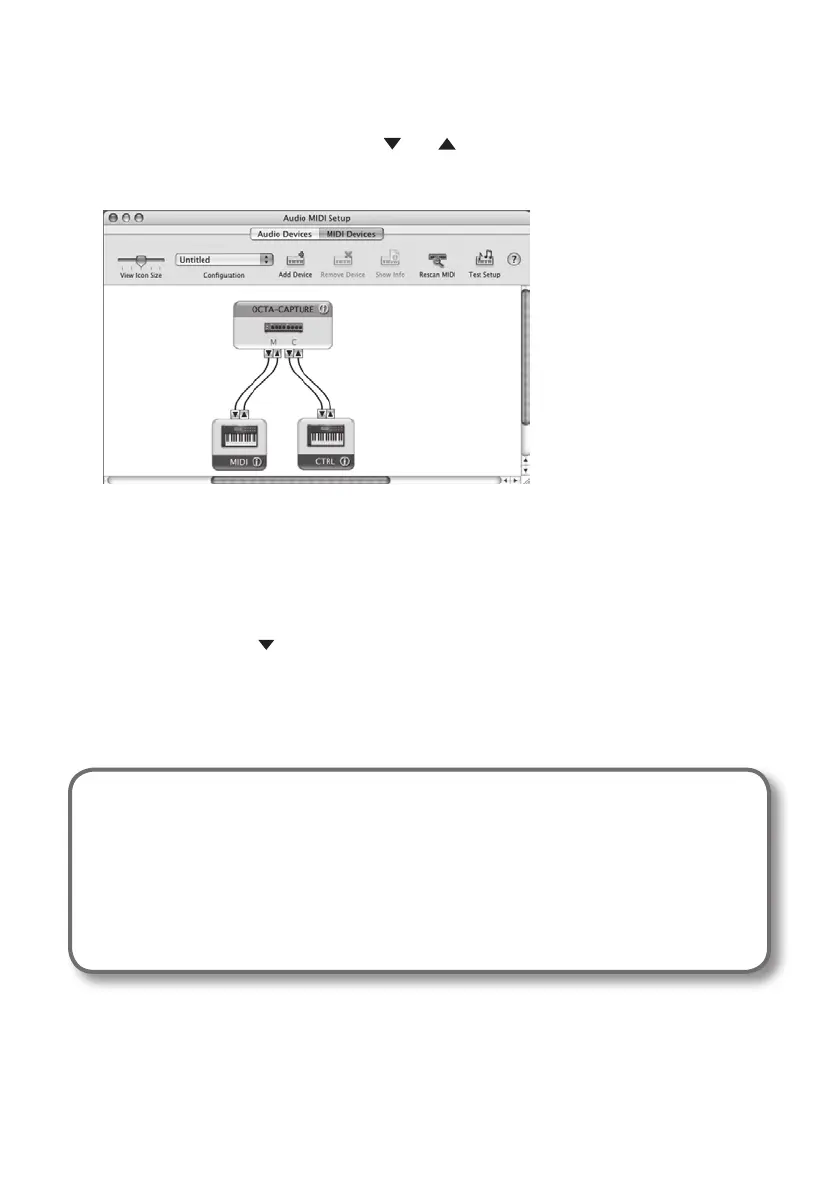
6. Use the mouse to drag between the and symbols (representing input and
output, respectively) of [OCTA-CAPTURE] and each [new external device] so that they
are connected as shown in the illustration below.
7. Check to make sure that MIDI transmission and reception takes place normally.
1. Click “Test Setup.”
* If you have a sound module connected to the OCTA-CAPTURE’s MIDI OUT connector, the following step
will cause it to produce a fairly loud sound, so please reduce the volume of your sound module before
continuing.
2. If you have a sound module connected to the OCTA-CAPTURE’s MIDI OUT connector, you
need to click the for the OCTA-CAPTURE that appeared in step 3. If the sound module
produces sound, the settings are correct.
3. Click Test Setup once again to end the test.
8. From the [Audio MIDI Setup] menu, select [Quit Audio MIDI Setup] to nish making
settings.
Caution when recording or playing back with your software
Check the following points before you use the OCTA-CAPTURE to record or play back.
• Connect the OCTA-CAPTURE to your Macintosh before you start up the software you’re
using.
• Do not switch o the OCTA-CAPTURE’s power or disconnect the USB cable from your
computer while your software is running. Close the software you’re using before you
disconnect the OCTA-CAPTURE’s USB cable from your Macintosh.
This completes driver installation and settings.
Next, verify that you hear sound from the OCTA-CAPTURE. -> “Verifying That You Hear Sound” (p. 27)
 Loading...