EasyManua.ls Logo

Roland Octa-Capture - User Manual

Roland Octa-Capture
100 pages
Print Icon
To Next Page IconTo Next Page
Loading...

Table of Contents

Other manuals for Roland Octa-Capture

Questions and Answers

  • P
    prestonmitchellSep 12, 2025
    Why does the “Found New Hardware Wizard” appear even though I’ve installed the Roland Recording Equipment driver (Windows XP)?
    • J
      Jamie BurkeSep 12, 2025
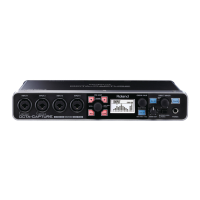
      If the “Found New Hardware Wizard” appears even though you’ve installed the Roland OCTA-CAPTURE driver (Windows XP), it might be because you connected the OCTA-CAPTURE to a different USB connector than the one you used when installing the driver. In this case, install the driver again.
  • G
    Greg CohenAug 22, 2025
    Why is there no sound from my computer speakers when using Roland Recording Equipment?
    • J
      John BarnesAug 22, 2025
      When the Roland OCTA-CAPTURE is connected to your computer, the sound will not be heard from your computer’s speakers. To hear sound, connect your headphones or audio playback system (external monitors) directly to the OCTA-CAPTURE.
  • L
    Laura BrockAug 25, 2025
    What to do if I can't install the Roland Recording Equipment driver?
    • D
      Denise RileyAug 25, 2025
      If you're having trouble installing the Roland OCTA-CAPTURE driver, make sure of the following: * Log on to Windows with a user name belonging to the Administrators group, such as Administrator, or a user name whose account type is Computer Administrator. * If using Windows XP, refer to 'Driver Signing Option Settings (Windows XP)' and make the appropriate settings. * Close all other software before you perform the installation, as other software running in the background (such as anti-virus software) could interfere.
  • P
    paulpetersonAug 27, 2025
    What to do if installation is not successfully completed when you connect Roland Recording Equipment?
    • M
      Marcus BarryAug 27, 2025
      If the installation of your Roland OCTA-CAPTURE is not successfully completed when you connect the device, consider the following: * After you connect the OCTA-CAPTURE, it may take several minutes before it is recognized by your computer. This is not a malfunction. Please wait until the Found New Hardware Wizard appears. * Make sure that the OCTA-CAPTURE is correctly connected to your computer. * Please use your computer with its power supply connected. * Disconnect all USB devices (other than a mouse and keyboard, if used) from your computer before performing the installation. * If your computer does not meet the requirements of the USB specification, you may be able to solve the problem by connecting a self-powered USB hub.
  • G
    Gabriel MurrayAug 29, 2025
    How to adjust the recording levels on Roland Recording Equipment?
    • J
      Jamie RubioAug 29, 2025
      If the recorded sound with your Roland OCTA-CAPTURE is too loud or too soft, use the OCTA-CAPTURE’s [SENS] knob to adjust the input level. Also, check your recording software's input level settings if it has that capability.
  • B
    brownanthonyAug 31, 2025
    Why is the guitar volume insufficient with my Roland Recording Equipment?
    • R
      rdavilaAug 31, 2025
      If you're experiencing insufficient guitar volume with your Roland OCTA-CAPTURE, verify these settings: * Connect your guitar to the INPUT 2 combo input jack. * Set the input impedance select switch to the Hi-Z position. * Turn the OCTA-CAPTURE’s [SENS] knob toward the right to increase the input level. * Make connections using a cable that does not contain an internal resistor.
  • M
    Megan MaldonadoNov 25, 2025
    Why is the sound from my Roland Recording Equipment inaudible or too soft?
    • P
      Paul ReyesNov 25, 2025
      If the sound played by your computer through the Roland OCTA-CAPTURE is inaudible or too soft, consider the following: * If you can hear sound through headphones connected to the OCTA-CAPTURE’s headphone jack, check that you have correctly connected your audio playback system (external monitors), and adjust the volume of your equipment. * Use the OCTA-CAPTURE’s front panel monitor volume and direct monitor volume knob to adjust the volume. * In the OCTA-CAPTURE control panel’s direct mixer, check whether Mute might be turned on. * Use the 'Control Panel' to view and adjust the volume of the direct mixer. * Check the patch bay settings in OCTA-CAPTURE Control Panel. * Set the volume of your computer system to the appropriate level. * If you’re using voice communication softwa...
  • C
    Carly WhiteSep 13, 2025
    Why does a number such as “2-” appear at the beginning of the Roland Recording Equipment device name (Windows)?
    • C
      Christian McguireSep 13, 2025
      If a number such as “2-” appears at the beginning of the Roland OCTA-CAPTURE device name in Windows, it could be because you connected the OCTA-CAPTURE to a different USB port. You can either connect the OCTA-CAPTURE to the same USB port as when you installed it, or install the driver once again.
  • W
    williambennettSep 10, 2025
    Why can't I record via a digital connection, or why is something wrong with the recorded sound on my Roland Recording Equipment?
    • R
      Ronald TranSep 10, 2025
      If you're experiencing issues recording via a digital connection with your Roland OCTA-CAPTURE, or if there's something wrong with the recorded sound, check the following: * If you want to digitally capture audio data from a CD or MD into your computer, turn on the digital input switch to select digital input mode. * Set the OCTA-CAPTURE to the same sample rate as the device from which you’re recording. If you switch the OCTA-CAPTURE’s sample rate, you must cycle the power to the OCTA-CAPTURE in order to make the new setting take effect.
  • B
    Benjamin CookSep 6, 2025
    Why can’t I select or use the Roland Recording Equipment within software or system settings?
    • A
      Ashley LarsenSep 6, 2025
      If you're unable to select or use the Roland OCTA-CAPTURE within software or in system settings, it might be due to the following reasons: * The OCTA-CAPTURE could be in use by other software. Close all software you currently have running. Next, switch off the OCTA-CAPTURE’s power, then turn it back on again. If this does not solve the problem, reinstall the driver. * The driver installation may have failed. Please reinstall the driver. * If the device name is not displayed, it may be that the driver installation failed. Please reinstall the driver.

Summary

Using the Unit Safely

Essential Safety Guidelines

Lists critical safety instructions to prevent hazards like fire, shock, or injury.

Important Notes

Panel Descriptions

Front panel Overview

Introduces the controls and indicators on the front of the OCTA-CAPTURE.

Rear Panel Overview

Introduces the connectors and ports on the rear of the OCTA-CAPTURE.

Driver Installation and Settings

Installation Procedure Overview

Provides a table outlining driver installation steps for different OS.

Windows 7;Vista: Driver Installation

Step-by-step guide for installing the driver on Windows 7/Vista.

User Account Control and Setup Wizard

Details the User Account Control prompt and the driver setup wizard steps.

Input;Output Device Settings

Explains selecting OCTA-CAPTURE as audio/MIDI device in software.

Windows XP: Driver Installation

Step-by-step guide for installing the driver on Windows XP.

Windows XP: Found New Hardware Wizard

Explains the process for the Found New Hardware Wizard on Windows XP.

Windows XP: Input;Output Device Settings

Selecting OCTA-CAPTURE as audio/MIDI device in software for XP.

Mac OS X: Driver Installation

Step-by-step guide for installing the driver on Mac OS X.

Mac OS X: Audio I;O Device Settings

Selecting OCTA-CAPTURE as audio device in system settings for Mac.

Mac OS X: MIDI I;O Device Settings

Configuring MIDI settings in Audio MIDI Setup.

Mac OS X: MIDI Configuration and Testing

Setting up MIDI connections and testing transmission.

Verifying That You Hear Sound

Connecting Your Audio Playback System

Illustrates connecting headphones or speakers for monitoring.

Playing Back the Sample Data

Instructions for playing sample audio files to verify setup.

Basic Operation

Basic Connections Diagram

Illustrates the physical connections for power, computer, and audio output.

Turning the Power On

Step-by-step guide for powering on the unit and connected equipment.

Turning the Power Off

Step-by-step guide for powering off the unit and connected equipment.

Controlling the Preamp

How to select channels and adjust preamp gain using buttons and knob.

PHANTOM [48 V] Button

How to turn phantom power on/off for condenser microphones.

Recording a Microphone or Guitar

Guides on connecting and setting up microphones and guitars for recording.

Input Impedance Setting (CH 1 & 2)

How to set input impedance for Hi-Z or Lo-Z on channels 1 and 2.

Phantom Power On;Off

Instructions for enabling or disabling phantom power.

Input Sensitivity Setting

How to adjust input sensitivity for optimal recording quality.

Auto Sens Setting

Explains how Auto Sens automatically sets recording levels.

Direct Monitor Volume Adjustment

How to adjust monitor sound balance without affecting recording level.

Advanced Operation

Simultaneously Recording Multiple Inputs

Guides on connecting multiple instruments for simultaneous recording.

Input Sensitivity Adjustments

Reiteration on adjusting input sensitivity for best quality.

Direct Monitor Volume Adjustments

Reiteration on adjusting monitor volume balance.

Direct Mixers and Routing

Overview of direct mixers and patch bay for monitoring and output assignment.

Control Panel Introduction

Explains the function of the dedicated control panel software.

Main Window and Control Screens

Describes the main window, preamp, and direct mixer control screens.

Preamp Control Parameters

Details settings like input gain, phantom power, phase, and low cut.

Compressor Control Parameters

Explains compressor settings like Gate, Attack, Release, Ratio, Gain, Link.

Direct Mixer Control Overview

Explains mixer select tabs and controls for input mixers.

Input Mixer A-D Controls

Details controls like Stereo Link, Mute, Solo, Send, Pan, and Slider for input mixers.

Patch Bay Functionality

Explains assigning output destinations for mixers and playback channels.

Live Set-up with Four Stage Monitors

Guides on setting up monitor mixes for band members using direct mixers.

Connecting Two OCTA-CAPTURE Units

Instructions for linking two units for expanded I/O.

Connecting Two Units: Windows Setup

Configuring settings for two units on Windows, including driver settings.

Connecting Two Units: Mac OS X Setup

Configuring settings for two units on Mac OS X, including MIDI and aggregate devices.

Headphone Monitoring (Two Units)

Configuring headphone monitoring when using two units.

Operations in the OCTA-CAPTUREs Panel

Compressor Parameter Settings

Details how to adjust compressor parameters like THRS, GAIN, GATE, ATK, REL, RATIO, LINK.

System Settings Details

Explains AUTO SENS, BACKUP/RECALL, VS EXPAND, DIGITAL, CLEAR MUTE/SOLO, POWER OFF, INITIALIZE.

Appendices

Setting the Sampling Frequency

How to match OCTA-CAPTURE's sampling frequency with software.

Sampling Frequency Setting Procedure

Steps to set the sampling frequency and restart the unit.

Restoring the Factory Settings

How to perform a factory reset using buttons and power.

Driver Settings: Viewing;Changing (Windows)

How to adjust driver settings like audio buffer size in Windows.

Reinstalling the Driver

Procedure to reinstall the driver if installation issues occur.

Troubleshooting

Overall: Power Issues

Checks for power-related problems like the unit not turning on.

Driver Installation: Initial Checks

Checks for common issues during driver installation.

Playback Issues: No Computer Sound

Troubleshoots why sound is not heard from computer speakers.

Two Units Connected: USB & VS EXPAND

Addresses issues with connected USB devices and VS EXPAND settings.

Two Units Connected: Coaxial Sync & Mac Settings

Troubleshoots coaxial synchronization and Mac OS X audio settings for two units.

Two Units Connected: Monitoring Sound Issues

Troubleshoots problems with hearing monitor sound from the second unit.

Main Specifications

Roland Octa-Capture Specifications

Audio Channels IconAudio Channels
number of audio record channels (44.1/48/96 kHz)12 channels
number of audio playback channels (44.1/48/96 kHz)10 channels
number of audio record channels (192 kHz)4 channels
number of audio playback channels (192 kHz)4 channels
Signal Processing IconSignal Processing
pc interface bit depth24-bit
ad/da conversion bit depth24-bit
internal processing bit depth40-bit
Sampling Frequency IconSampling Frequency
ad/da conversion sampling frequency44.1/48/96/192 kHz
digital (in/out) sampling frequency44.1/48/96 kHz
Input and Output Levels IconInput and Output Levels
nominal input level (input jack 1-6, xlr type)-56 to -6 dBu
nominal input level (input jack 7-8, xlr type)-50 to +0 dBu
nominal input level (input jack 1-8, 1/4-inch trs phone type)-46 to +4 dBu
nominal output level (output 1-8)+0 dBu (balanced)
headroom16 dB
Impedance IconImpedance
input impedance (input jack 1-6, xlr type)5 k ohms (balanced)
input impedance (input jack 7-8, xlr type)10 k ohms (balanced)
input impedance (input jack 1-8, 1/4-inch trs phone type)17 k ohms (balanced)
output impedance (output 1-8)1.8 k ohms (balanced)
output impedance (phones)47 ohms
Frequency and Noise IconFrequency and Noise
frequency response (192 kHz)20 Hz to 90 kHz (+0/-8 dB)
frequency response (96 kHz)20 Hz to 40 kHz (+0/-2 dB)
frequency response (48 kHz)20 Hz to 22 kHz (+0/-2 dB)
frequency response (44.1 kHz)20 Hz to 20 kHz (+0/-2 dB)
residual noise level-87 dBu typ. (GAIN: min., 600 ohms terminated, IHF-A)
Dynamic Range and Display IconDynamic Range and Display
dynamic range (ad block input 1-8)104 dB typ. (GAIN: min.)
dynamic range (da block output 1-8)113 dB typ.
display128 x 64 dots Graphic LCD (backlit LCD)
Connectors IconConnectors
input jacks (xlr type / 1/4-inch trs phone type)XLR type (balanced/phantom power +48 V), 1/4-inch TRS phone type (balanced)
coaxial input connectorpresent
coaxial output connectorpresent
headphone jackStereo 1/4-inch phone type
output jack (1/4-inch trs phone type)balanced
midi connectorsIn, Out
usb connectorpresent
Power and Dimensions IconPower and Dimensions
power supplyDC 9 V (AC adaptor)
current draw1.45 A
dimensions283.8 (W) x 157.9 (D) x 50.4 (H) mm / 11-3/16 (W) x 6-1/4 (D) x 2 (H) inches
weight1.32 kg / 2 lbs 15 oz

Related product manuals