69
Restoring the Factory Settings (Factory Reset)
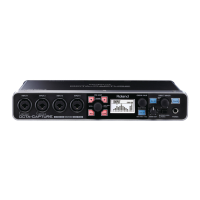
After rst switching o the OCTA-CAPTURE’s power, hold down the CHANNEL [ ] and [ ]
buttons while you press the [POWER] button to turn on the power.
11
The screen will indicate “Factory Reset.”
Driver Settings
In the driver settings dialog box you can view or change driver settings such as the buer size.
Viewing or changing the settings (Windows)
* If the Windows monitoring function is enabled, it won’t be possible to change the driver settings
on Windows 7. Refer to “Windows Monitoring Function Settings (Windows 7)” (p. 80) and disable
monitoring.
1. Use a USB cable to connect the OCTA-CAPTURE to your computer, then switch on the
OCTA-CAPTURE’s power.
2. Open the Windows Control Panel and double-click the OCTA-CAPTURE icon.
If you don’t see the OCTA-CAPTURE icon, open the control panel and change the view to the Icon
view (Windows 7) or Classic view (Windows Vista/Windows XP).
3. From the Driver menu, choose Driver Settings.
The OCTA-CAPTURE Driver settings dialog box will appear.
Audio Buer Size
You can adjust the audio input/output buer size. (The default setting is the sixth step from the left.)
Decreasing the buer size will decrease the latency and improve the realtime response. However,
depending on the processing power of your computer and the complexity of your song data, this
may make clicks and pops during recording or playback more likely.
Increasing the buer size will increase the latency, but will make audio data transfer more stable,
decreasing the likelihood of clicks and pops.
If you’re playing a software synthesizer in real time or using your DAW software to monitor the
“thru” signal of the audio input, you should decrease the buer size in order to improve the realtime
response.

 Loading...