23
Chapter 1: Getting Started
1-3 Assembling and Installing
Step 2: Install the Included Items
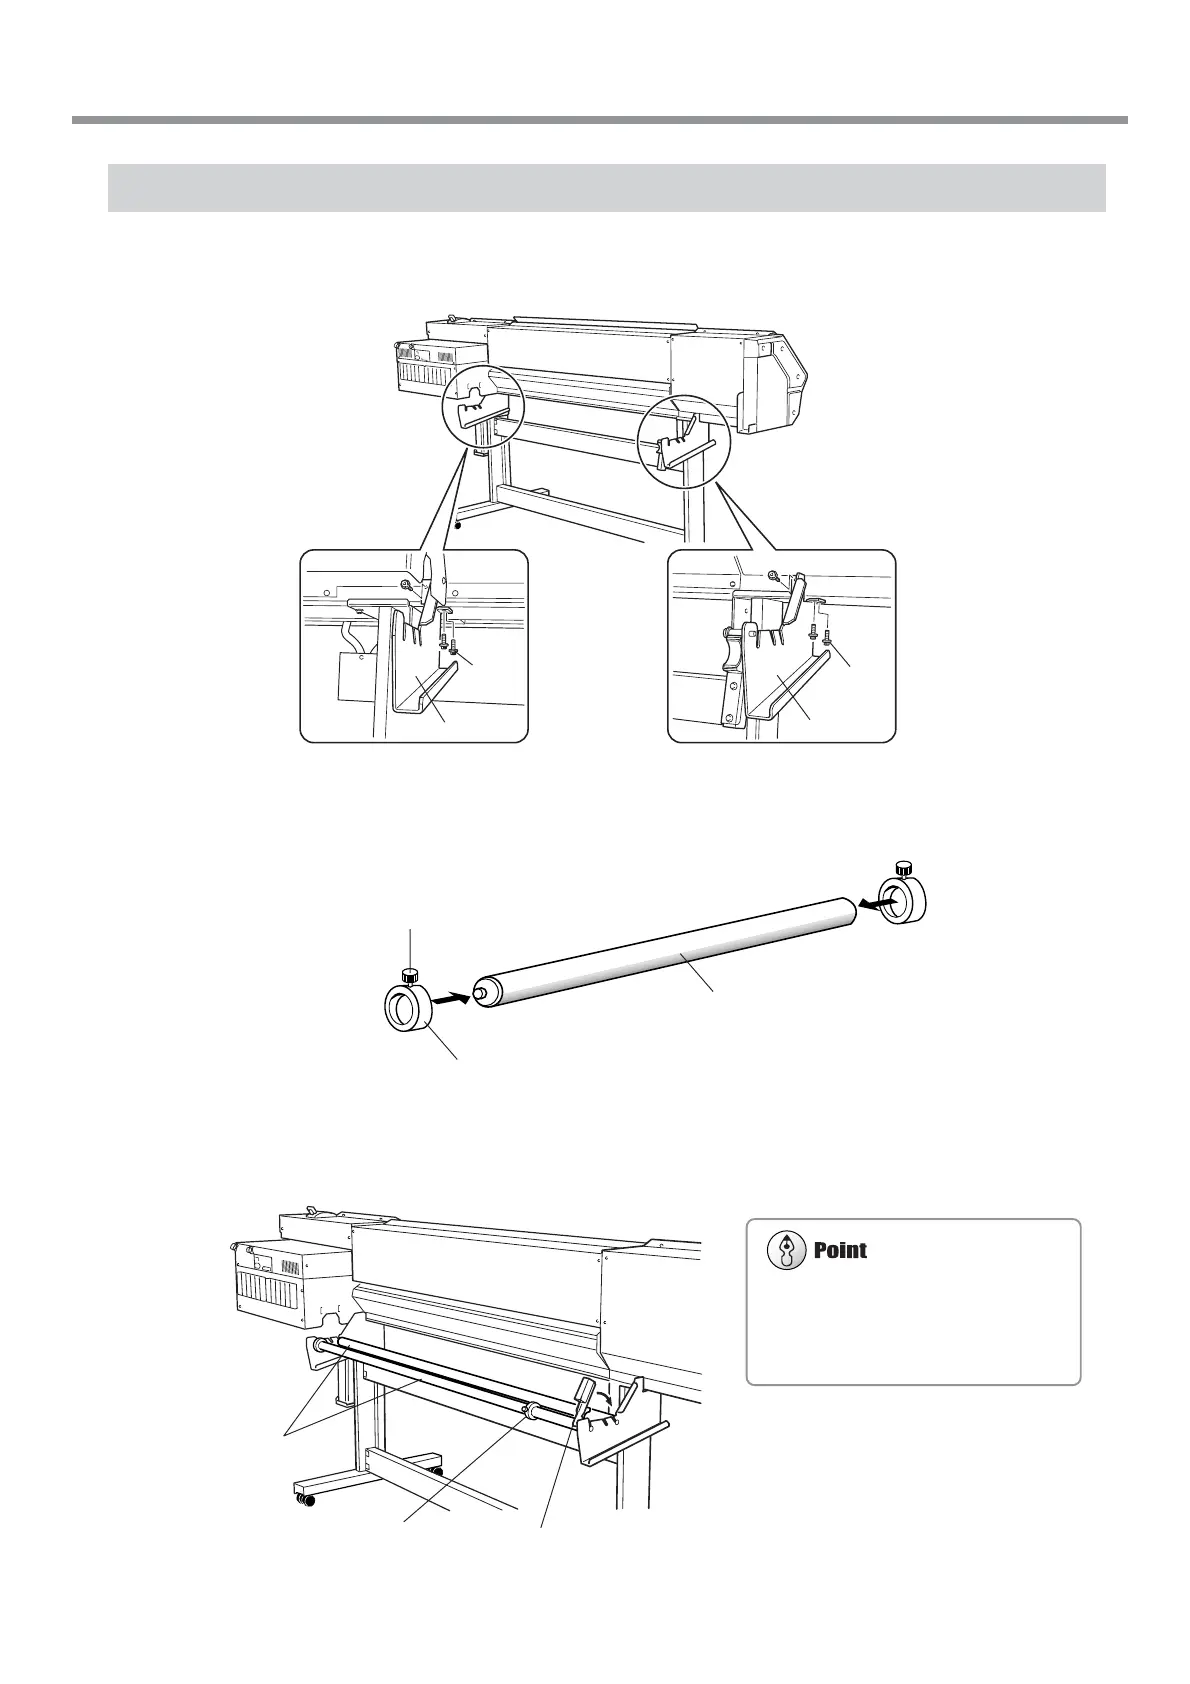
1
Attach the arms onto the back of the machine at the locations shown in the figure.
2
Pass the stoppers onto both ends of the shaft.
When passing the shaft through the stopper, be sure to loosen the screws on the stopper first.
3
Attach the two shafts and engage the brake. Install the shafts so that the one with the stopper is in front
of the back of the machine.
Tighten loosely with the screws.
Shaft
Stopper
Rear
Shafts
Brake
Left-hand side of
the back of the unit
Right-hand side of
the back of the unit
Arm
(Right)
Bolts
(Large)
Arm
(Left)
Bolts
(Large)
Stopper
Make sure the shaft brake is engaged. Us-
ing the machine with the brake disen-
gaged may result in unstable media feed,
leading to poor image quality.
 Loading...