33
Chapter 1: Getting Started
1-6 Installing the Blade
Installing a Blade
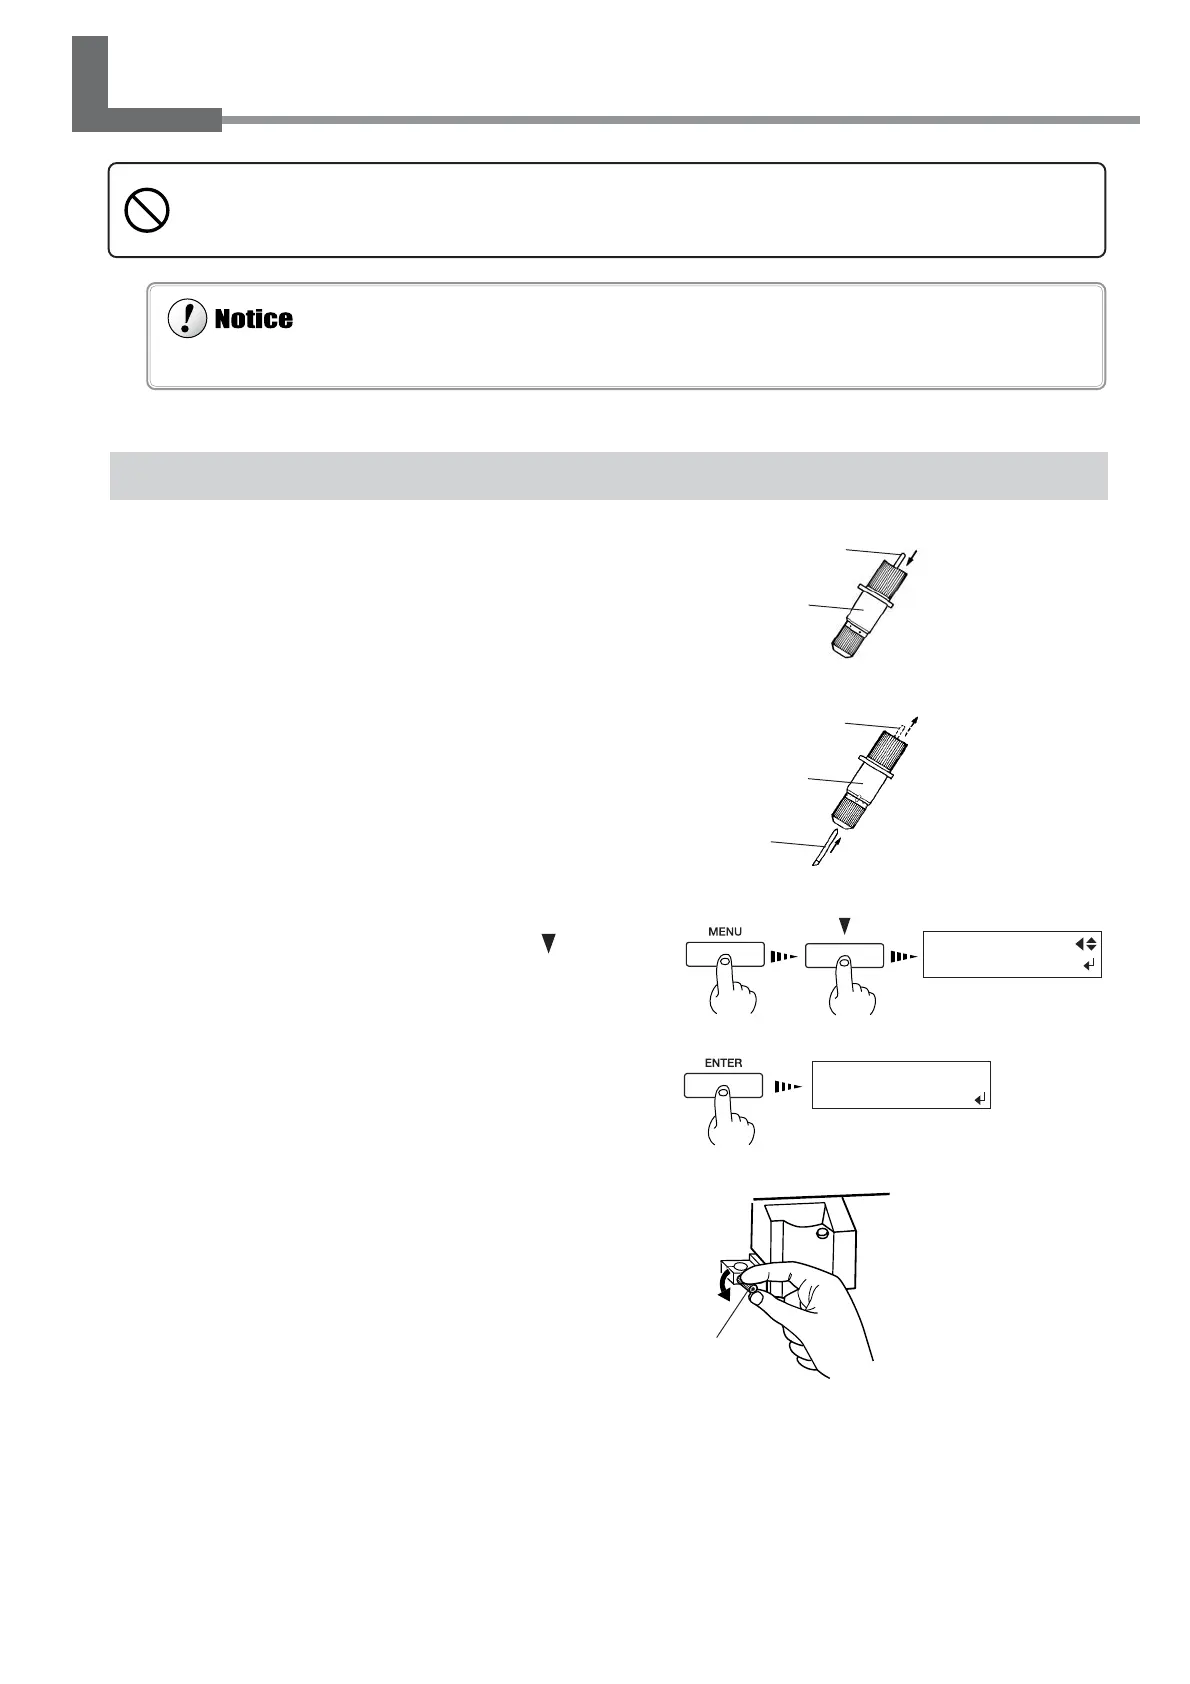
1
Insert the push-pin into the blade holder.
2
Insert a blade into the blade holder until it snaps
into place with an audible click.
3
Press the [MENU] key, and press the [ ] key
to make the following screen appear on the dis-
play.
4
Press the [ENTER] key to make the following
screen appear on the display.
When the screen shown in the figure appears, the print-
head carriage simultaneously moves to the left.
5
Open the front cover, loosen the screw in the
figure.
FINISHED ?
Do not touch the tip of the blade with your fingers.
Doing so may result in injury, and the cutting performance of the blade will be impaired.
Blade
Do not leave the tool mounting screws tightened. Tightening the screw makes it more difficult to install the blade holder.
Blade holder
Push-pin
Blade holder
Push-pin
Screw

 Loading...