92
Chapter 5: Maintenance
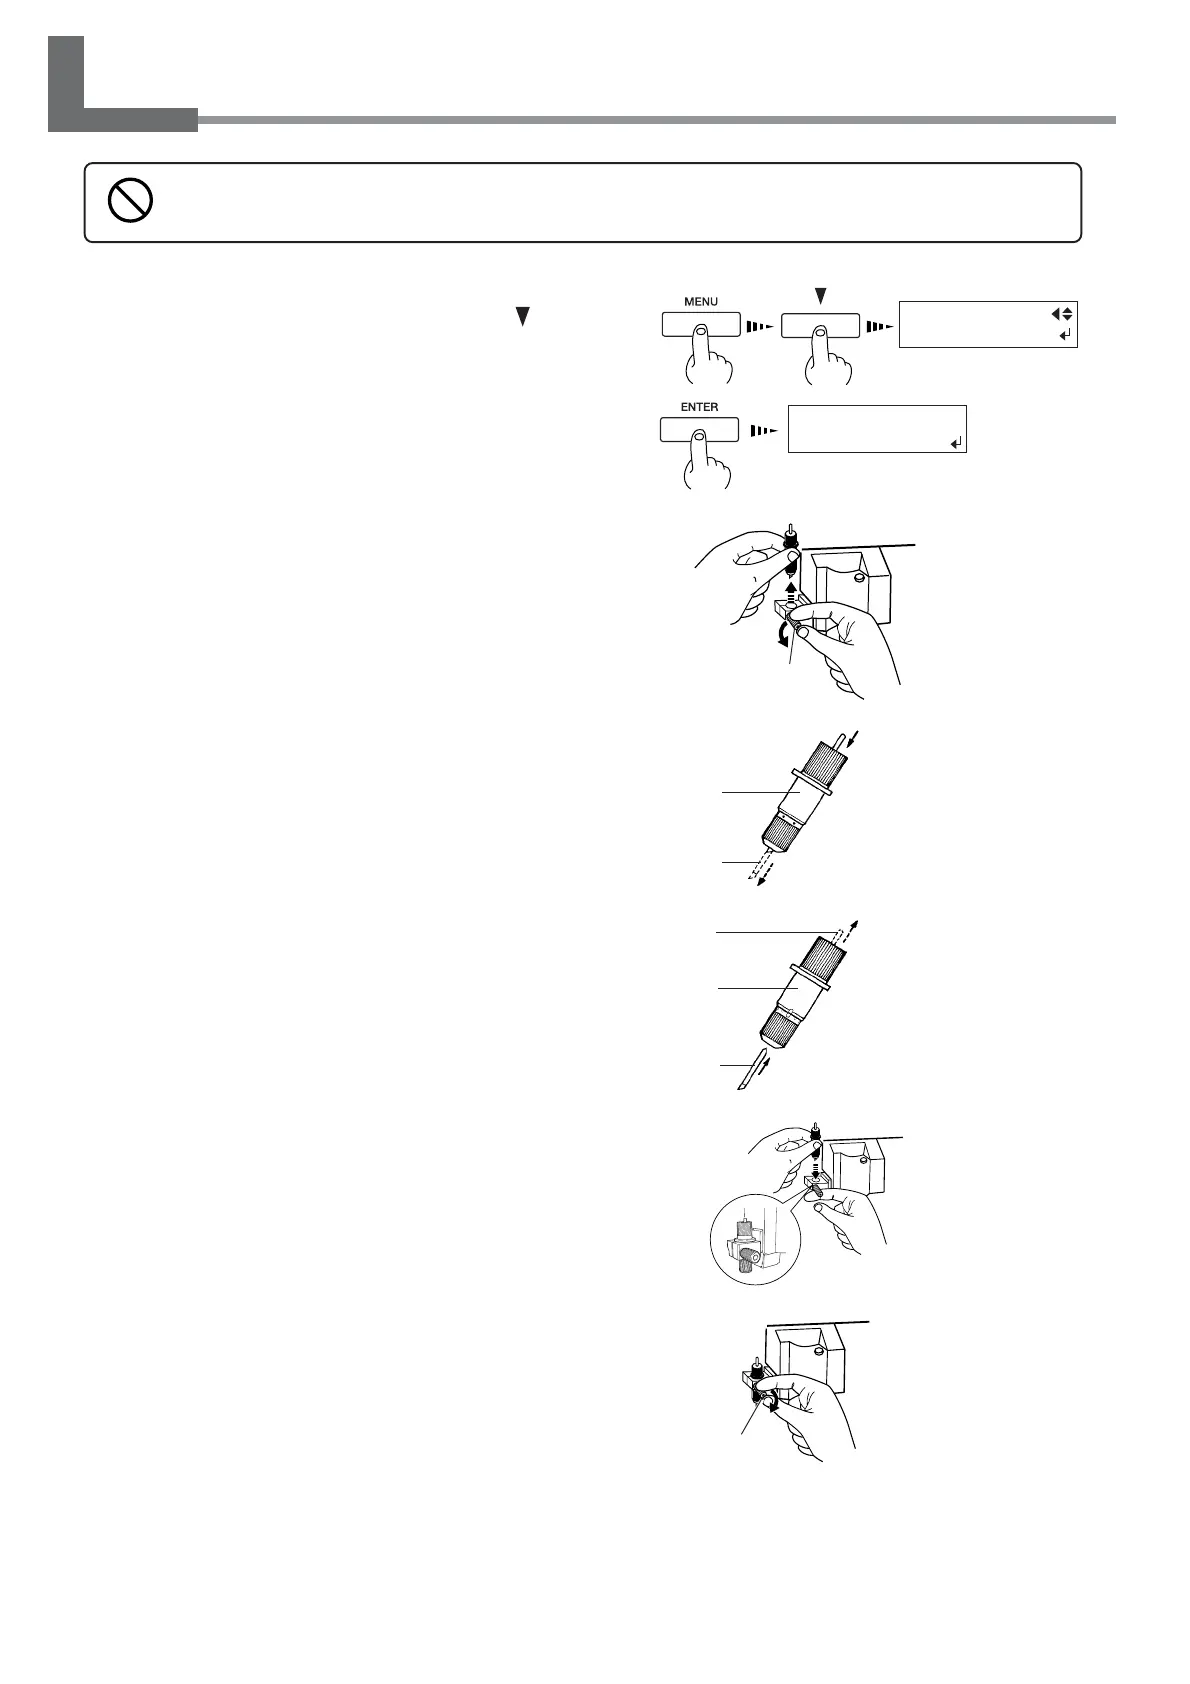
5-6 How to Replace the Blade
1
Press the [MENU] key, and press the [ ] key
to make the following screen appear on the dis-
play.
2
Press the [ENTER] key to make the following
screen appear on the display.
When the screen shown in the figure appears, the print-
head carriage simultaneously moves to the left.
3
Loosen the tool securing screw in the figure,
remove the blade holder from the cutting car-
riage.
4
Remove the old blade.
5
Replace with a new blade.
6
Support the tool-securing screw from below and
install the blade holder.
Insert the blade holder until the collar is flush with the
carriage.
7
Tighten the tool securing screw.
Tug the blade holder upward to make sure it does not
come loose.
8
Close the front cover, and press the [ENTER]
key.
Do not touch the tip of the blade with your fingers.
Doing so may result in injury, and the cutting performance of the blade will be impaired.
MENU
REPLACE KNIFE
FINISHED ?
Screw
Press the push-pin
Blade holder
Old blade
Blade holder
New blade
It snaps into place with
an audible click.
Push-pin
Screw

 Loading...