93
Chapter 5: Maintenance
5-7 How to Replace the Separating Knife
If the separating knife becomes dull, replace with the included replacement blade.
1
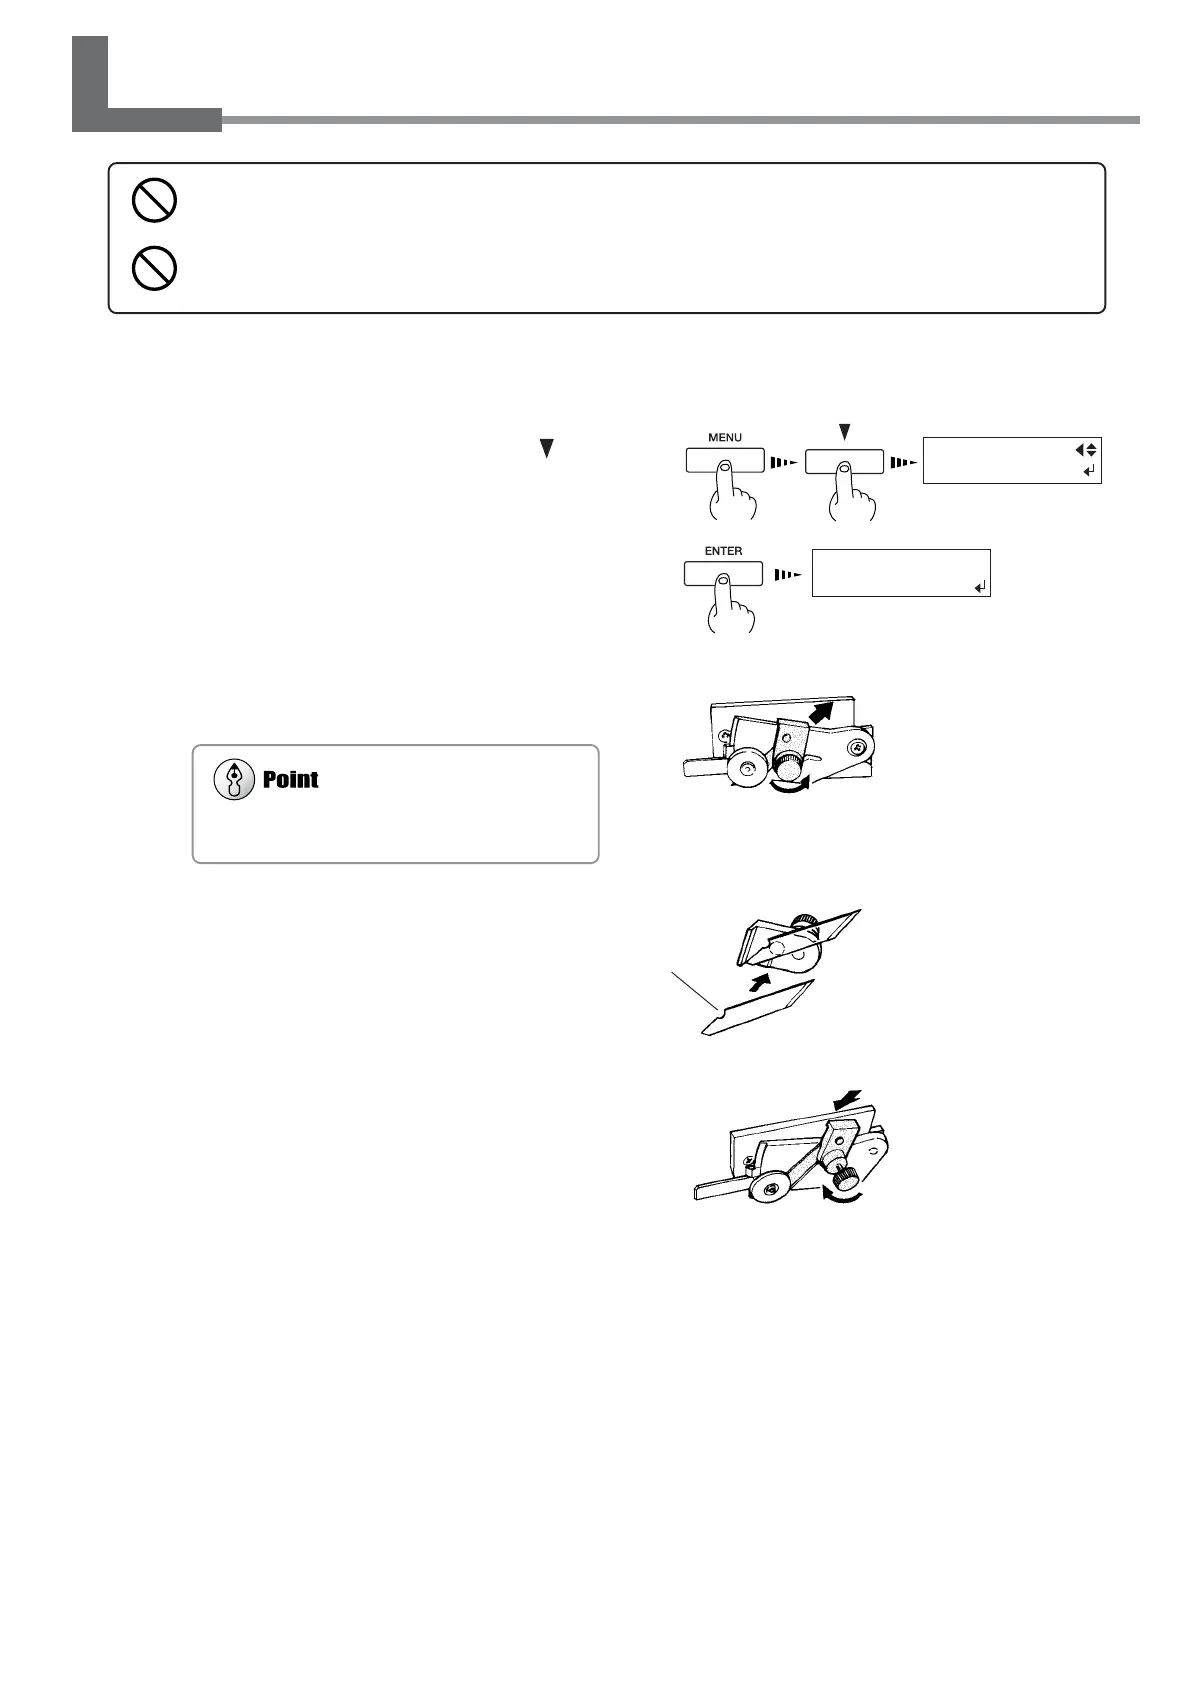
Press the [MENU] key, and press the [ ] key
to make the following screen appear on the dis-
play.
2
Press the [ENTER] key to make the following
screen appear on the display.
When the screen shown in the figure appears, the print-
head carriage simultaneously moves to the left.
3
Open the front cover, and then remove the
separating knife.
4
Replace with a new knife.
5
Install the separating knife.
6
Close the front cover and press the [ENTER]
key.
(1) Loosen the screw
until it slips out.
(2) Grasp the screw portion,
and slowly pull it out in
the direction of the arrow.
If a blade remains in the print-head carriage, use
the tweezers in the cleaning kit to remove it.
Do not touch the tip of the separating knife with your fingers.
Doing so may result in injury.
Do not touch the control panel while head cleaning or other cleaning is in progress.
The print-head carriage may move and cause injury.
(1)Grasp the screw portion
and slowly insert it into
the groove.
Positioning
groove
(2) Tighten the screw.
FINISHED ?
The knife is secured in
place by the magnet.
 Loading...