76
Example: Entering Geographical Data and Performing External Calibration
Preparation
(see also “Calibration and Adjustment” in the chapter entitled “Operation”)
§ Remove the cap that covers the menu access switch on the left-hand side of the back
of the indicator
§ Move the menu access switch to the right (towards the interface connectors);
“accessible” position.
§ Activate the Service mode and open the
Device parameters menu
(see the corresponding section at the beginning of this chapter).
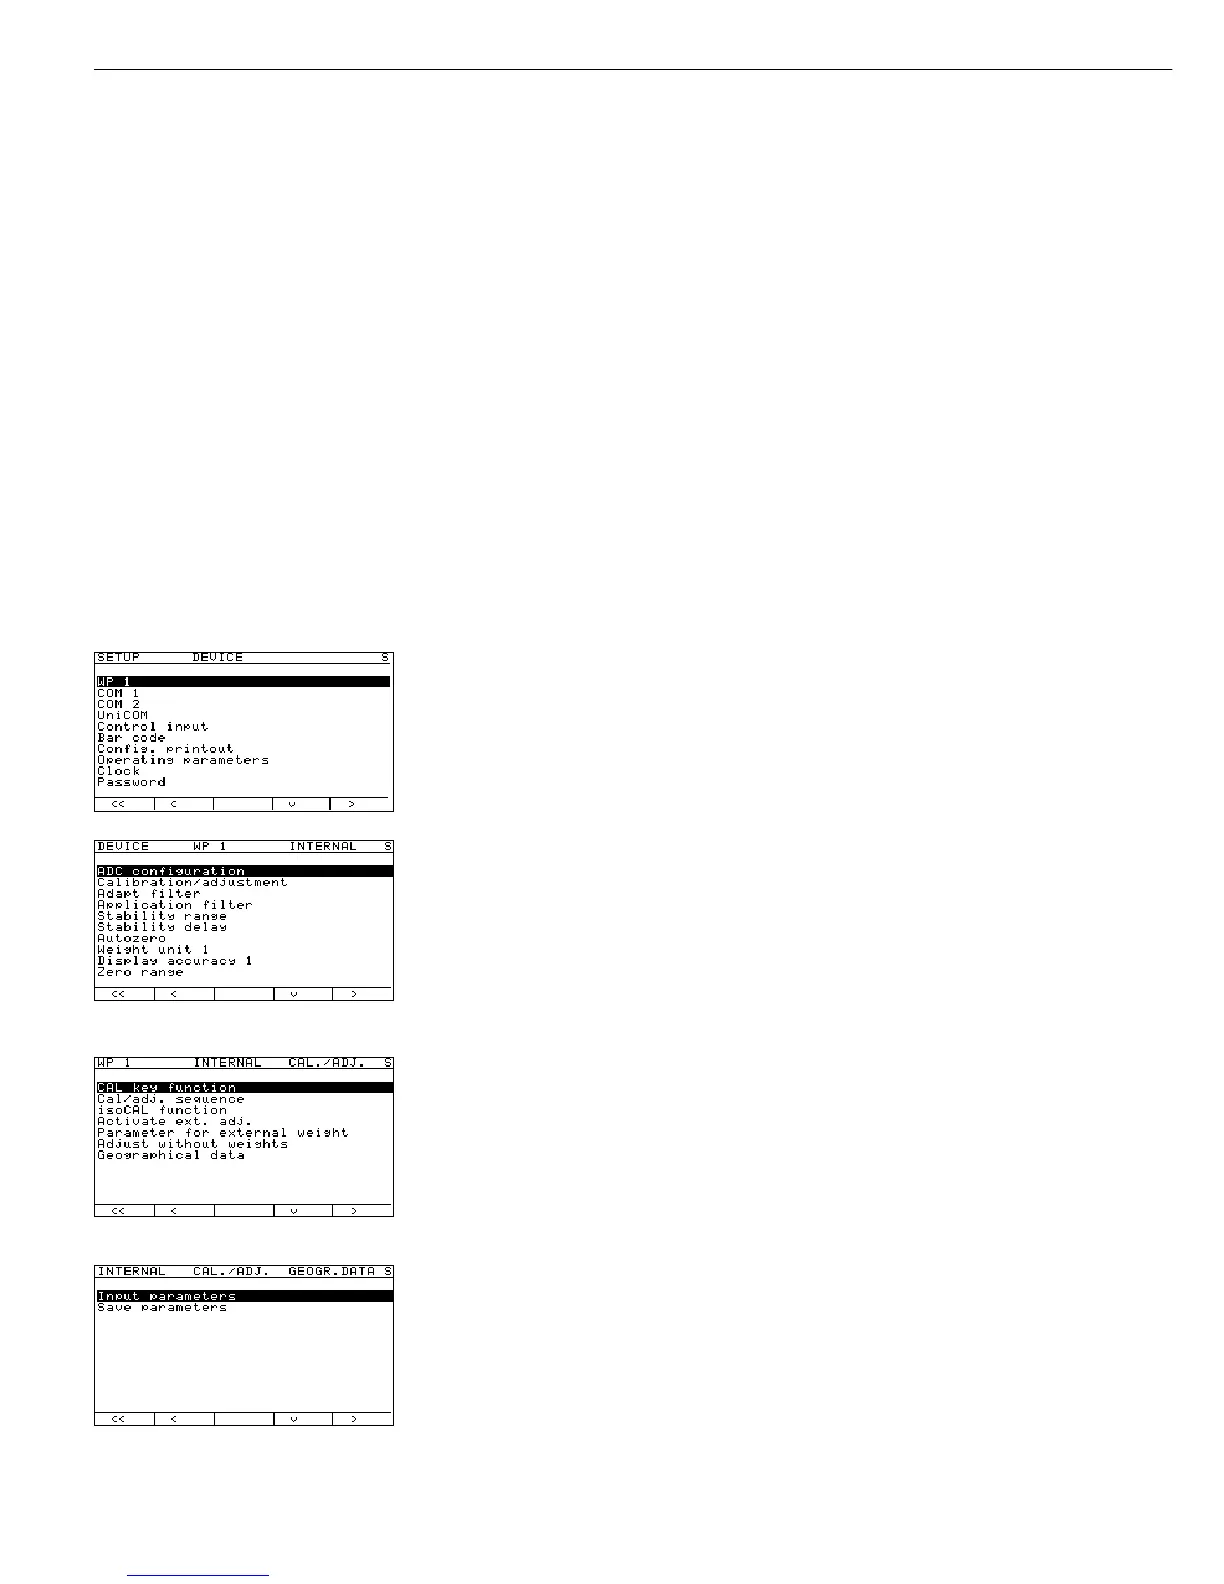
Select weighing platform
WP1.
If the
Internal setting is not already activated (marked by o), press the
Q or q soft key to select the setting and press O to confirm. The message
Function active is shown briefly in the first line of the display, after
which the Setup menu for “WP1” - “Internal” is opened.
The Setup menu for the “WP1 - Internal” device parameters is displayed.
Soft key q, soft key O Open the Calibration/adjustment menu.
5+ soft key q, soft key O Open the Geographical data menu.
Soft key O Open the Input parameters menu.
When the display of geographical data is
active, the calibration procedure is as fol-
lows:
When the calibration procedure is started
(
CAL), the display shows Altitud for
2 seconds (if latitude and elevation are
used), followed by the configured value
(indicating meters above sea level).
Press ) to confirm the data, or ( to
cancel the adjustment routine. Next, the
display shows
Latitud for 2 seconds, fol-
lowed by the value set for the geographical
latitude (in degrees).
Again, press ) to confirm the data or
( to cancel the adjustment routine.
The calibration weight is now prompted.
If the gravitational acceleration is given
rather than the latitude and elevation,
the display shows
CAL and then Gravity
(for 2 seconds), followed by the value
entered for the local gravitational accelera-
tion. Press ) to confirm or ( to
cancel.
 Loading...