EasyManua.ls Logo

SATO GL4xxe Series - User Manual

SATO GL4xxe Series
149 pages
Print Icon
To Next Page IconTo Next Page
Loading...
PN: 9001163B
GL4xxe Operators Manual
GL4xxe series
Read thisOperator’s Manual before and during the servicing of the
above product. Keep this document handy for future reference.

Table of Contents

Questions and Answers

  • J
    Jason HenrySep 7, 2025
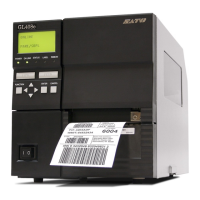
    What does ERROR: OCCURRED: CLEARING QUEUES Please Wait mean on SATO GL4xxe?
    • M
      Meredith LambertSep 7, 2025
      The SATO Barcode Reader displays 'ERROR: OCCURRED: CLEARING QUEUES' as an interim message while the printer discards host data it cannot use because a fault condition exists. While the message displays, the asterisk (*) rotates. Wait. When the asterisk (*) stops rotating, a different fault message will appear. Troubleshoot the final message.
  • M
    Matthew HarrisAug 25, 2025
    What causes GAP NOT DETECTED error on SATO GL4xxe Barcode Reader?
    • D
      Dan GriffinAug 25, 2025
      The SATO Barcode Reader displays 'GAP NOT DETECTED' because the printer is set for Gap or Mark sensing, but a black mark is not being detected. Ensure the Gap/Mark Sensor setting in the SENSOR SETUP menu matches the installed media. Ensure the sensors are properly positioned. Clean the sensor assembly and paper path. Run Auto-Cal to improve the sensor’s ability to detect the media in use. Run the Media Profile printout in the SENSOR SETUP menu. Run Manual Calibrate. Manually change the Gap/Mark Thresh and/or Paper Out Thresh values.
  • D
    dhallAug 25, 2025
    How to fix RIBBON OUT Load Ribbon error on SATO GL4xxe Barcode Reader?
    • A
      Annette WatkinsAug 26, 2025
      The SATO Barcode Reader indicates RIBBON OUT when the ribbon is broken between the ribbon rewind spindle and the print head or the ribbon supply is empty. To fix this, reattach the ribbon or load the printer with a new ribbon.
  • K
    Kimberly StevensSep 16, 2025
    What causes SERIAL PARITY ERROR on SATO GL4xxe Barcode Reader?
    • W
      wangjillSep 17, 2025
      The SATO Barcode Reader displays a SERIAL PARITY ERROR due to a parity error (serial interface). Ensure the printer’s serial interface parameter settings match those of the host. Change as required to match.
  • B
    brandonrojasNov 25, 2025
    Why does my SATO GL4xxe Barcode Reader say LABEL MISSING Check Media Path?
    • T
      Tonya KingNov 25, 2025
      The SATO Barcode Reader shows 'LABEL MISSING' because the Label Taken Sensor did not detect the label present over the tear bar with Tear-Off or Peel-Off Media Handling mode enabled, the label was removed before the printer stopped printing or before the LCD “Remove Label” message displayed, the label slipped behind the platen roller, the label wrapped around the platen roller, or Tear-Off or Peel-Off Media Handling mode was mistakenly selected. To solve this, press the Pause key to continue printing and then wait for the LCD “Remove Label” message before removing the label. Open the pivoting deck, reinstall the label, close the print head, press the Pause key, and continue printing. Open the pivoting deck and remove wrapped labels from the platen. Clean all adhesive from the platen. Reins...
  • M
    Marc DavidSep 12, 2025
    What does DOWNLOADER ERROR BEYOND 32MB EFC Repeat Download mean on SATO GL4xxe Barcode Reader?
    • G
      greenjillSep 13, 2025
      The SATO Barcode Reader displays 'DOWNLOADER ERROR BEYOND 32MB EFC' because the printer contains an 32MB EFC and the firmware attempted to access beyond its limit. Contact an authorized service representative.
  • A
    Alicia FieldsSep 3, 2025
    Why does SATO Barcode Reader show ERROR: WRONG CHECKSUM Repeat Download?
    • A
      Ana RobbinsSep 3, 2025
      The SATO Barcode Reader displays 'ERROR: WRONG CHECKSUM' because the printer received the complete program but the checksum did not match, indicating data corruption during download. Power off the printer for 15 seconds, then power on again. If the problem persists, contact an authorized customer service representative.
  • G
    Gregory LopezSep 3, 2025
    What to do when SATO GL4xxe Barcode Reader displays DOWNLOADER ERROR EXTERNAL FLASH IS FULL Optimize Files?
    • M
      Michelle BenjaminSep 3, 2025
      The SATO Barcode Reader displays 'DOWNLOADER ERROR EXTERNAL FLASH IS FULL' because an attempt was made to download to a full EFC. Delete and optimize files.
  • P
    Pamela EdwardsSep 23, 2025
    How to fix power supply issues on SATO GL4xxe Barcode Reader?
    • S
      Steven BarronSep 23, 2025
      Ensure cable properly connected. Check/replace power supply.
  • G
    George BrooksAug 29, 2025
    What does FILE SYS WRITE Check Flash mean on SATO GL4xxe Barcode Reader?
    • K
      Kendra RamirezAug 29, 2025
      The SATO Barcode Reader shows 'FILE SYS WRITE' because there is a problem writing to flash memory. Power off the printer for 15 seconds, then power on again. If the problem persists, contact an authorized customer service representative.

Summary

INTRODUCTION

About This Manual

Explains the manual's layout, structure, and use of special information boxes.

General Description

Describes the GL4e Series printers, their high-volume labeling applications, and construction.

Control Features

Identifies interactive control features like LCD display, LED indicators, and operator buttons.

TECHNICAL DATA

Physical and Environmental Specifications

Details printer dimensions, weight, operating, and storage conditions.

Power, Processing, and Interface Specs

Covers power requirements, CPU, ROM, buffer, and interface module details.

Print and Media Handling Capabilities

Outlines print speed, resolution, media width, length, and ribbon specifications.

Sensing and Regulatory Compliance

Describes media sensing features and regulatory compliance standards.

Font and Barcode Capabilities

Lists supported character fonts and barcode types.

INSTALLATION

Unpacking and Initial Setup

Guides on unpacking the printer, identifying parts, and initial physical setup.

Printer Installation and Connection

Provides guidance on stationing, connecting the printer, and selecting its location.

Media and Ribbon Loading

Details media selection, loading procedures for rolled/fan-fold media, and ribbon loading.

Operational Mode Selection

Explains different printer operational modes like Continuous, Tear-Off, Cutter, and Dispense.

Interface Installation Procedures

Presents interface types and guides on installing interface hardware.

Accessories Installation

Details the installation process for flash memory cards.

PRINTER CONFIGURATION

Printer Configuration Overview

Provides in-depth instructions for printer configuration using the operator panel.

Configuration Modes Explained

Overviews User Mode, Configuration Mode, Advanced Mode, and various emulation modes.

Menu Definition Tables

Explains parameters within User Mode, providing descriptions and factory defaults.

DIAGNOSTICS MODE

Printer Test Procedures

Details various test print options to verify printer operation and quality.

Error Logging and Clearing

Covers printing the error log and clearing it for troubleshooting.

System Status Information

Shows installed memory, printer usage, and head status.

Statistics Reset and Data Management

Allows resetting print statistics and managing head data.

TROUBLESHOOTING

Error Signal Troubleshooting Guide

Lists specific error signals, their explanations, and recommended solutions.

Troubleshooting Common Print Quality Issues

Provides a table of common print quality problems and their resolutions.

Interface Troubleshooting Checklists

Offers checklists for diagnosing problems with Parallel, Serial, USB, and other interfaces.

Test Print Troubleshooting

Explains using Hex Dump and Test Labels for identifying print problems.

MAINTENANCE

Cleaning Procedures

Details procedures for cleaning debris and residue from the print head and platen roller.

Component Replacement

Provides instructions for replacing primary and secondary printer components like the print head and fuse.

Roller and Sensor Adjustments

Details replacing the media platen roller and positioning the label sensor for accurate media detection.

Print Head and Ribbon System Adjustments

Covers print head balance, pressure, alignment, and ribbon guide/roller alignment for optimal print quality.

SATO GL4xxe Series Specifications

General IconGeneral
Print MethodThermal Transfer / Direct Thermal
Print Resolution203 dpi
Max. Print Width104 mm (4.09 inches)
Media TypeRoll, Fanfold, Tag, Ticket
Media Width25.4 mm - 118 mm (1 inch - 4.65 inches)
Media Thickness0.06 mm - 0.25 mm (0.0024 inch - 0.0098 inch)
InterfacesUSB, Serial, Ethernet, Parallel
Barcodes1D and 2D barcodes
Scanning TechnologyN/A (Printer, not a scanner)
Scan RateN/A (Printer, not a scanner)
ResolutionN/A (Printer, not a scanner)
InterfaceN/A (Printer, not a scanner)
Operating Temperature5°C - 40°C (41°F - 104°F)
Storage Temperature14°F to 140°F (-10°C to 60°C)
Humidity20% - 85% (non-condensing)
LightingN/A (Printer, not a scanner)
Power SupplyAC 100-240 VAC ±10%, 50/60 Hz

Related product manuals