SECTION 8: CLEANING AND MAINTENANCE
SATO HT200e Page 8-5
REPLACING
THE PRINT HEAD
The print head is a user-replaceable item. If it becomes damaged for any reason, it can be easily
removed and replaced. Contact your local SATO representative for information on obtaining a
new print head.
1. SUPPLIES NEEDED
• No. 2 Phillips screwdriver
• Replacement Print Head
2. HOW TO DO
1. Turn the printer off and remove the power cable
2. Open the Top Cover to expose the Print Head.
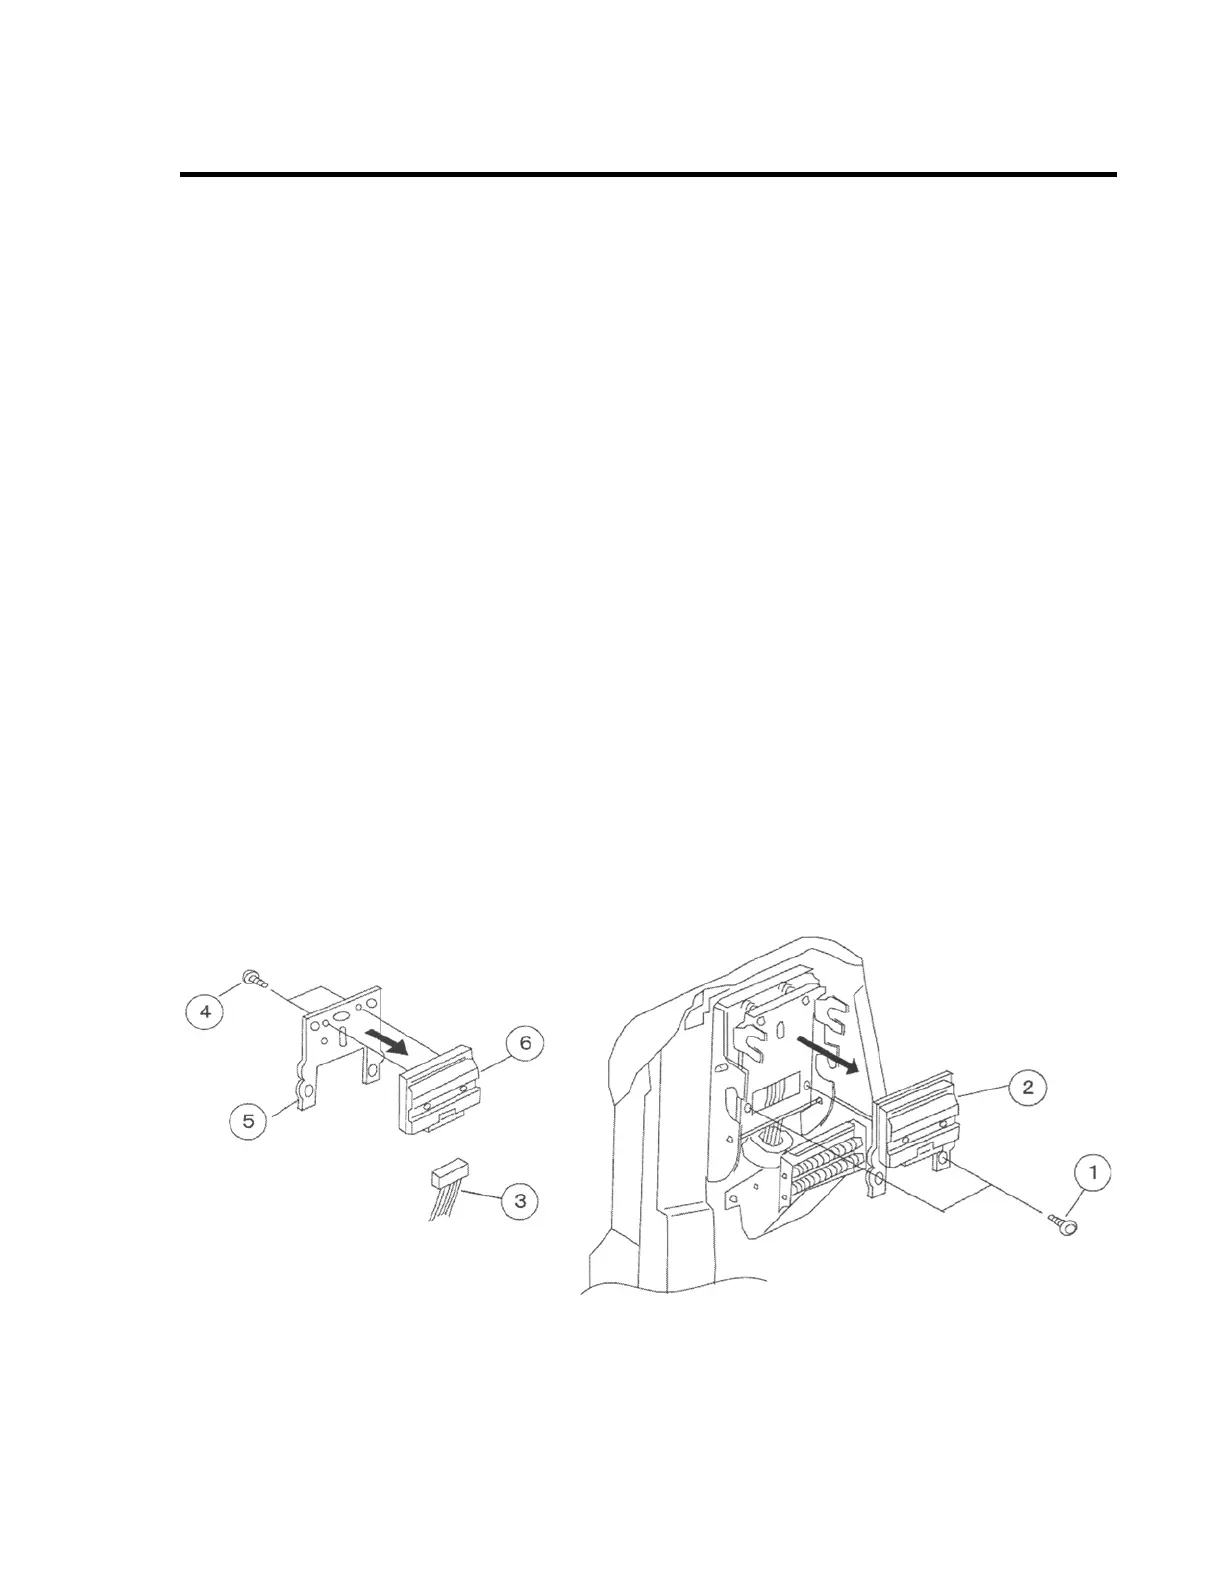
3. Remove the two Print Head Assembly retaining screws (1).
4. Remove the Print Head Assembly (2).
5. Disconnect the Print Head cable (3).
6. Remove the two Print Head mounting screws (4).
7. Remove the old Print Head from the mounting plate (5).
8. Replace the Print Head (6) with the new part.
9. Replace the Print Head mounting screws (4).
10. Reattach the cable (3).
11. Replace the Print Head Assembly (2) in the printer and reattach with screws (1).