SECTION 2: INSTALLATION AND SETUP
Page 2-18 SATO HT200e
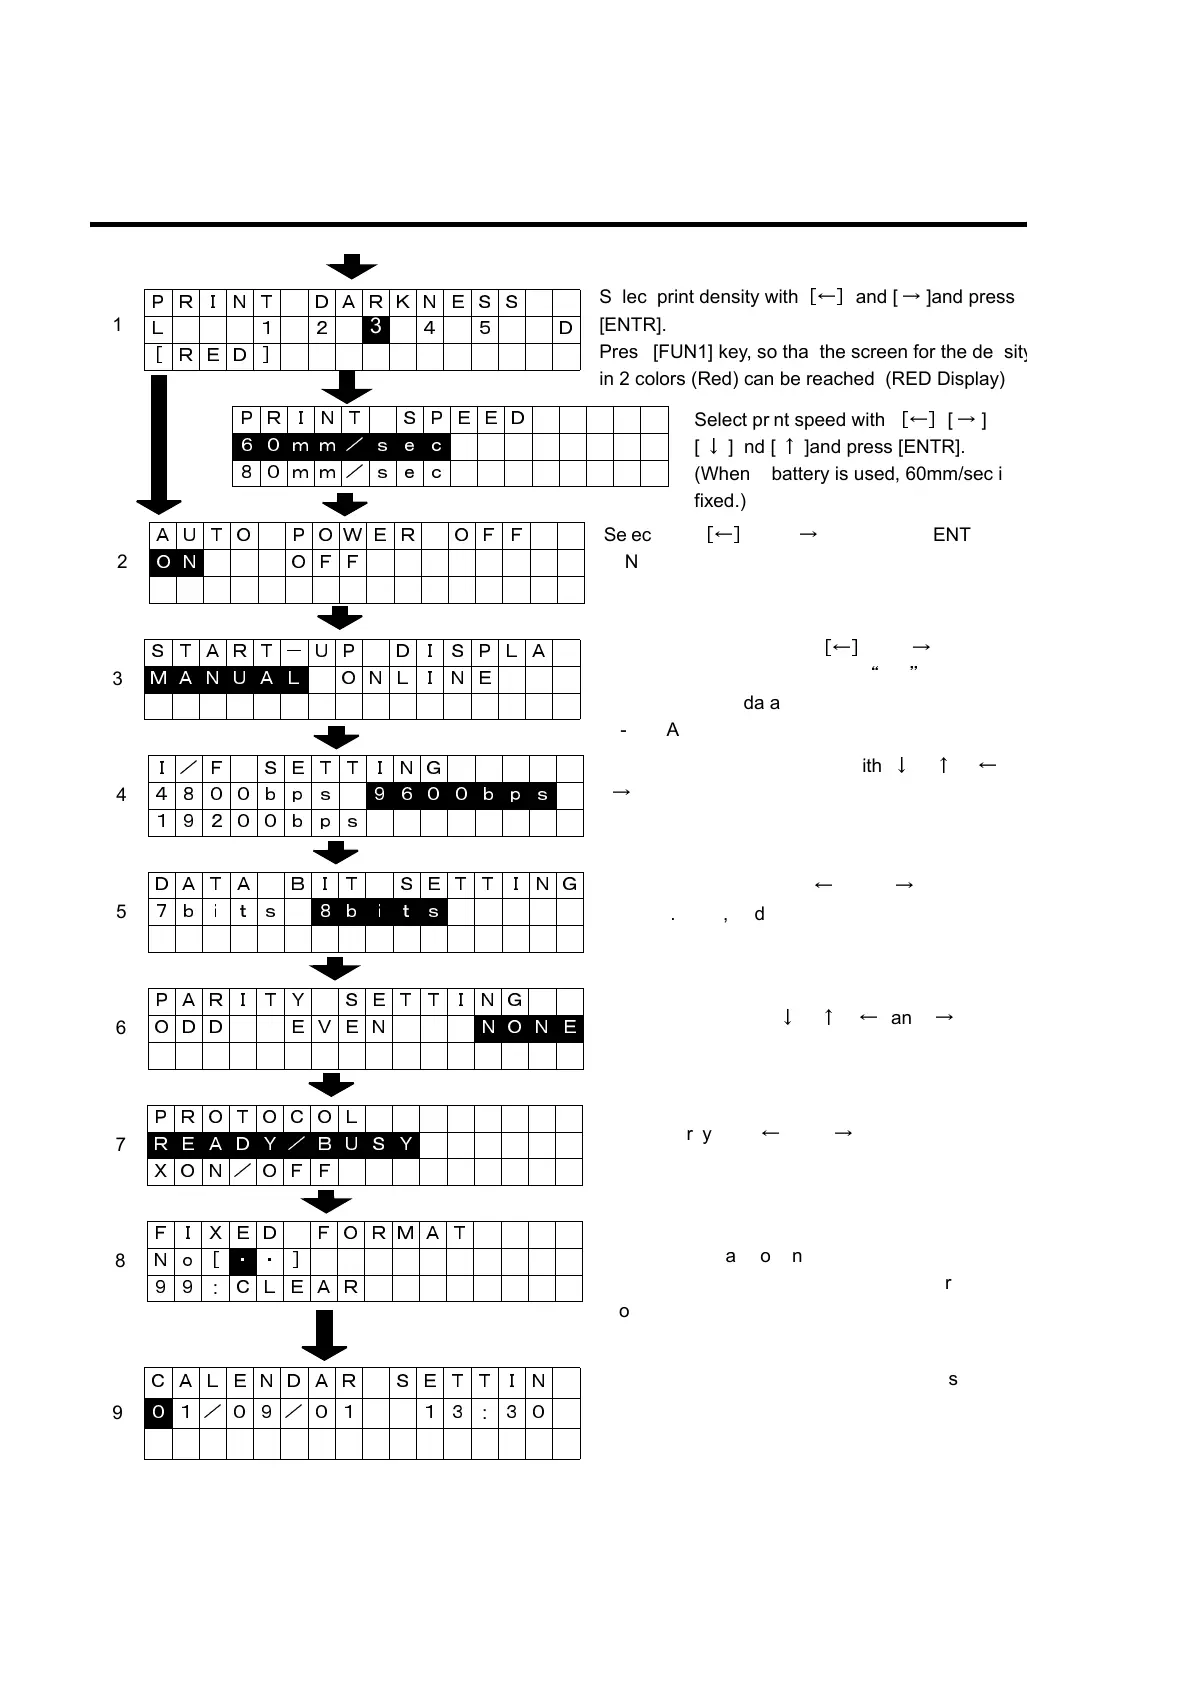
PROCESS ON THE SCREEN FOR USER MAINTENANCE MODE
3 + Power “ON”
PRINT DARKNESS
1
L12
3
45 D
[RED]
PRINT SPEED
6 0 m m / s e c
80mm/sec
AUTO POWER OFF
2
O N OFF
START-UP DISPLA
3
M A N U A L ONLINE
I/F SETTING
4
4800bps 9 6 0 0 b p s
19200bps
DATA BIT SETTING
5
7bits 8 b i t s
PARITY SETTING
6
ODD EVEN N O N E
PROTOCOL
7
R E A D Y / B U S Y
XON/OFF
FIXED FORMAT
8
No[ ・ ・]
99
:
CLEAR
CALENDAR SETTIN
9
0 1/09/01 13
:
30
Select print density with
[←]
and [
→
]and press
[ENTR].
Press [FUN1] key, so that the screen for the densit
in 2 colors (Red) can be reached. (RED Display)
Select print speed with
[←]
[
→
]
[
↓
]and [
↑
]and press [ENTR].
(When a battery is used, 60mm/sec is
fixed.)
Select with
[←]
and [
→
], and press [ENTR]
(ON: Auto Off Power is available.)
Select start-up screen with
[←]
and [
→
], and pres
[ENTR]. Manual: After power is
“
ON
”
, it displays
the entry for print data.
On-line: After power is “ON”, it displays the receivin
Select communication speed with[
↓
] [
↑
] [
←
]
[
→
], and press [ENTR].
(4800bps, 9600bps, 19200bps)
Select protocol with [
↓
] [
↑
] [
←
] and [
→
], press
[ENTR]. (READY/BUSY, XON/OFF)
Select parity with [
←
] and [
→
], and press [ENTR].
(Odd parity, even parity, and no parity)
Select data length with [
←
] and [
→
], and press
[ENTR]. (7 bit, and 8 bits)
Fix where the format for use needs to be fixed.
Enter the format No. and press [ ENTR]. If [**]
and [ENTR] are pressed, it goes to the process
No. 9.
Note: The format fixed can be released with “99”.
Enter date and time for calendar, and press [ ENT
(The setting will be made by pressing [ENTR] when
cursor is placed at the minute position. No other
position is NOT permitted.)
When AC adaptor is used: