28 GB
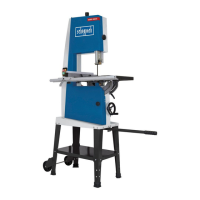
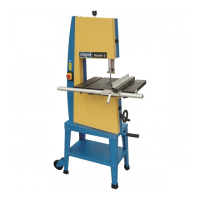
9.11. Push Stick retainer (Fig. 12)
The Push Stick retainer (48) is pre-mounted on the
machine frame. If unused, the Push stick (26) must
always be stowed in the Push Stick retainer.
10. Operation
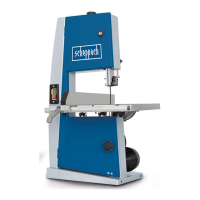
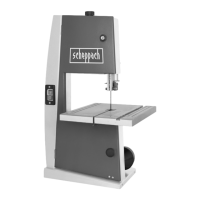
10.1 On/Off switch (12) (Fig. 15)
• To turn the machine on, press the green button „I“.
• To turn the machine off again, press the red but-
ton „0“.
• The band saw is equipped with an undervoltage
switch. With a power failure, the band saw must
be switched back on again.
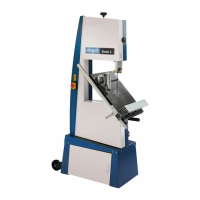
10.2. Parallel stop (Fig. 16)
• Press the clamping bar (26) of the parallel stop
(25) upwards
• Slide the parallel stop (25) left or right of the Band-
saw blade (22) on the saw table (7) and set to the
desired measurement.
• Press the clamping bar (26) down to x the parallel
stop (25) in place.
• Make sure that the parallel stop (25) always runs
parallel to the Bandsaw blade (22).
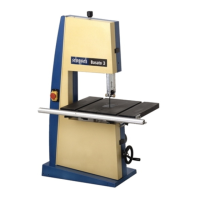
10.3. Angled cuts (Fig. 2+11+18)
In order to execute angled cuts parallel to the Band-
saw blade (22), it is possible to tilt the saw bench (7)
forwards from 0° - 45°.
• Loosen the locking handle for saw table (21).
• Tilt saw bench (7) forwards, until the desired angle
is set on the degree scale (52).
• Retighten locking handle (21).
ATTENTION: With a tilted saw table (7), the paral-
lel stop (25) must always be tted to the right of the
Bandsaw blade (22) in the working direction. This
prevents the workpiece from slipping.
11. Working instructions
The following recommendations are examples of the
safe use of band saws.
The following safe working methods should be seen
as an aid to safety. They cannot be applied suitably
completely or comprehensively to every use. They
cannot treat every possible dangerous condition and
must be interpreted carefully.
• Connect the machine to a suction unit when work-
ing in closed rooms. A suction device which con-
forms with commercial regulations must be used
for suction in commercial areas.
• Loosen the sawband when the machine is not in
operation (e.g. after nishing work). Attach a no-
tice on the tension of the saw band to the machine
for the next user.
• Collect unused sawbands and store them safely in
a dry place. Check for faults (teeth, cracks) before
use. Do not use faulty sawbands!
• Wear suitable gloves when handling sawbands.
• All protective and safety devices must be securely
mounted on the machine before beginning work.
• Never clean the sawband or the sawband guide
with a hand-held brush or scraper while the saw-
band is running. Resin-covered sawbands impair
working safety and must be cleaned regularly.
• For your own protection, wear protective glasses
and hearing protection. Wear a hairnet if you have
long hair. Roll up loose sleeves over the elbows.
• Always position the sawband guide as near the
workpiece as possible when working.
• Insure sufcient lighting in the work area and
around the machine.
• Always use the fence for straight cuts to keep the
workpiece from tipping or slipping away.
• When working on narrow workpieces with manual
feed, use the push stick.
• For diagonal cuts, place the saw bench in the ap-
propriate position and guide the workpiece on the
fence.
• In order to cut dovetail tenons and teeth or wedg-
es, bring the saw table into the corresponding po-
sition on the angle scale.
• For arced and irregular cuts, push the workpiece
evenly using both hands with the ngers togeth-
er. Hold the workpiece with your hands on a safe
area.
• Use a pattern for repeated arced or irregular cuts.
• Insure that the workpiece does not roll when cut-
ting round pieces.
Attention! After every new setting, we recommend
performing a test cut, in order to check the dimen-
sional settings.
• With all cutting processes, the top saw band guide
(5) must be positioned as close as possible to the
workpiece (see 9.5).
• The workpiece must always be guided with both
hands and kept at against the saw table (7). This
prevents the Bandsaw blade (22) from jamming.
• Forward feeding should always take place with an
even pressure, which is just sufcient for the saw
band to cut through the material with ease without
becoming blocked.
• Always use the parallel stop (25) for all cutting pro-
cesses that it can be used for.
• It is better to perform a cut in a single working step
than in multiple steps, which may require that the
workpiece be drawn back. However, if it is not pos-
sible to avoid drawing the workpiece back then the
band saw must be switched off rst. Only draw the
workpiece back once the bandsaw blade (22) has
come to a standstill.
• When sawing, the workpiece must always be guid-
ed by its longest side.
ATTENTION! When processing narrower workpiec-
es it is essential to use a Push stick. The Push stick
(27) must always be stored within reach, on the Push
Stick retainer (48) provided for this purpose on the
side of the saw.
11.1 Performing longitudinal cuts (Fig. 19)
Here, a workpiece is cut in its longitudinal direction.
• Position the longitudinal fence (25) on the left side
(if possible) of the Bandsaw blade (22), in accord-
ance with the desired width.
• Lower the saw band guide (5) onto the workpiece
(9.5).
• Switch on the saw (see 10.1).
• Press one edge of the workpiece against the lon-
gitudinal fence (25) with the right hand, whilst the
at side lies on the saw bench (7).
• Slide the workpiece at an even feed rate along the
longitudinal fence (25) into the Bandsaw blade (22).
 Loading...