29
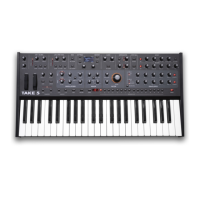
Take 5 User’s Guide
Auxiliary Envelope
6. Set the decay parameter to 3 o’clock.
7. Finally, with decay set to 3 o’clock and sustain still set to zero, repeat-
edly strike a note on the keyboard as you turn the Amplier Envelope’s
release knob clockwise. Notice how the release becomes longer the
further you turn the knob.
8. Continue experimenting with various Amplier Envelope settings while
you also adjust the Filter Envelope to hear how these two controls
interact. You will understand how powerful the envelopes are and how
essential they are to designing sounds.
Auxiliary Envelope
Envelope 1 can be designated as an Auxiliary envelope using the front-
panel env routing button. By doing so, you can set its shape as you
wish and use the modulation matrix to route it to a specic modulation
destination to create modulation that varies over time according to the
shape of the envelope. Routing an envelope to an oscillator’s frequency,
for example, causes the oscillator’s pitch to rise and fall according to the
contour of the envelope.
Either of the Take 5’s envelopes can be routed to any destination (or multiple
destinations) using the modulation matrix. See “Modulation” on page 34 for more details.
There are many ways to make creative use of the Auxiliary Envelopes:
• Route an envelope to one of the oscillators’ osc 1 octv parameter to
create the classic “pitch blip” effect used in many synth lead sounds.
• Route an envelope to the lter’s cutoff parameter (in addition to the
standard Filter Envelope) to create a more complex lter envelope
shape.
• Route an envelope to one or more of the oscillators’ shape parameter to
make their timbre evolve according to envelope’s contour.
• Route an envelope with a fast attack and short decay to noise level to
add a percussive attack to a sound. (Noise should be set to zero in the
Mixer.)