Original User Guide | Pedelec Shimano Steps E6000 Version 1 EN-41
The charging display symbols can vary. If you are not sure
what the symbols mean, contact your cycle dealer.
6.3 Functions
6.3.1 Chargingthebattery
DANGER
Readandfollowtheinformationonthechargerspecicationplate,
otherwise there is a risk of misuse resulting in serious injuries.
Damagedbatteriesmustnotbecharged.
The battery can remain on the pedelec during the charging
process. It can also be removed and charged elsewhere.
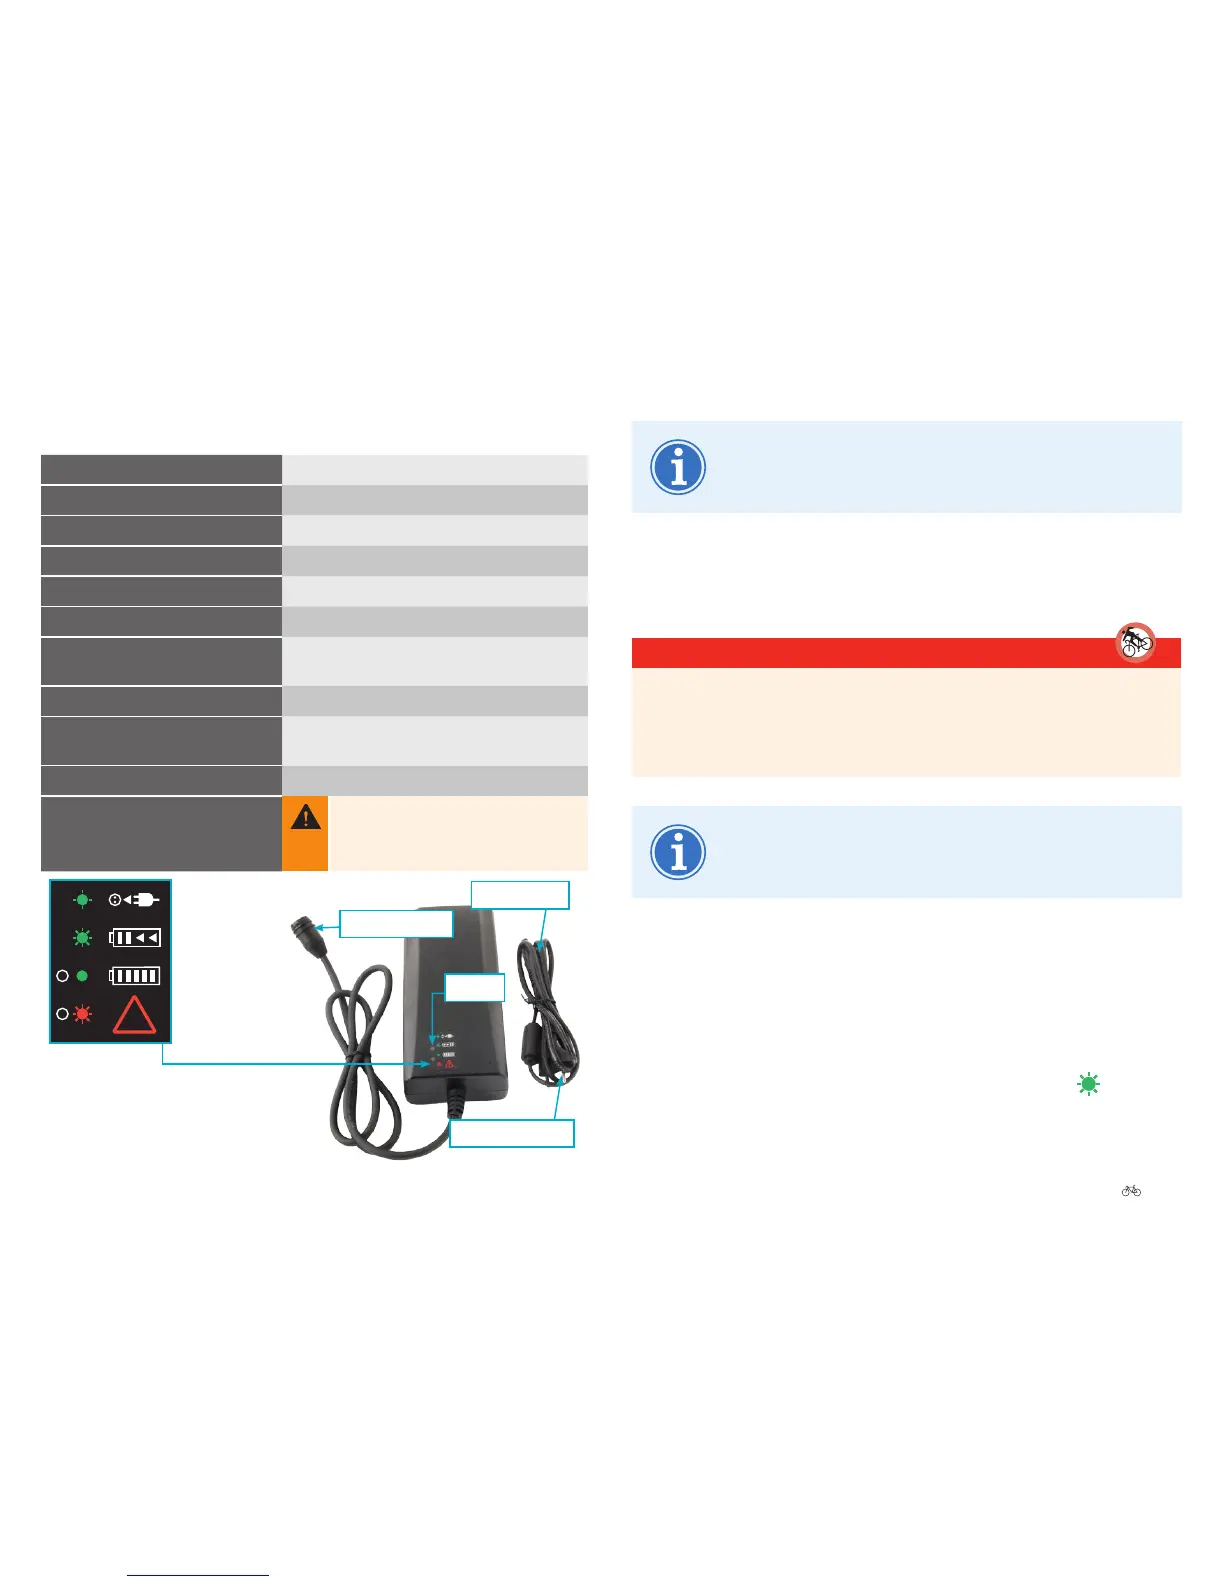
1. Connect the power cable to the battery charger.
2. Fold up the protective cap on the battery.
3. Connect the charging cable to the battery charging socket (it clicks into
place).
4. Insert the mains plug into a power socket. The red LED lights red
briey
, then the green LED ashes at a constant speed .
6.2 Technicaldetails
Batteryvoltage
36 V
ACinputvoltage
230 - 240 V
Frequency
50 – 60 Hz
Max.DCoutputvoltage
42 V
Max.chargecurrent
4 A
Dimensions(L|W|H)
206 mm | 94 mm | 61 mm
Permissibleambient
temperaturewhencharging
0 to +40 °C
Storagetemperature
-10 to +50 °C
Recommendedstorage
temperature
18 to 23 °C
Weight
753 g
Protectionclass
Thechargerisonlyintendedtobeused
indoors. Keep the charger away from rain
and moisture. Water penetrating into the
charger poses a risk of electric shock.
LEDs
Mains connector
Charging cable
Power cable
!
Charger connected to
power supply
| green LED ashes
Battery being charged
| green LED ashes
Fully charged
| green LED continually ON
Charging fault
| red LED ashes
Description of
charging indicator