Copyright © Shimmer 2017
Realtime Technologies Ltd Shimmer User Manual
All rights reserved Rev3p
23
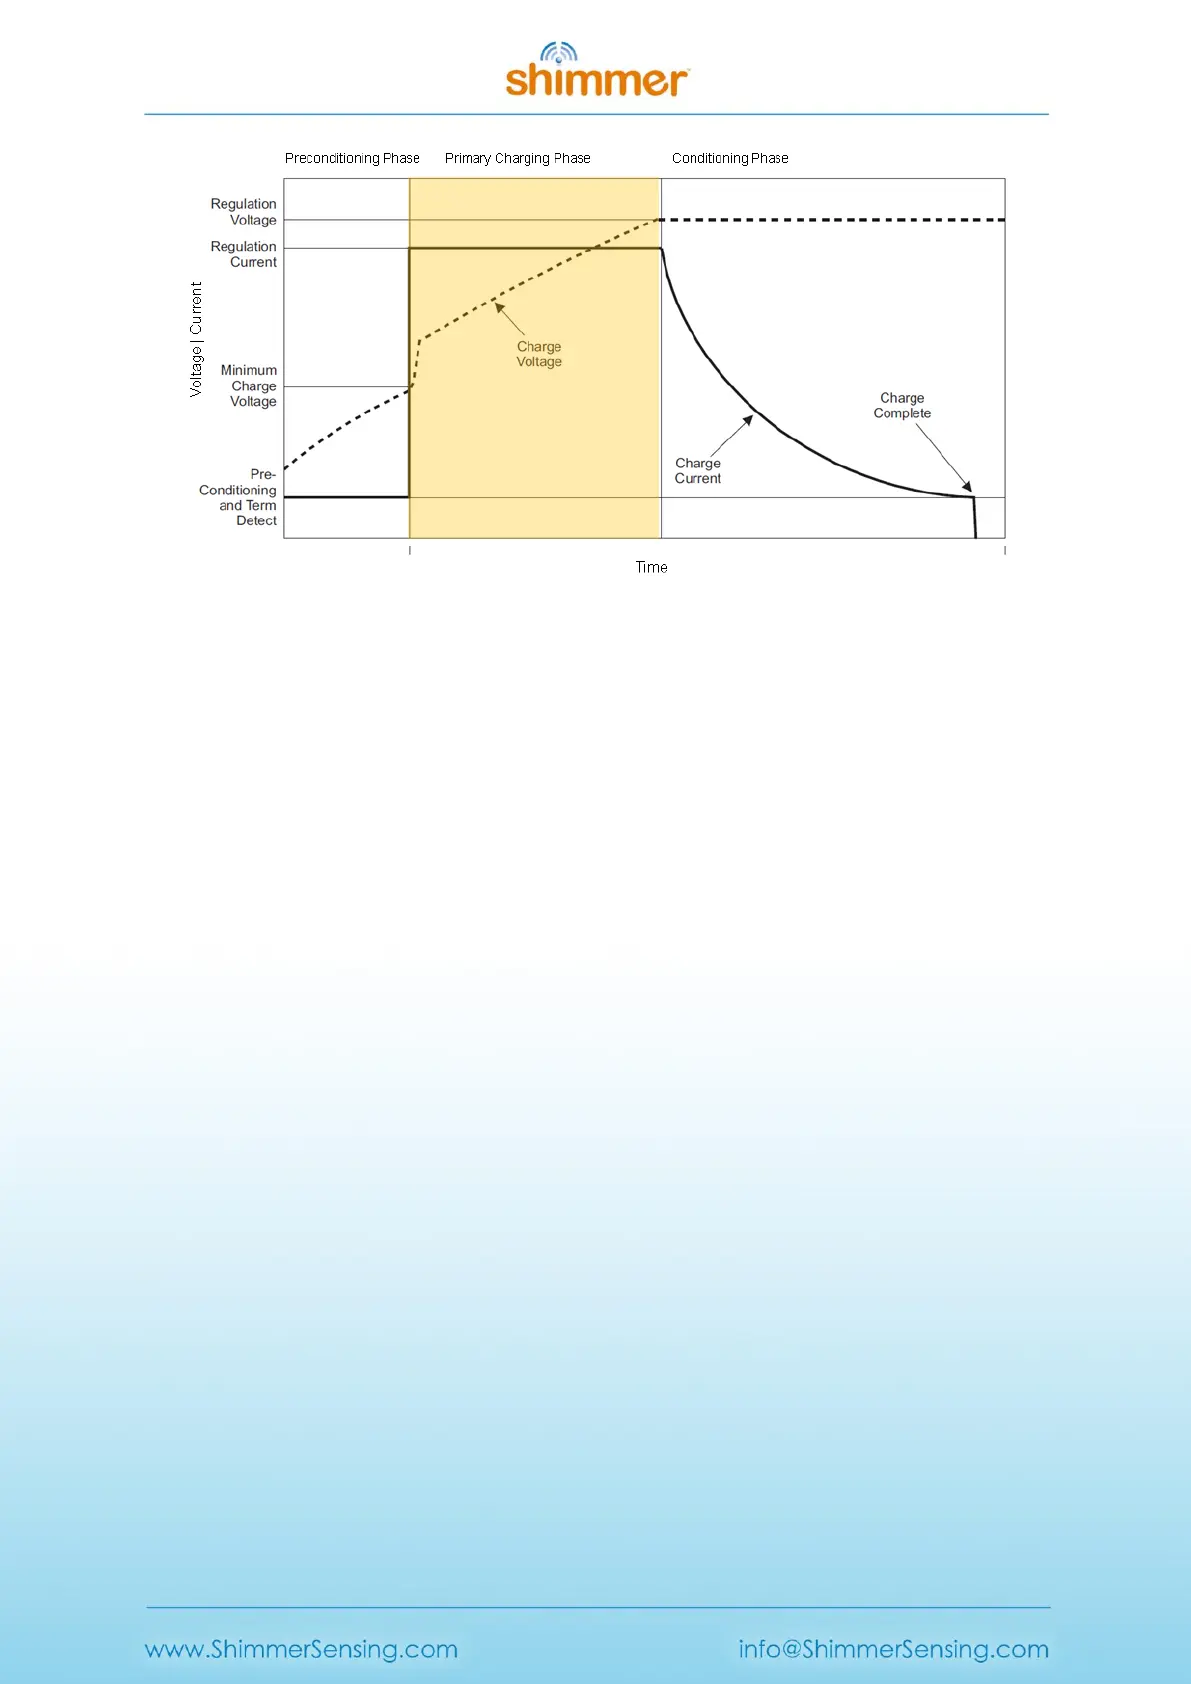
Figure 3-8 Shimmer Battery Charging Phases. The background colour on the graph indicates the
colour of the charge indicator LED on the Dock during this phase.
For the most efficient recharging after a deep discharge, it is recommended to program the Shimmer
unit with the Sleep firmware image (see Troubleshoot section for further details). During the
Preconditioning Phase the charge indicator LED on the Dock will be off.
Phase 2 is the Primary Charging Phase. This phase is the standard charging phase and involves the
application of a constant current (125mA) to bring the battery voltage to the Regulation Voltage
level. During this phase, the charge indicator LED on the Dock will illuminate yellow/orange.
Phase 3 is the Conditioning Phase. The charger will continue to condition the battery as long as the
Shimmer remains inserted in the charger. For maximum operating life, it is advisable to allow as
much conditioning time as your needs allow. During this phase, the charge indicator LED on the Dock
will be off.
The duration of primary charging for a standard Shimmer battery (3.7V - 450mAh) is typically 4.5
hours. Knowing that the Shimmer charges at 125mA/hr and conditions at 12.5mA/hr, it is possible to
estimate charge times for larger or smaller batteries. The charger has a 6.16hr time-out. Users using
>800mAh capacity rechargeable batteries need to increase the charge rate on the Shimmer
mainboard to ensure a full charge; please contact support@shimmersensing.com for further details.
3.2.4. microSD Card Access
When a Shimmer with microSD card is inserted into a Dock that is connected to a PC, the standard
drivers on the host system should mount the microSD card as though it were a USB flash key.
Depending on the specifics of your system, a few things may happen:
A window may open to display the contents of the SD card.
A prompt window may pop-up and ask you what you want to do.
Nothing may happen, but when you click on the drive letter or volume name associated
with the USB port of the USB Dock, the contents of the SD card may be browsed.