Copyright © Shimmer 2017
Realtime Technologies Ltd Shimmer User Manual
All rights reserved Rev3p
65
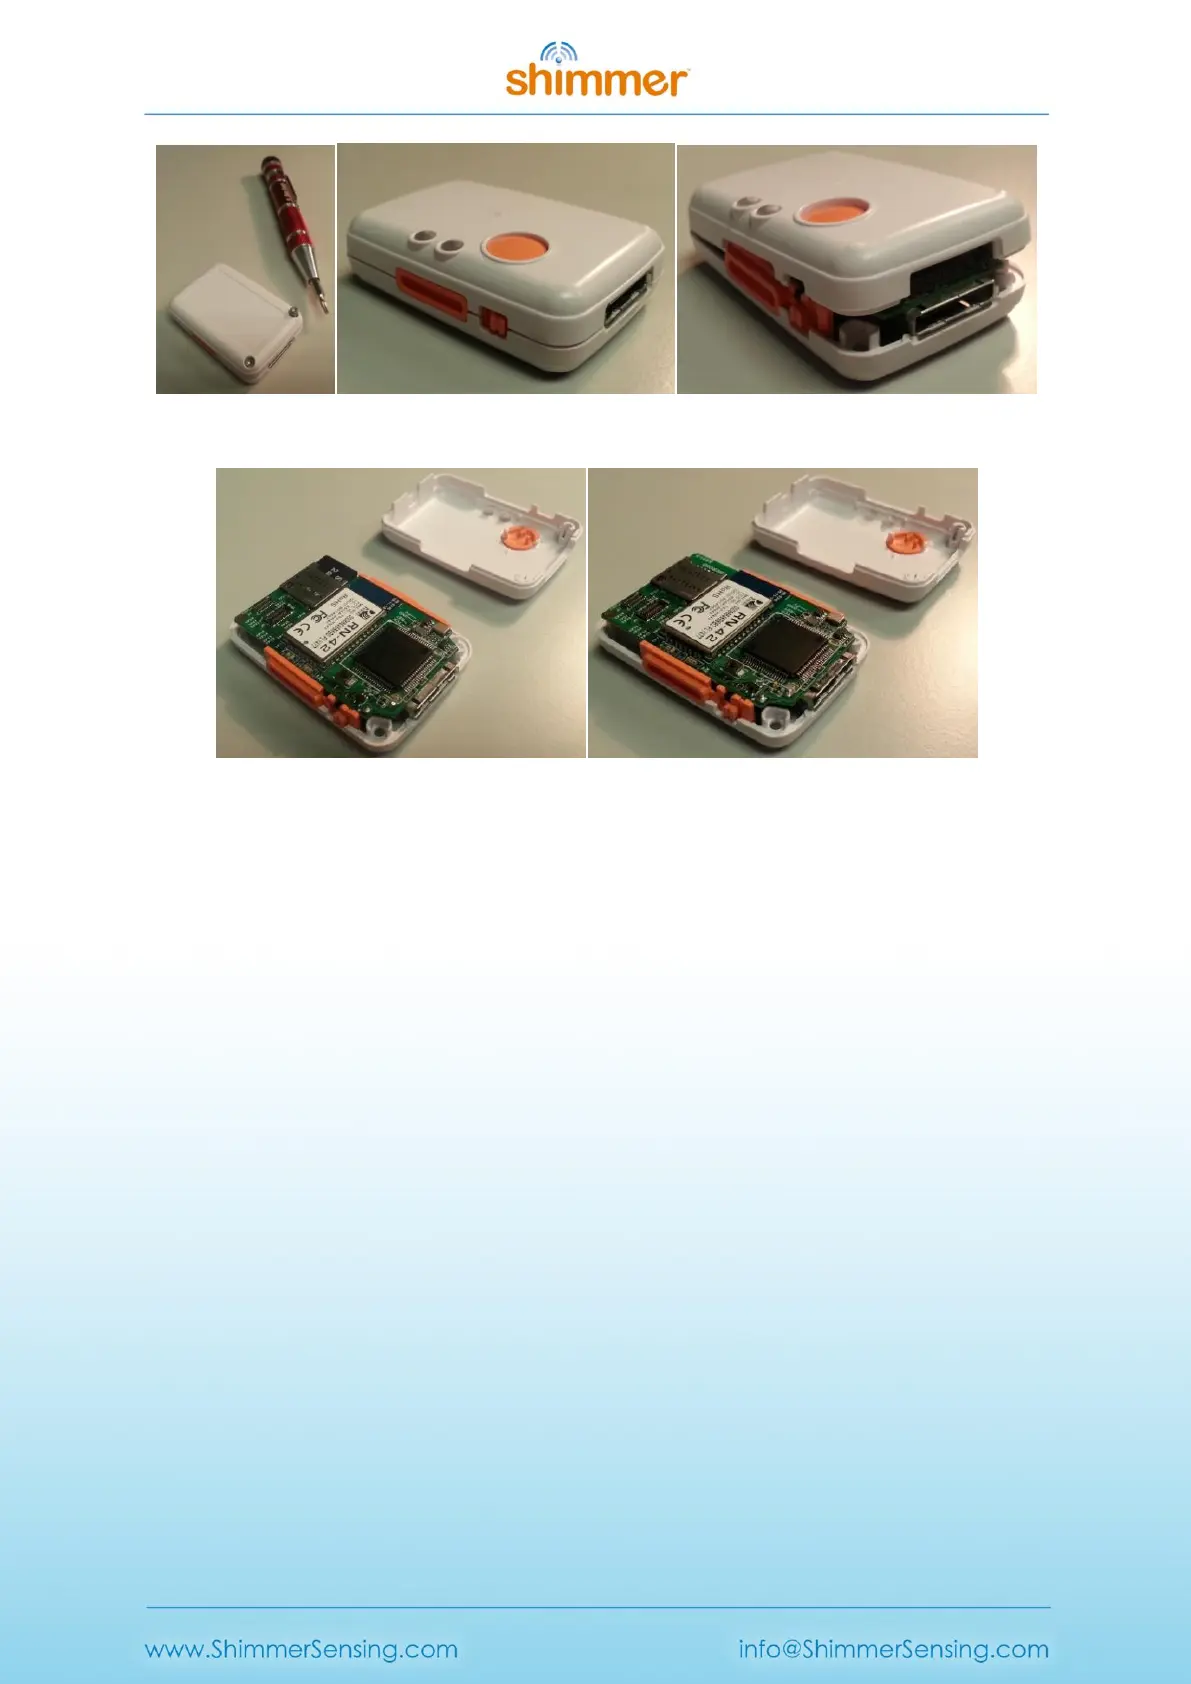
Figure 9-3 Opening the enclosure
Figure 9-4 Open enclosure with (left) and without (right) SD card
9.3.2. Assembling the enclosure
1. Ensure that you have all of the required plastic parts as shown in Figure 9-5, as well as two
screws (M2.0 x 8mm).
2. Assemble the orange clip fittings in the bottom of the enclosure (these are both the same so
it doesn’t matter which one goes to which side).
3. Install the power switch cap, as shown in Figure 9-6.
4. Place the circuit board, with the battery attached to the underside, into the bottom of the
enclosure, as shown in Figure 9-7.
o The bottom of the enclosure has a plastic divider to hold the battery in place; ensure
that the battery is fitted beside this divider.
o Ensure that the power switch actuator sits in the notch on the power switch cap and
that the dock connector sits neatly into its slot.
o Ensure that the battery wires are fully underneath the circuit board and not
obstructing the screw positions.
o The orange clip fittings are designed to hold the circuit board in place – it should be
an exact fit.
5. Insert the SD card, as shown in Figure 9-7.
6. Carefully attach the top of the case, starting from the end of the dock connector, as shown
in Figure 9-8. When the top is in place, gently push down on the top to snap closed.
o Do not force the top closed – if there is an obstruction, remove the top to clear the
obstruction before trying again.
7. Tighten the screws in the underside of the enclosure.