7.6.2 Setting the region of interest
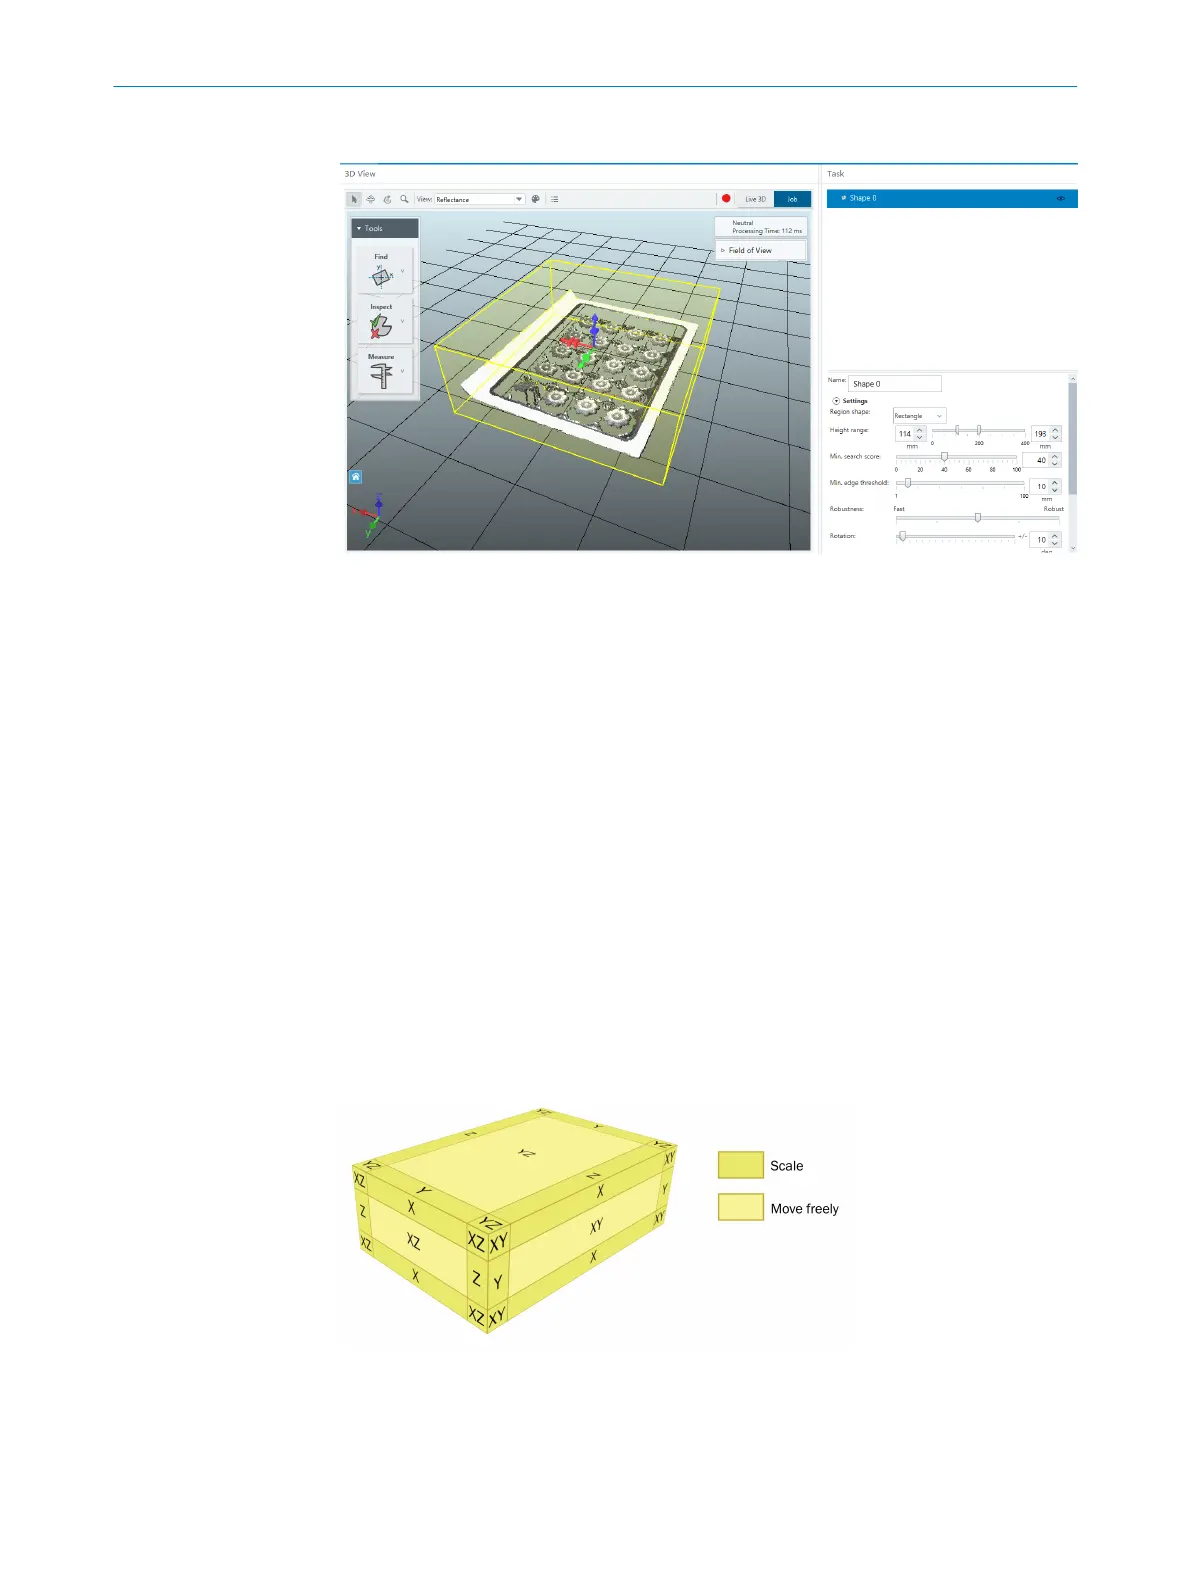
Figure 23: The region of interest (yellow)
The region of interest is the region that a tool is applied to. The region of interest is set
for each tool and is displayed as a yellow box in the image area.
To set the region of interest for a tool:
1. Select a tool in the parameter pane.
2. Click the Select button in the image handling controls panel.
3. In the 3D navigation control in the lower left corner of the image area, click the
green arrowhead for a FRONT view.
4. Use the Height range slider in the Settings section in the parameter pane to adjust
the height of the 3D region, so that it covers only the region of interest. This is
important to only include relevant data, and to reduce the processing time.
5. In the 3D navigation control, click the blue arrowhead for a TOP view.
6. Select the most applicable Region shape in the parameter pane.
7. Use the region of interest handles (figure 24) or the region of interest manipulator
(figure 25) in the image area to adjust the sides and position of the 3D region, so
that it covers only the region of interest.
8. If needed, select Masks in the parameter pane to apply a mask that excludes non-
relevant parts from the region.
Region of interest handles
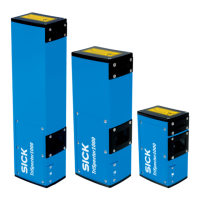
Figure 24: Region of interest handles.
Hover over the region of interest to highlight its handles. Click and hold a handle to
move or scale the region of interest, according to figure 24.
OPERATION 7
8021808/12ID/2019-01 | SICK O P E R A T I N G I N S T R U C T I O N S | TriSpector1000
33
Subject to change without notice