2-13
Installation
the following (See Appendix J for a
complete list of Trouble Messages):
Device multiple response
Input device not responding
Incorrect device ID
Unspecified device responding
• Identify the addresses of the devices
with troubles and eliminate them, reset
the system, and verify that the troubles
have cleared before proceeding.
Modify your test configuration by adding to
it any initiating devices that are connected
to the second analog loop on the ALD-2I.
Turn off the power; connect the field wiring
to analog loop 2 on the ALD-2I. Turn on
the power.
• Turn off the power and connect the field
wiring to analog loop 1 on the SMB-2.
• Turn on the power. Wait for the System
to initialize (approximately 3 minutes).
• Check the trouble list on the MKB for
troubles on the devices that were just
added. The troubles will be from among
the following (See Appendix J for a
complete list of Trouble Messages):
Device multiple response
Input device not responding
Incorrect device ID
Unspecified device responding
• Identify the addresses of the devices
with troubles and eliminate them, reset
the system, and verify that the troubles
have cleared before proceeding.
Installing the CMI-300 Interface Module
Before installing the CMI-300 in the
MOM-2/4, you must do the following:
1. Check that there is a jumper installed for
jumper J2, pins 1 and 2 on the CMI-300
module.
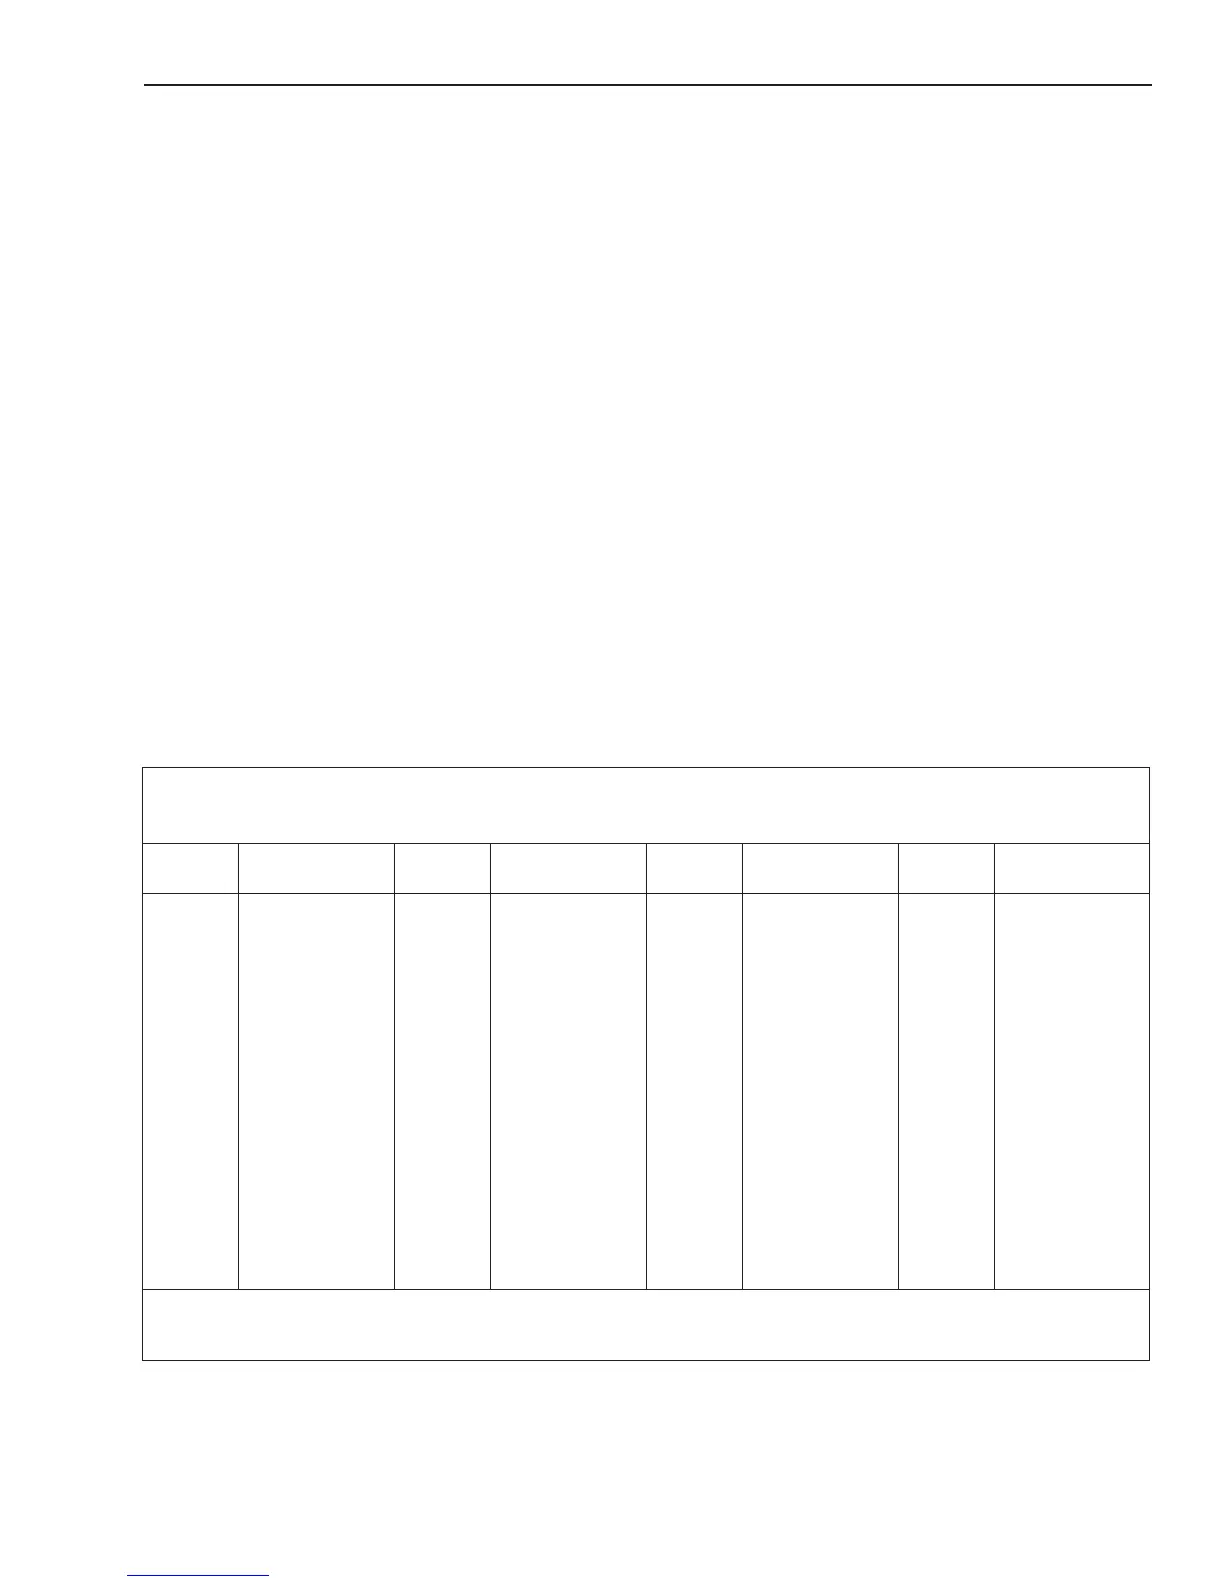
9ELBAT
)2WS(gnimmargorPrebmuNlenaP
RDDA12345678RDDA12345678RDDA12345678RDDA12345678
000
100
200
300
400
500
600
700
800
900
010
110
210
310
410
510
---
ISF
XOOOOO
OS
OXOOOOOS
XXOOOOOS
OOXOOOOS
XOXOOOOS
OXXOOOOS
XXXOOOOS
OOOXOOOS
XOOXOOOS
OXOXOOOS
XXOXOOOS
OOXXOOOS
XOXXOOOS
OXX
XOOOS
XXXXOOOS
------------
610
710
810
910
020
120
220
320
420
520
620
720
820
920
030
130
---
OOOOXOOS
XOOOXOOS
OXOOXOOS
X
XOOXOOS
OOXOXOOS
XOXOXOOS
OXXOXOOS
XXXOXOOS
OOOXXOOS
XOOXXOOS
OXOXXOOS
XXOXXOOS
OOXXXOOS
XOXXXOOS
OXXXXOOS
XXXXXO
OS
------------
230
330
430
530
630
730
830
930
040
140
240
340
440
540
640
740
---
OOOOOXOS
XOOOOXOS
OXOOOXOS
XXOOOXOS
OOXO
OXOS
XOXOOXOS
OXXOOXOS
XXXOOXOS
OOOXOXOS
XOOXOXOS
OXOXOXOS
XXOXOXOS
OOXXOXOS
XOXXOXOS
OXXXOXOS
XXXXOXOS
---------
---
840
940
050
150
250
350
450
550
650
750
850
950
060
160
260
360
460
OOOOXXOS
XOOOXXOS
OXOOXXOS
XXOOXXOS
OOXOXXOS
XOXOXXO
S
OXXOXXOS
XXXOXXOS
OOOXXXOS
XOOXXXOS
OXOXXXOS
XXOXXXOS
OOXXXXOS
XOXXXXOS
OXXXXXOS
XXXXXXOS
OOOOOOXS
7elytSstcele
sdesolC=S
4elytSstcelesnepO=S
FFOronepO=O
NOrodesolC=X
NOTE:
To open a dipswitch, press down on the side of the dipswitch marked OPEN.
To close a dipswitch, press down on the side of the dipswitch opposite the side marked OPEN.
To open a slide switch, push the slide to the side opposite the side marked ON.
To close a slide switch, push the slide to the side marked ON.