Wiring
3.3 Configuring PROFIBUS DP address and terminating resistor
Interface module IM 157-1 DP (6ES7157-1AA00-0AB0)
Manual, 12/2016, A5E32100641-AD
17
Configuring PROFIBUS DP address and terminating resistor
Properties
Use the PROFIBUS address to specify at which address the ET 200AL distributed I/O
system is addressed on the PROFIBUS DP.
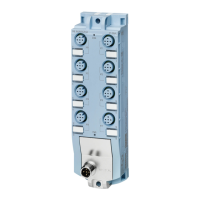
The PROFIBUS DP address is configured for the ET 200AL distributed I/O system with a
rotary coding switch on the front of the housing.
The following requirements apply:
● Each address is only assigned once on the PROFIBUS DP.
● The configured PROFIBUS DP address must match the PROFIBUS address defined in
the configuration software.
● A change of the PROFIBUS DP address is only valid after POWER ON/POWER OFF on
the IM 157-1 DP interface module.
You need the following tools to configure the PROFIBUS DP address:
● 14 mm socket wrench
● 2.5 mm screwdriver
Setting the PROFIBUS DP address
Configurable PROFIBUS DP addresses are 1 to 99.
Proceed as follows to configure the PROFIBUS DP address:
1. Remove the two M12 sealing caps from the rotary coding switches
(use 14 mm socket wrench, if needed).
2. Configure the desired PROFIBUS DP address with a screwdriver on the rotary coding
switches.
– Top rotary coding switch: Tens digit
– Bottom rotary coding switch: Ones digit
3. Screw the two M12 sealing caps back onto the thread to protect the rotary coding
switches (torque: 0.5 to 0.8 Nm).
4. Switch the supply voltage off and on again (POWER OFF/POWER ON).
 Loading...
