39
Chapter 2 Create a design data
2.5
Set Registration Marks
If you want to cut according to the position of the printed image, use the Registration Marks (Alignment Marks).
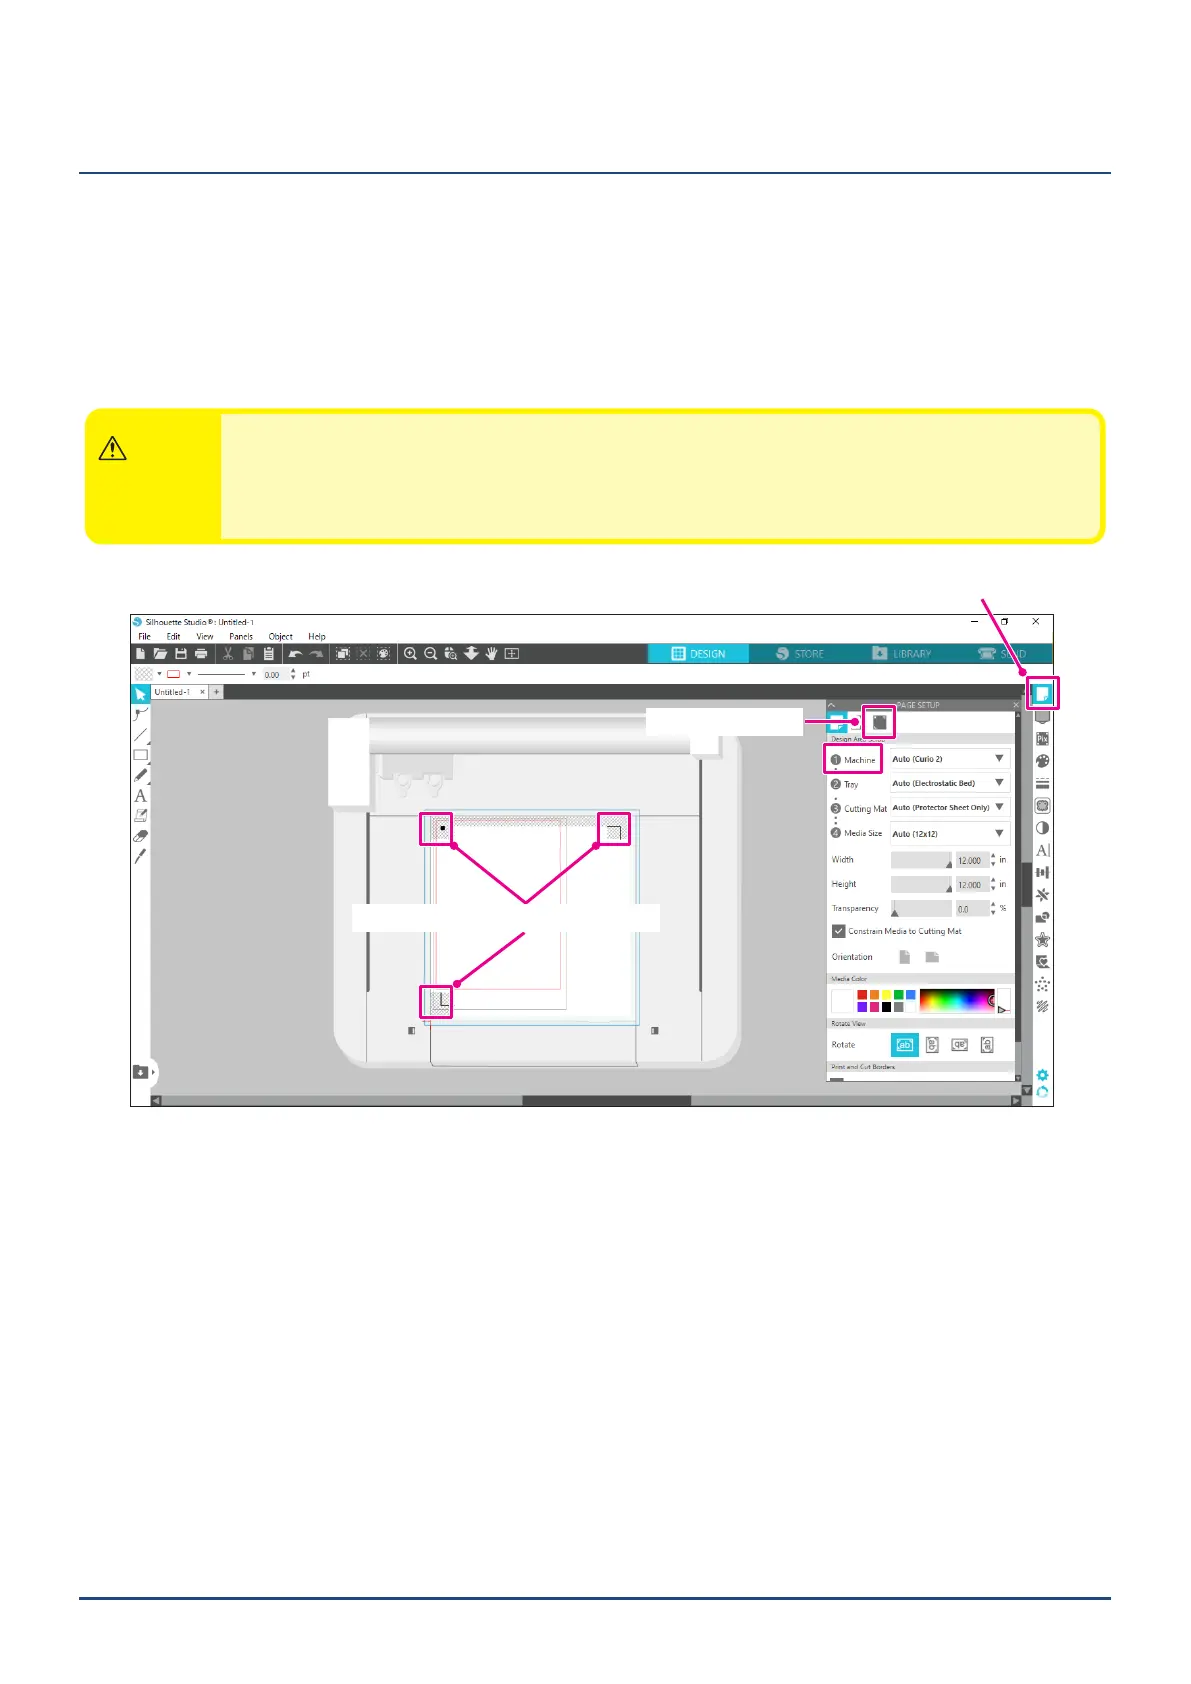
If you open the "Registration Marks" tab in the Page Settings Panel and set Registration Marks to ON, Registration
Marks will appear in the workspace.
You can change the length, thickness, and position of the Registration Marks according to the size and position of
the design.
When the cutting data is sent to the Silhouette CURIO2, the sensor automatically reads the position of the
Registration Marks and cuts according to the position of the printed design.
CAUTION
●Donotplaceyourdesignintheshadedarea.Itmaycauseregistermarkscanningerrors.
●IftheRegistrationMarksistoosmall,thescanningmayfail.
●ArrangetheRegistrationMarksandthenprintwiththeprinter.
●DonotchangeRegistrationMarksordesignsafterprinting.Thecuttingpositionwillshift.
PageSetupPanel
RegistrationMarks
RegistrationMarks(AlignmentMarks)
 Loading...