CN-Series Hardware Installation and Maintenance Guide Task 2—Installing Each CN-Series System in a Rack
• You have installed the rail kit.
• You have read all supplied rack and CN-Series system safety information. This is important if you are
installing the enclosure into the upper U locations of tall racks, where you need to use steps or platforms.
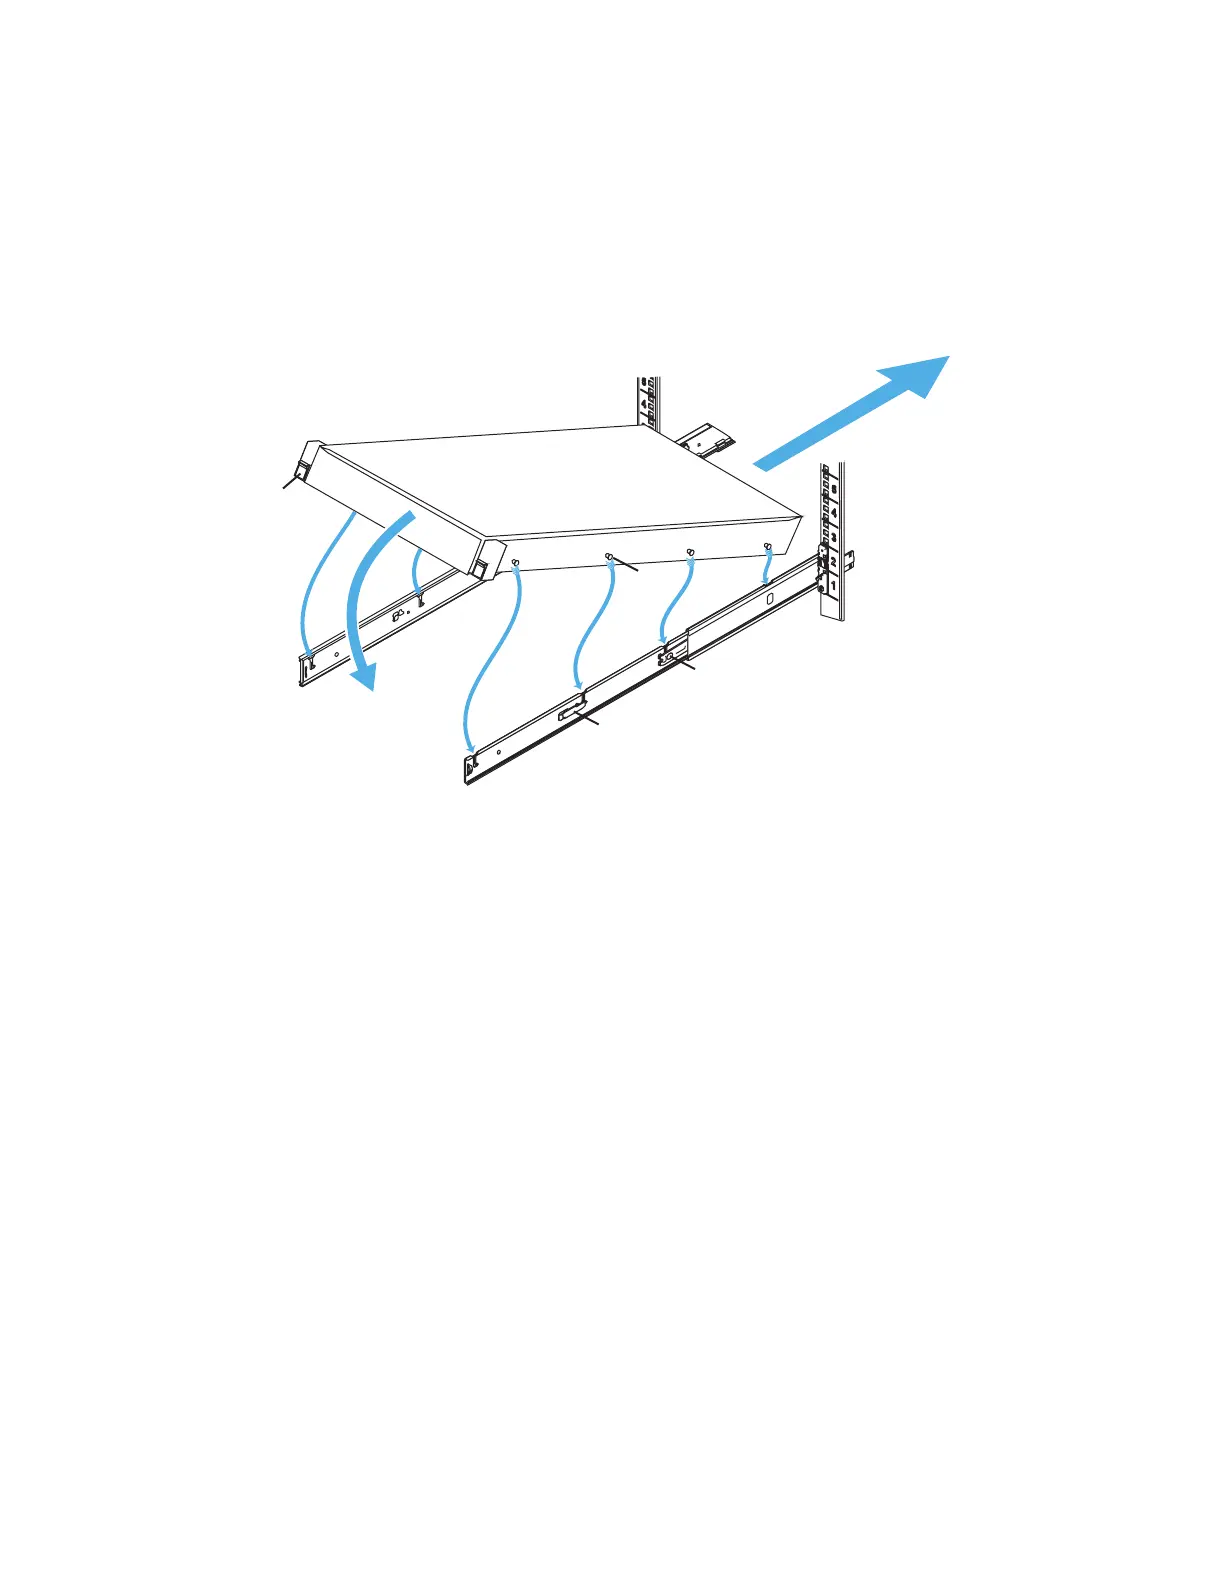
To mount the enclosure into the rails:
1. Extend each rail from the rack until it locks in place at lock A.
2. Identify the location of the four lugs (B)on each side of the enclosure, and the corresponding J-slots in
the rails.
3. Hold the enclosure over the rails, aligning the lugs with the J-slots.
4. Starting at the back two lugs, gently rotate the enclosure down in the direction of arrow C, engaging the
lugs in the J-slots.
Note: To ensure that the rails engage the J-slots, and are attached securely to the rack, apply slight
inward pressure to the rails to prevent them from spreading outward.
5. Make sure all eight lugs on the enclosure are seated firmly in the J-slots in the rails and that the lug lock
(D) engages.
6. Press the rail lock button A and slide the enclosure into the rack (E).
7. Make sure the enclosure retention lock (F) closes completely.
You can now connect the power cables to the system.
Related Topics
Protecting Sensitive Hardware from ESD on page 16
Task 3—Connecting the Power Cables on page 25
24