CN-Series Hardware Installation and Maintenance Guide Installing a Drive
Installing a Drive on page 51
Attaching and Removing the Bezel on page 31
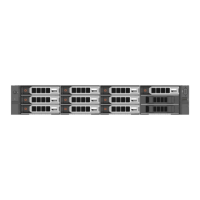
Installing a Drive
You install a drive to replace a failed, or failing, hard disk drive (HDD) or solid state drive (SSD). The
replacement drive must be of the same type, speed, and capacity of the drive you are replacing.
Before You Begin
You have completed the following tasks:
• Obtained a replacement drive of the same type, speed, and capacity.
• Read the guidelines for maintaining disk drives.
• Read the guidelines for protecting hardware from electrostatic discharge.
• Verified that all backup operations are up to date.
Drive replacement requires a RAID rebuild, which might take some time to complete on a system that
contains many GB or TB of data. The rebuild might proceed faster if you complete these tasks, which are
explained in the OmniCube for vSphere Client Administrator Guide:
• Quiesce I/O, or do the replacement operation at a time when I/O is minimal.
• Shut down VMs.
• Migrate VMs to an alternate host.
Note: You can monitor use the LEDs or the vSphere Client to monitor the RAIDrebuild status.
To install a drive:
1. Carefully remove the replacement drive from its packaging.
2. Hold the drive by the edge of the plastic drive carrier and press the release button to release the drive
handle.
51