Instruction Manual
37
E04052
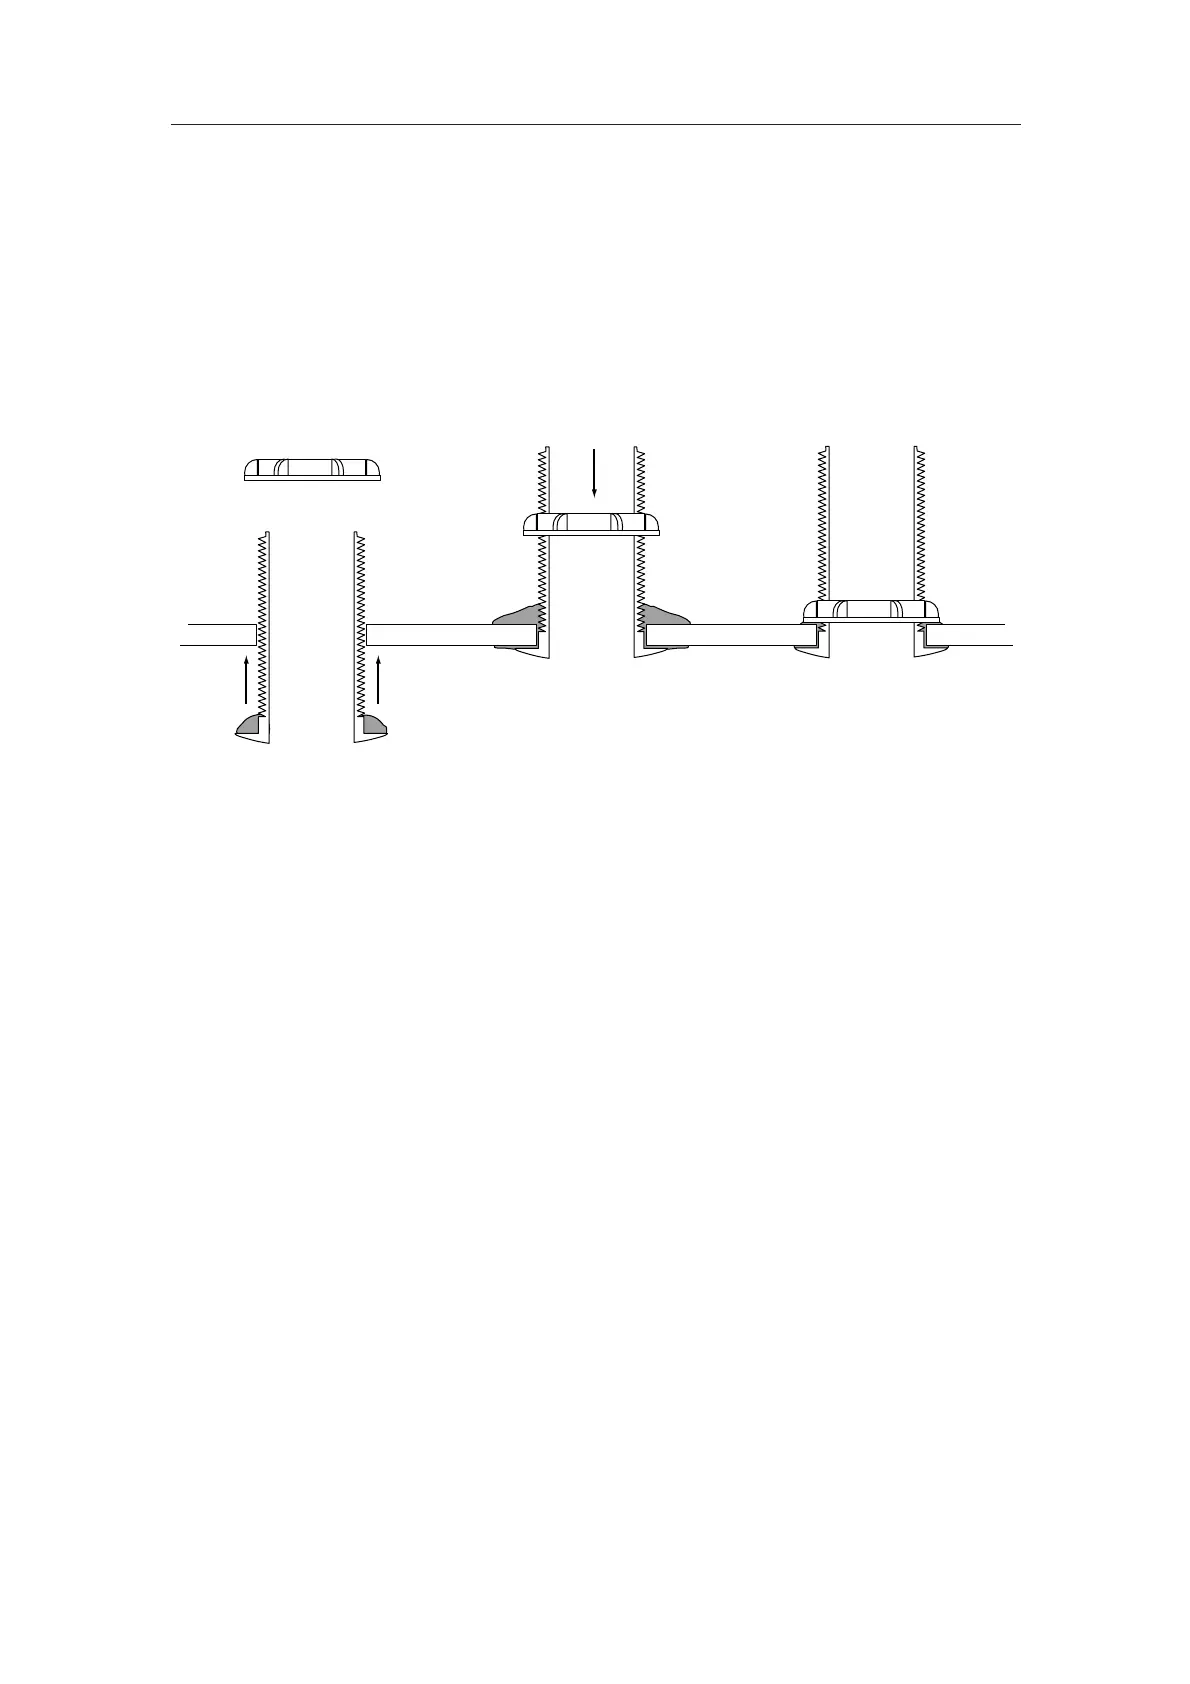
Fig 4.13 - Installing the Skin Fitting
ABC
NOTE The Skin Fitting is marked with an arrow on the flange which
should be aligned so that it is pointing dead ahead, otherwise
the transducer will not give an accurate speed reading.
Apply a generous amount of silicone sealant to the inside of the
Skin Fitting flange, then offer it up to the hole from the under-
neath of the boat (Fig 4.13A). Check that it is oriented correctly
(see note above) and press it against the hull.
From the inside of the boat, apply more silicone sealant around
the Skin Fitting where it meets the hull (Fig 4.13B). Again, be
liberal in application - any excess can always be removed.
Replace the skin fitting nut and tighten down as hard as possi-
ble by hand (Fig 4.13C). Check that the Skin Fitting does not
get rotated from its correct orientation while tightening.
WARNING Take care if using a wrench to tighten the nut - overtightening
could cause it to break. Normally hand tight is sufficient.
Check the installation both inside and out. Remove any excess
sealant using white spirit, making sure that there are no gaps
in the sealant around the Skin Fitting. Refer to the instructions
supplied with the sealant for curing times - allow sufficient
time for the sealant to set completely before fitting the Sea
Valve and Paddlewheel assemblies.
When the sealant is set, recheck the seal integrity around the
Skin Fitting and re-insert the Sea Valve and Paddlewheel
assemblies. The Sea Valve assembly is “keyed” so that it can
only be inserted into the Skin Fitting in the correct orientation -
align the peg on the Sea Valve Assembly with the notch on the
top edge of the Skin Fitting.
Check that the Sea Valve and Paddlewheel assemblies are fully
engaged into the Skin Fitting before tightening the locking nut.