10
SMART Board User’s Guide
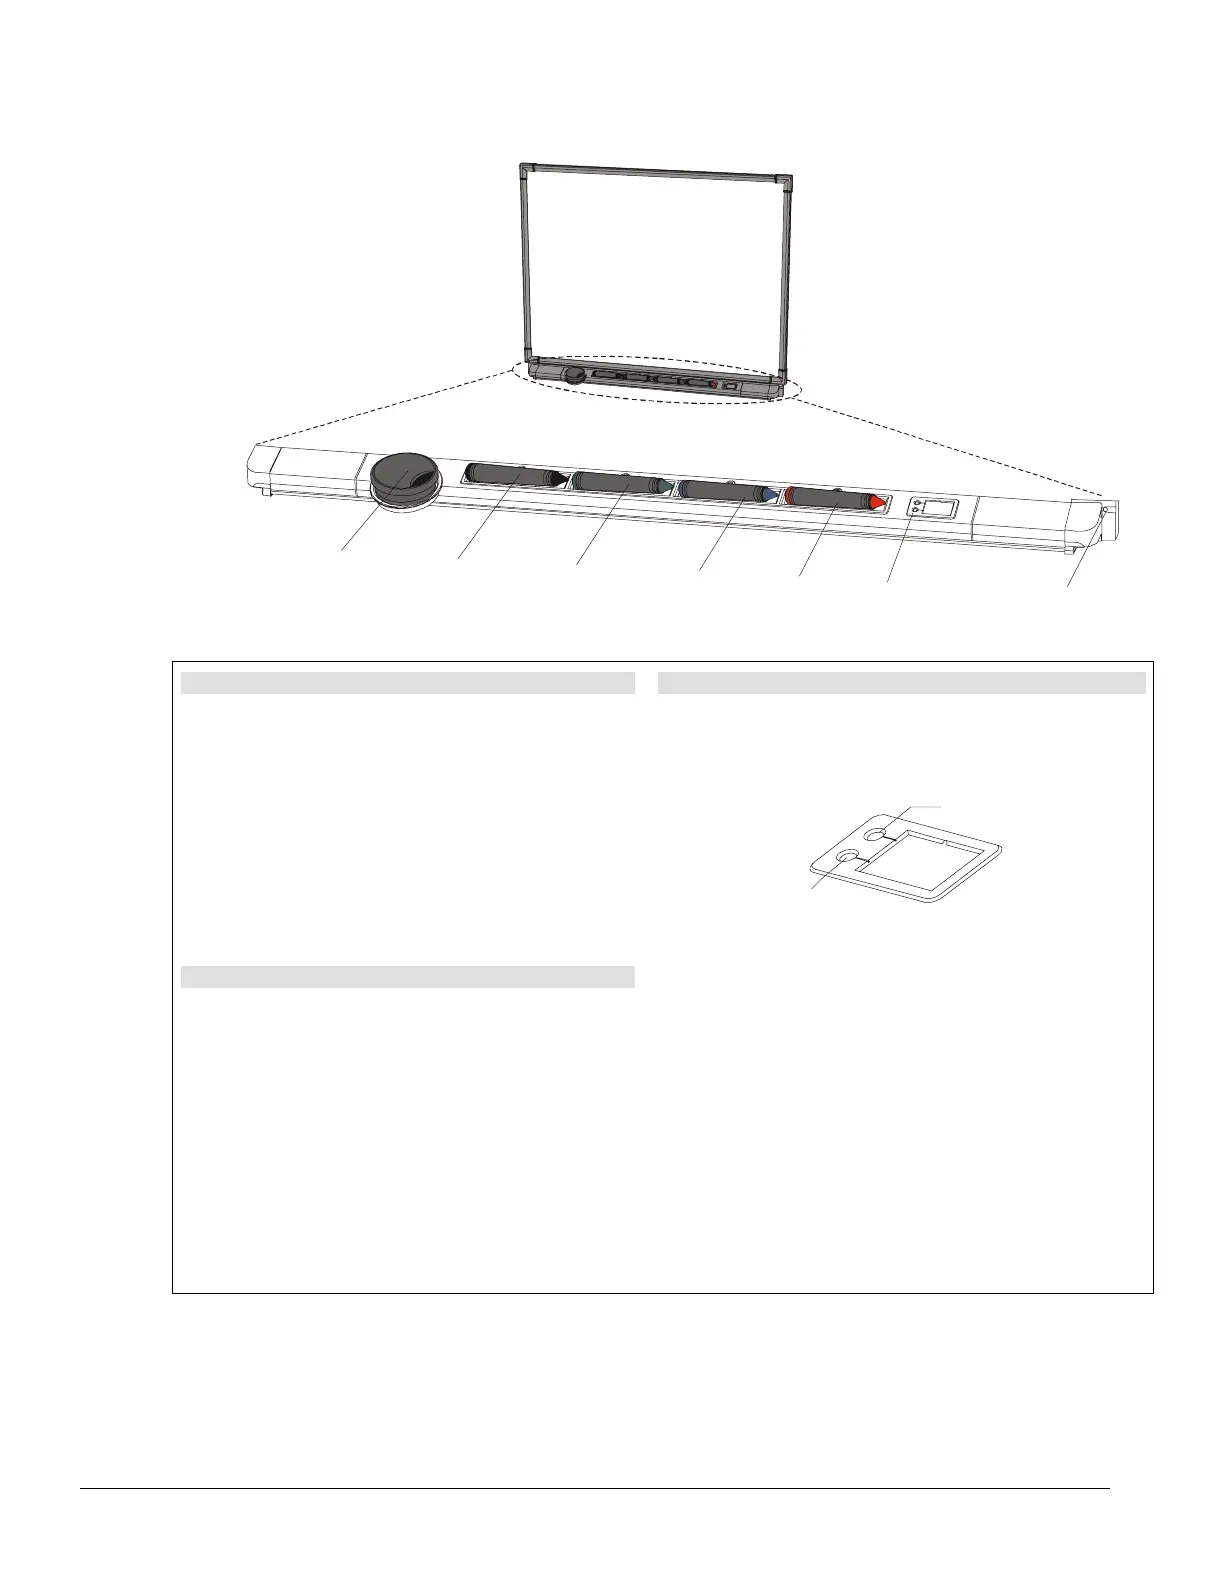
Getting to Know Your Pen Tray
Eraser
Black Stylus
Blue Stylus
Red Stylus
Green Stylus
Pen Tray Buttons
Ready Light
The Ready Light
When illuminated, this Light-Emitting Diode (LED)
indicates the current state of your interactive
whiteboard.
When the Ready Light flashes between red and green,
the pen tray is powering up. Steady red indicates the
pen tray is receiving power through the SMART USB
Adapter. Steady green means that SMART Board
software is installed and active on the connected
computer. It indicates your pen tray is fully operational:
power is being received and the hardware and installed
software are fully integrated.
Using a Pen Tray Stylus
To write over top of the computer image, just pick up
one of the four colored styluses from the pen tray and
write on the screen.
You also have the option of changing any or all of these
styluses to highlighters, assigning any one of an array of
colors to them, or altering their width. You can also
change the size of the pen tray eraser. Turn to page 12
for information on configuring the styluses and eraser.
Using the Pen Tray Buttons
Press the top pen tray button to make the SMART
Keyboard appear. Press the bottom button to make your
next contact with the interactive whiteboard a floating
mouse.
Keyboard
Right-Click
You can reconfigure the function of either button to:
• send the current page of Notebook software
to the printer
• move to the next or previous page in Notebook
software
• clear all annotations from the screen
• produce a floating mouse
NOTE: A “floating mouse” is similar to moving your mouse
on your workstation screen without clicking it. You may
want to replicate this mouse state so you can view tool tips
or simply relocate the pointer when you touch the
interactive screen (without activating a program
component).