18
SMART Board User’s Guide
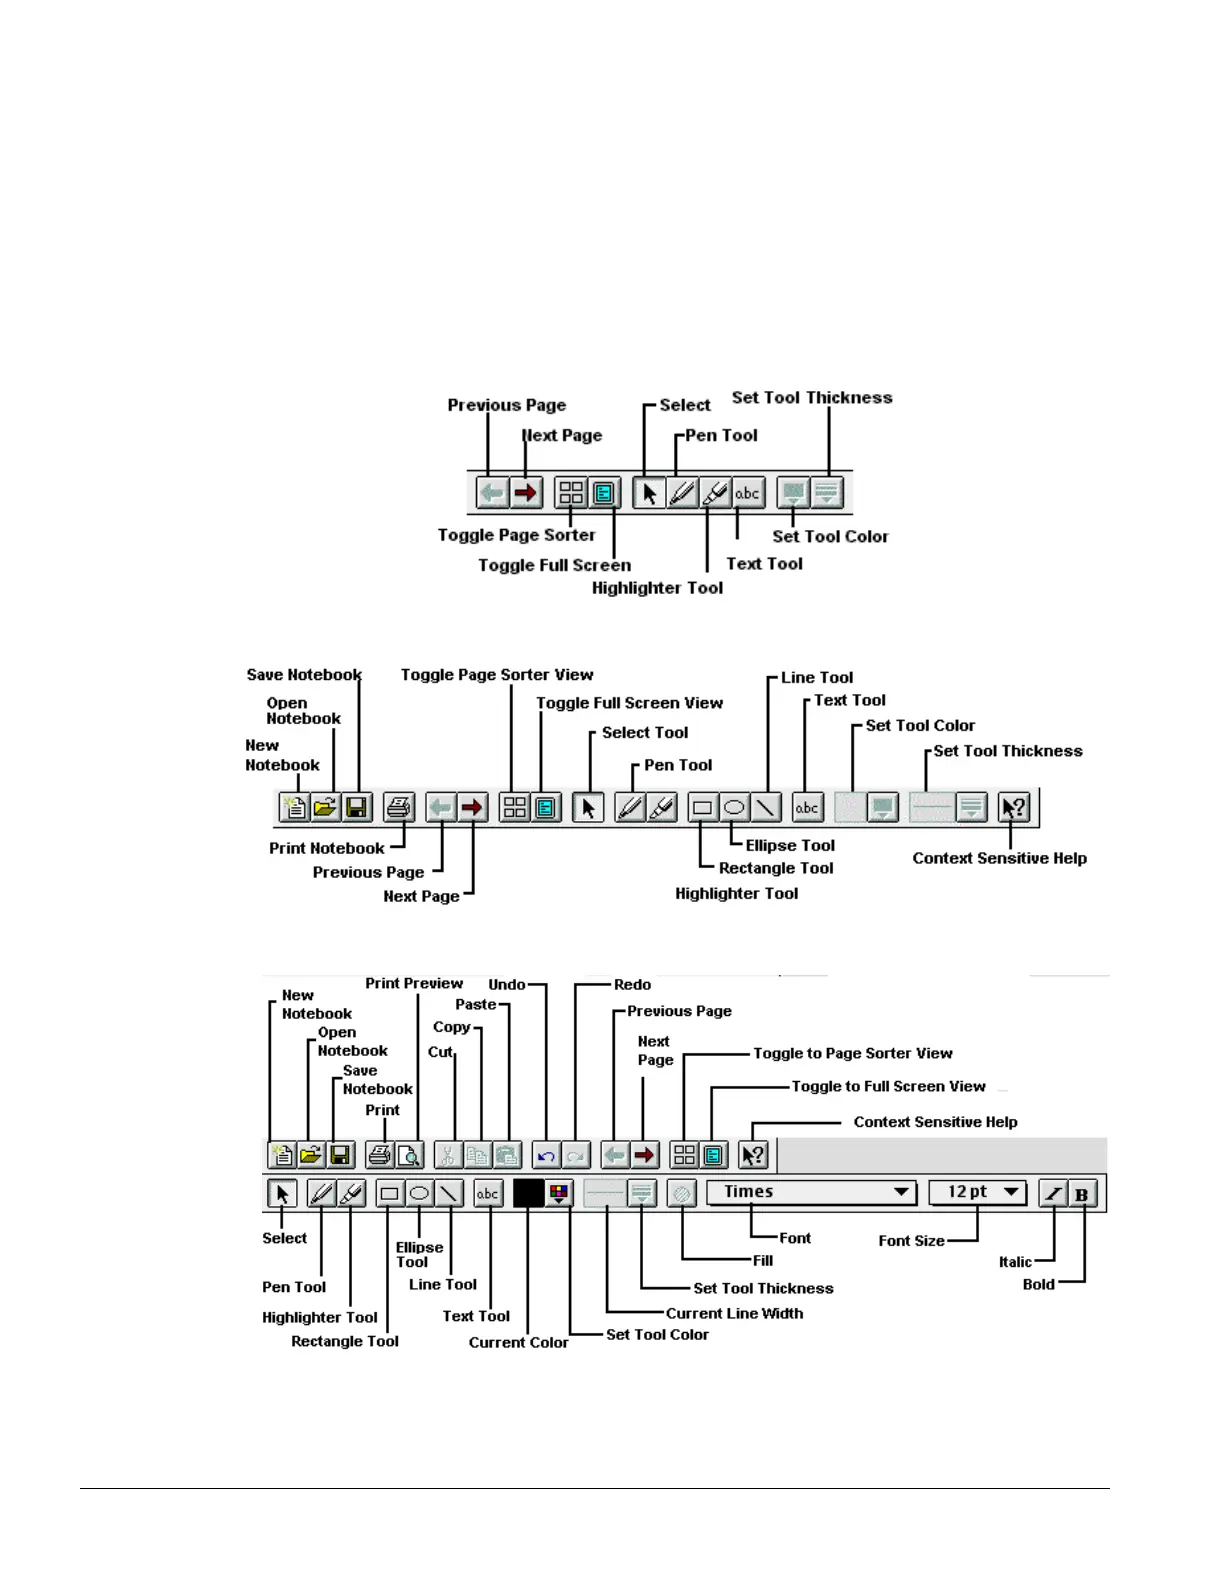
Toolbars in Notebook Software
In Notebook software, you can choose between the three toolbars. Your choice of toolbars depends largely
on how you use the Notebook interface and the amount of screen space you need. To choose your
toolbar, select Toolbars from the View menu.
You also have the option of using no toolbar at all. As well, you can designate different toolbars for
different views.
These toolbars are also completely portable: you can press and drag them elsewhere on the interactive
screen (transforming them into floating tool palettes, which can be resized). Moreover, you can choose to
have no toolbars at all, thereby maximizing your display space.
The Bare Minimum Toolbar contains a limited number of tools. With it, you’ll have a large amount of screen
space available for presentations.
The Compact toolbar is the default toolbar selection. It contains standard file management tools as well as
basic editing, writing and navigation tools.
The Full Toolbar provides a complete package of graphic creation, navigation, file management and
editing tools. These toolbars can be individually selected and moved elsewhere on the screen.