14
SMART Board User’s Guide
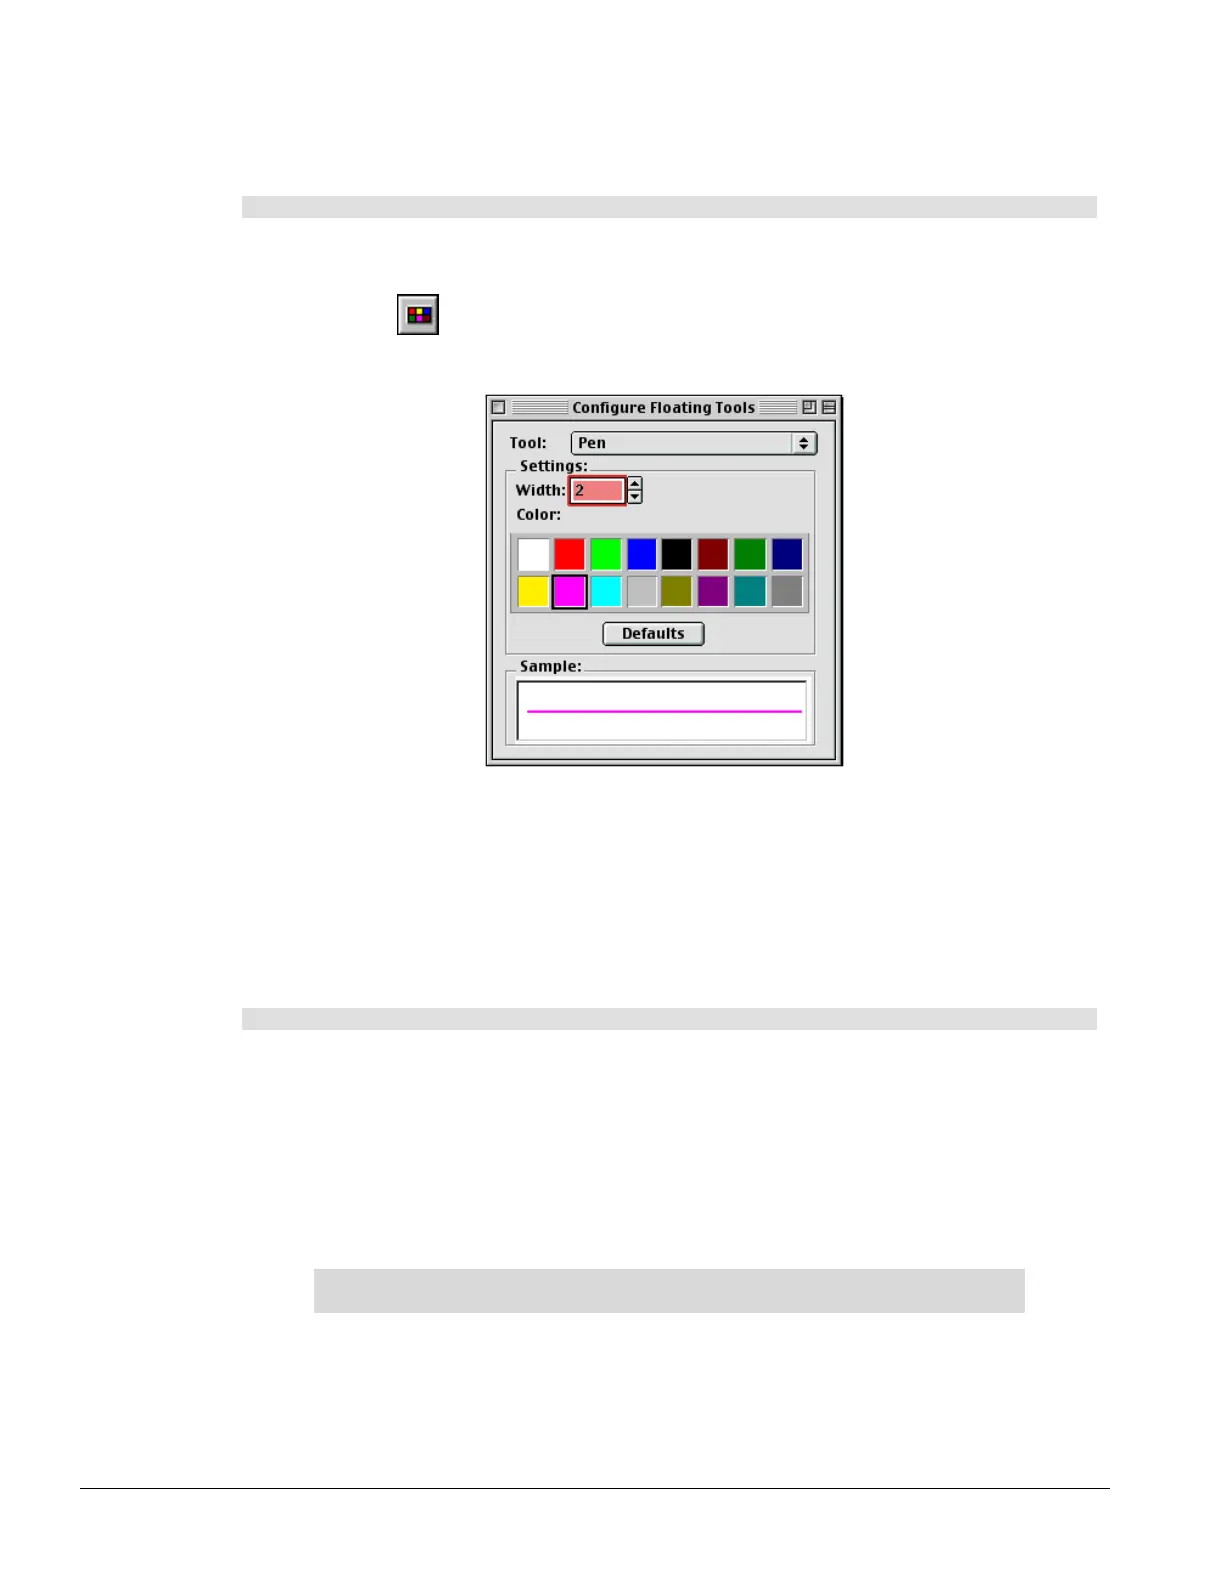
Configuring the Floating Tools
You can configure each floating tool in the Floating Tools palette so each tool takes on the properties that
you want.
To configure the Floating Tools
1 Double-press any Floating Tools button.
OR
Press the
Configure Floating Tools button.
The Configure Floating Tools dialog box appears.
2 Select the drawing tool you want to configure from the Tool list.
3 Select a width for the selected tool in the Width box to increase or decrease line width. The width
range is from 1 to 32 pixels.
4 Select a color from the palette under Color.
Capturing What You Write
The Screen Capture tools allow you to capture an area of the screen or an entire screen and place it in the
current page of your Notebook file.
To do a screen capture
1 Press the SMART Board icon in the menu bar.
2 To capture a region, select Capture Selection, and then press and drag to select the area you
want to capture.
OR
To capture the entire screen, select Capture Screen.
By default, your captured image is saved on a new page in Notebook software. You can change
this by de-selecting the Snapshot to New Page command in the Tools menu of Notebook
software. The newly captured image then appears at the top of the current page.
NOTE: As soon as you capture an image, Notebook software launches for you to see,
manipulate, print and save the image.