4 Installation
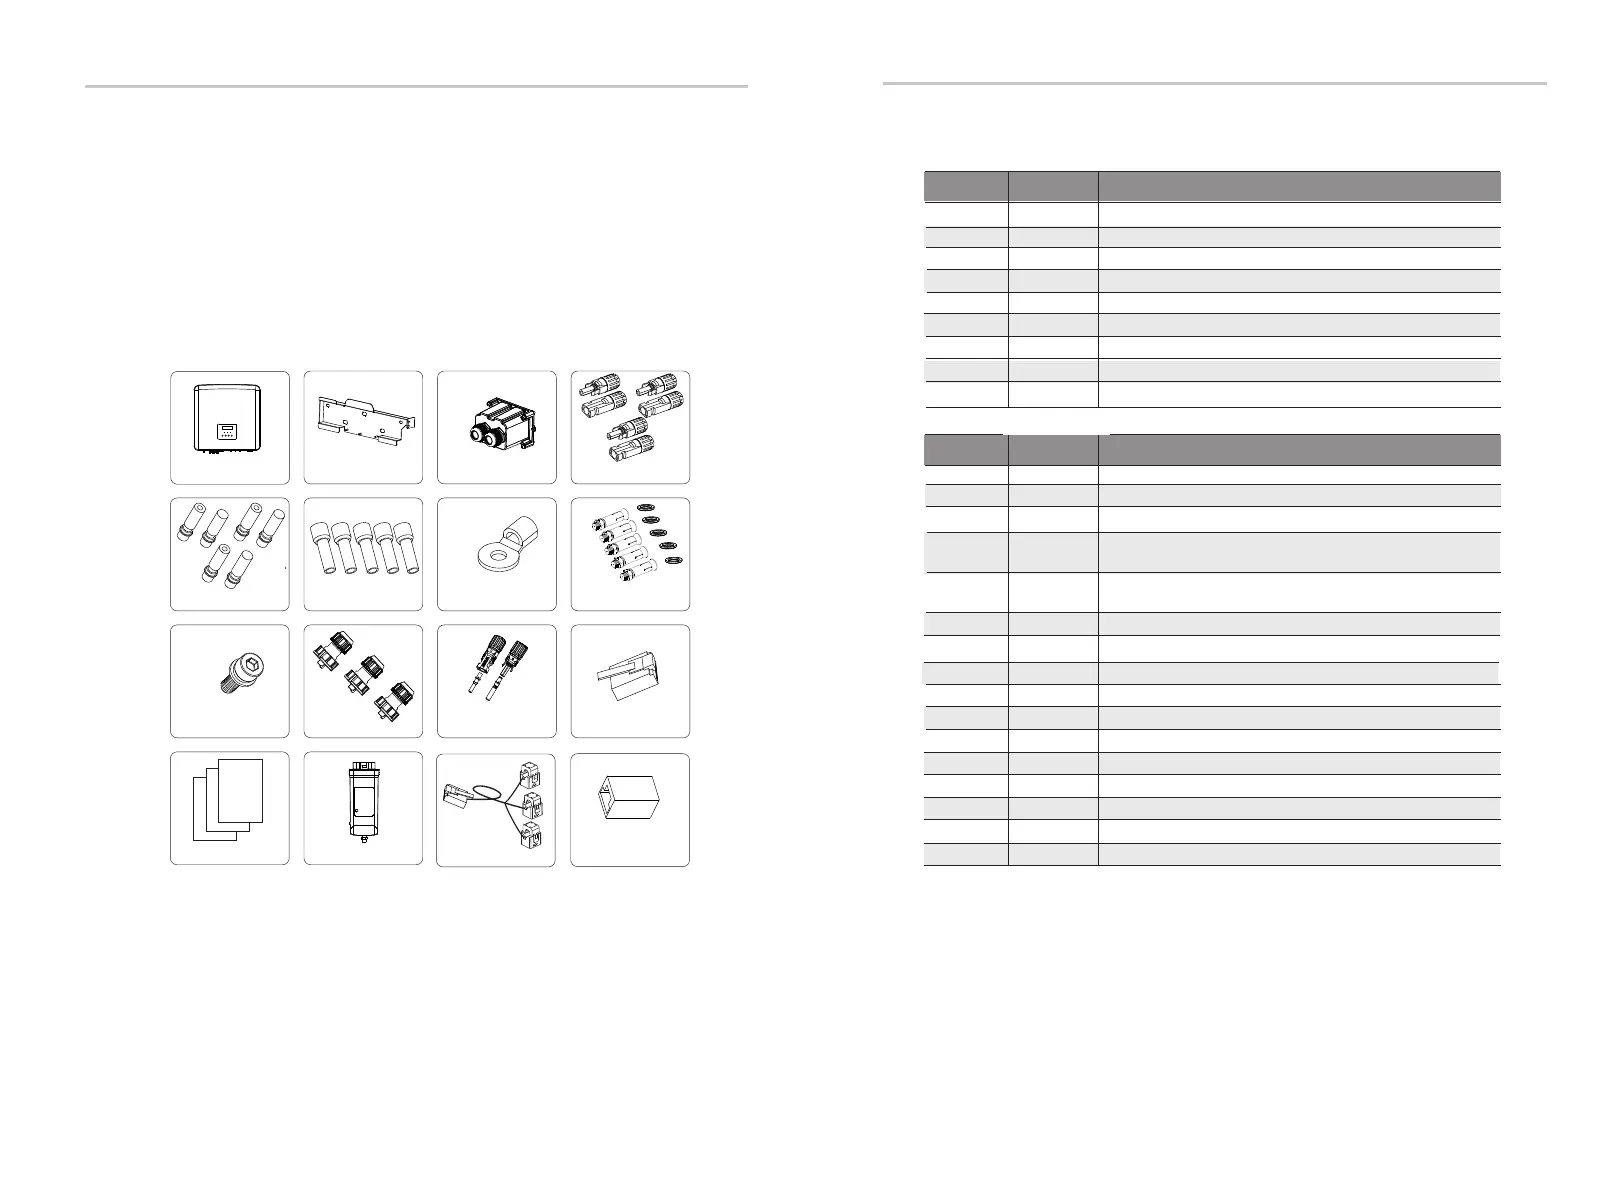
4.2 Packing List
Ensure that the inverter is in good condition via transportation. If there
is any visible damage such as cracks, please contact the dealer
immediately.
1
A
B
C
D
E
F
G
H
I
J
K
1
1
6
3
12
1
6
Description (for D series)
L
M
1
Number
Quantity
Inverter
Bracket
AC protective cover
Positive & negative PV connectors (for 5-6kW inverter,
positive*2, negative*2; for 8-15kW inverter, positive*3, negative*3)
Waterproof connectors with RJ45
6 mm² ferrules
Positive & negative battery connectors & pin contacts
N
O
1
6
OT terminal
P
1
4.1 Check for Transport Damage
Documents
M5 inner hexagon screw
5
Wifi Dongle (optional)
CT
2
Installation
RJ 45 terminals
Note:
“ L ” The inverter in Australia needs to be connected to DRM, which is 1 more communication line
RJ 45 adapter than that in other countries.
23
22
1
A
B
H
I
J
1
3
1
Description (for M series)
L
M
Number
Quantity
Inverter
Bracket
Waterproof connectors with RJ45
(Expansion tubes, expansion bolts, screws, washers)
N
P
1
6
1
Documents
M5 inner hexagon screw
5
Wifi Dongle (optional)
RJ 45 terminals
Installation
RJ45 connector
1
B C D
F G H
M N
O
I
J
KK
L
P
E
A
Positive & negative PV pin contacts (for 5-6kW inverter,
positive*2, negative*2; for 8-15kW inverter, positive*3, negative*3)
(Expansion tubes, expansion bolts, screws, washers)
RJ45 connector
Open the package and check the materials and accessories
according to the following list.

 Loading...


