4.6 Mounting
Ø Preparation
Ø Step 1: Fix the wall bracket to the wall
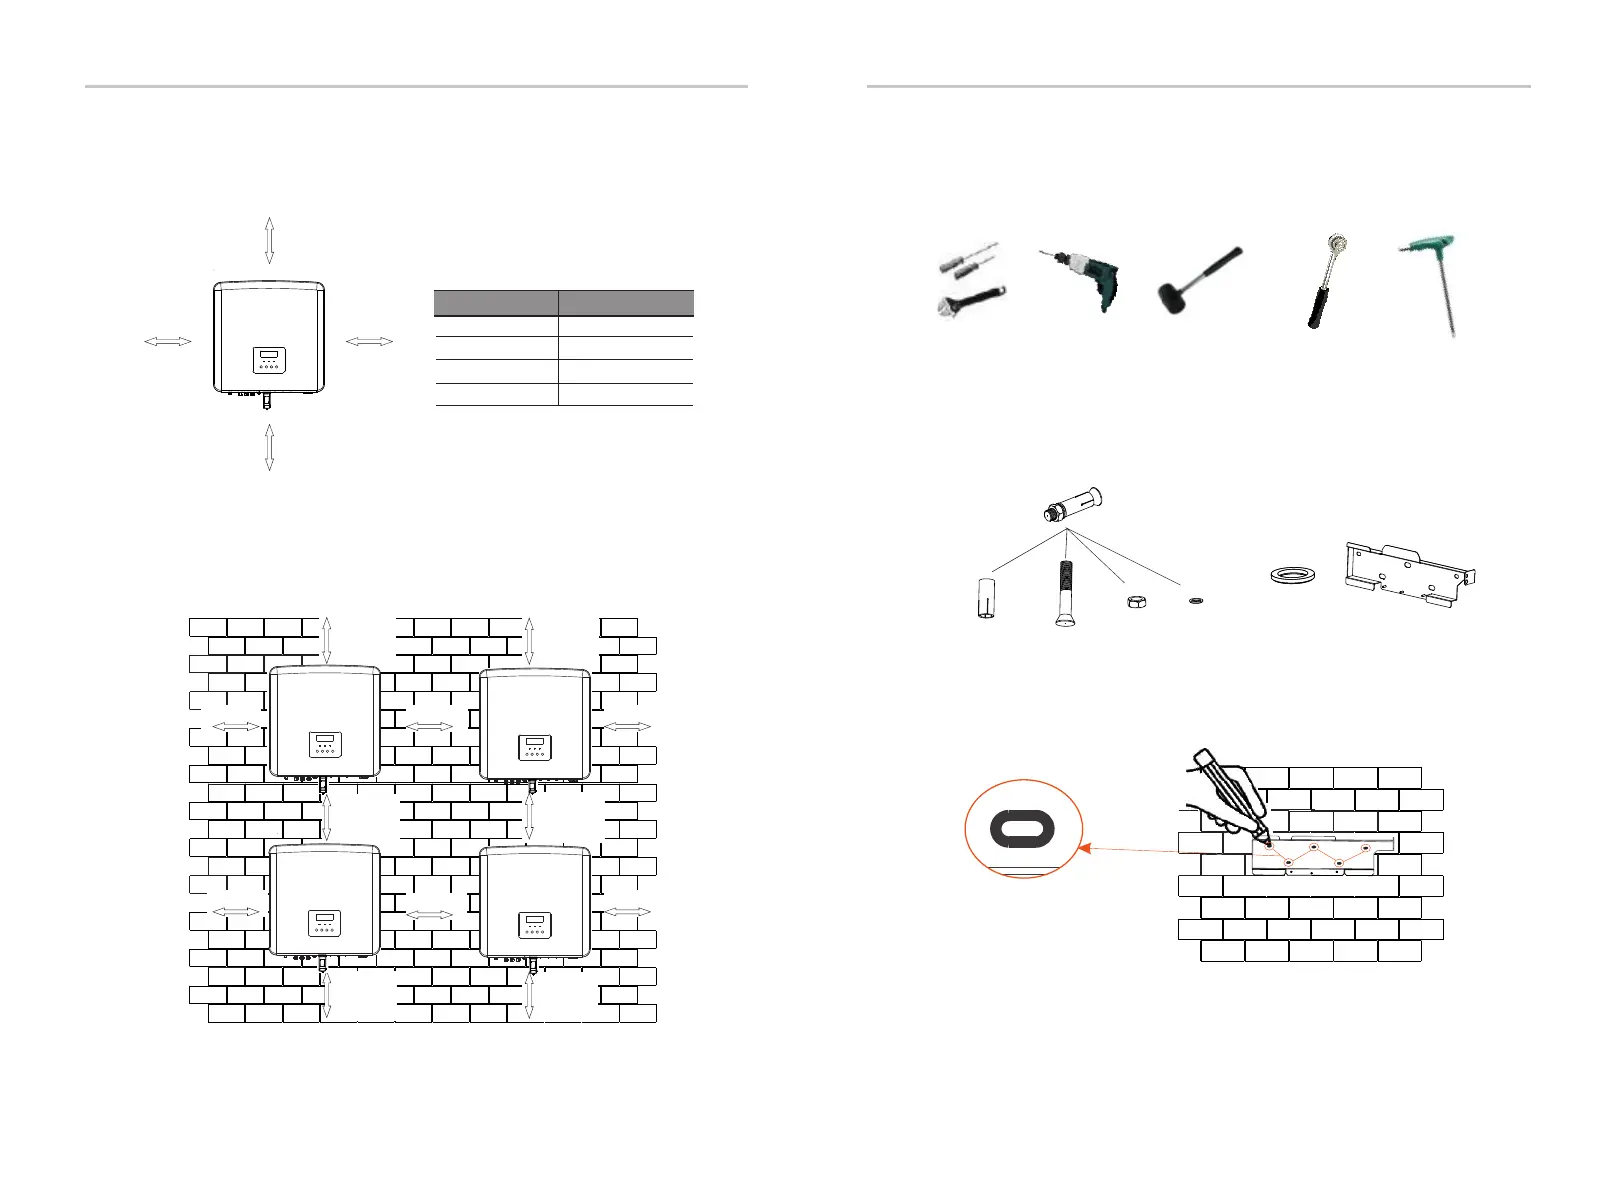
Please prepare the following tools before installation.
Installation tools: screwdriver, wrench, Φ8 drill, rubber hammer, socket
wrench set and Hexagon keys.
a) Use a spirit level and a marker to mark drilling holes of the bracket on
the wall.
b) Drill holes at marked spots with depth of 65 mm.
4.5.3 Installation Space Requirements
Reserve enough space when installing inverter (at least 300mm) for heat
dissipation.
InstallationInstallation
Expansion screw, Expansion bolt, Screw, Washer
Bracket
It consists of four parts
Washer
28
29
300mm
300mm
300mm
500mm
Position
Min Distance
Left
Right
Up
Down
Reserved space dimensions of
installation
≥300mm
≥300mm
≥300mm≥300mm
≥300mm
≥300mm ≥300mm
≥300mm
≥300mm
≥300mm
≥1000mm
≥1000mm
≥500mm
≥500mm
≥300mm
≥300mm
First find the expansion screw and the bracket in the accessory bag,
as shown below:
For multi-inverter installation scenarios, the inline installation
method is recommended; when the space is insufficient, the
recommended method of installation in the form of "products"; it is
not recommended to install multiple inverters in stacks. If you
choose stack installation, please refer to the installation separation
distance below.

 Loading...


