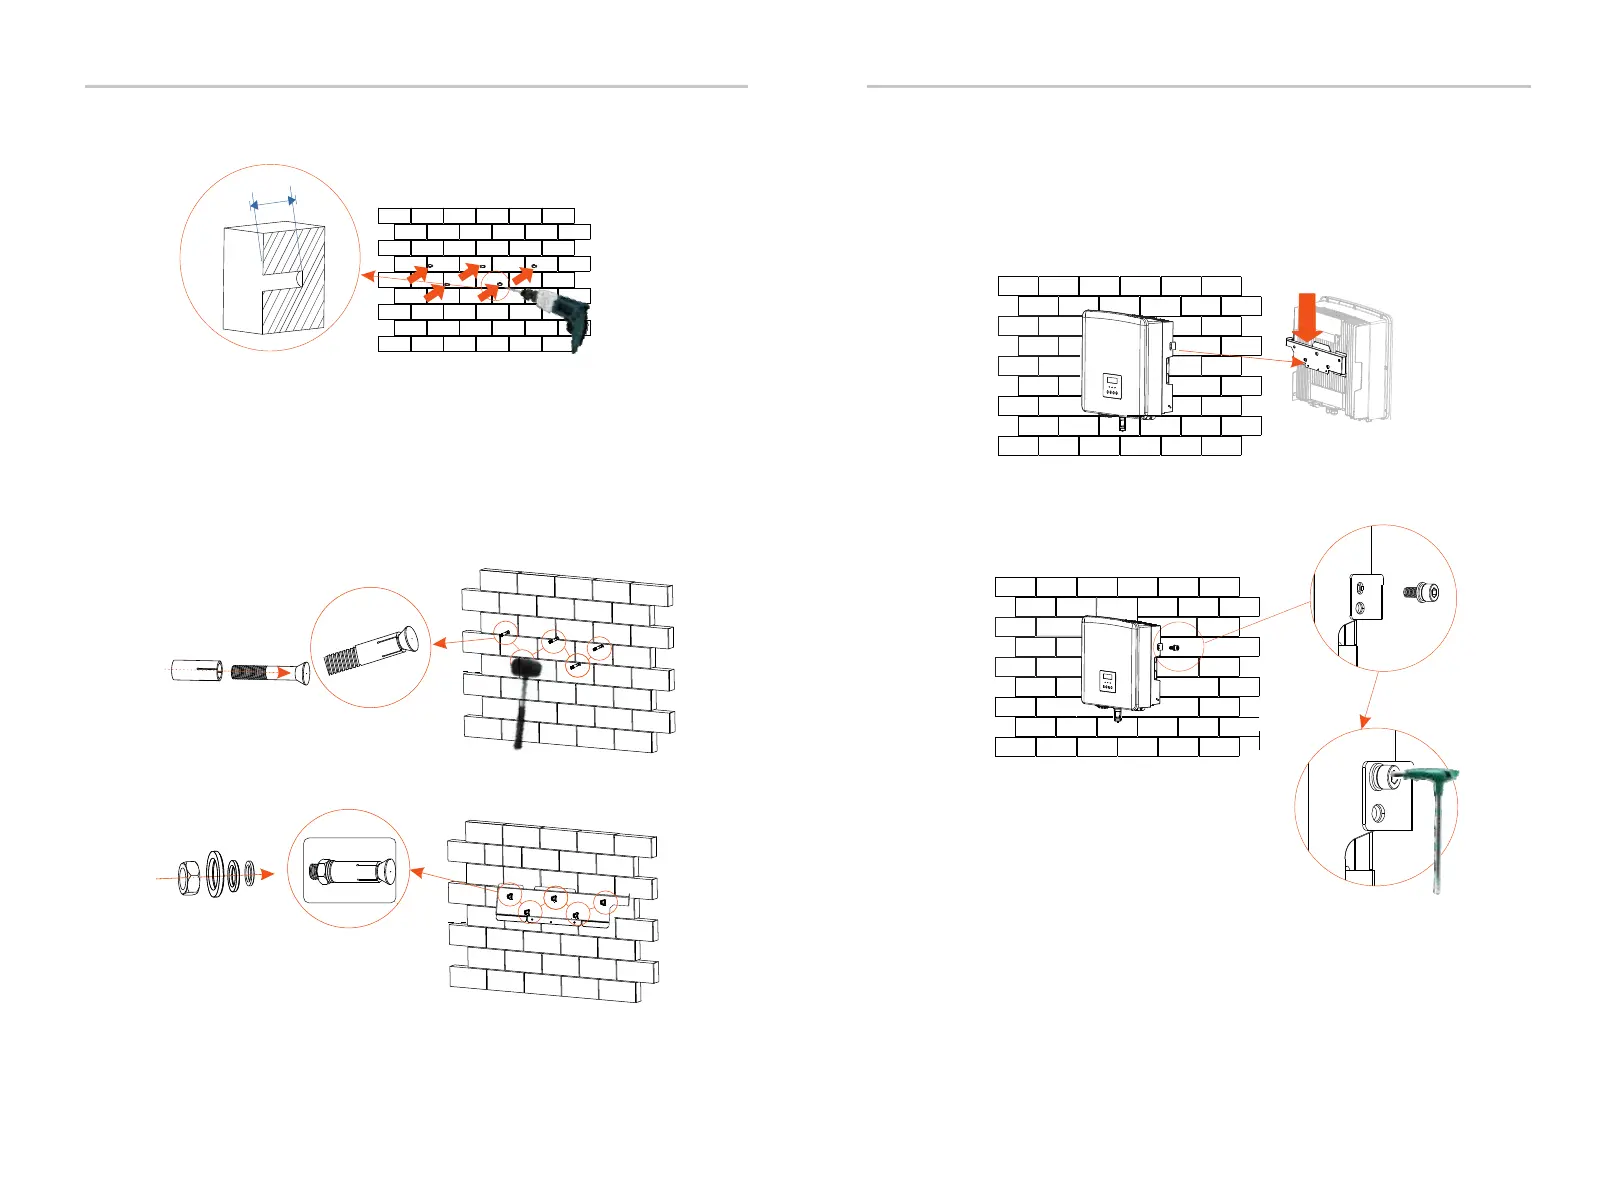
Ø Step 3: Tighten the inverter and bracket
e ) Hang the buckle on the inverter to the corresponding position of the
backplane;
f ) Use the inner hexagonal wrench to tighten the inner hexagonal screw
on the right side of the inverter.
Ø Step 2: hang the inverter on the bracket
c) Insert an expansion bolt into an expansion tube and then insert them
into the hole, use rubber hammer to knock them into the wall;
d) Hang the bracket on the expansion bolts on the wall, put different
types of washers into the bolts and then use the inner hexagonal wrench
to screw the screw until a "bang" is heard.
InstallationInstallation
c)
Hammer
Expansion tube, expansion bolt
30
31
b)
6
5
.
0
0 m
m
Φ8 Drill
(Depth: 65 mm)
d)
Screw, Washer
e)
Inner hexagonal wrench
(Torque:1.2±0.1 N· m)
f)

 Loading...


