C
Electrical Connection
Electrical Connection
72
73
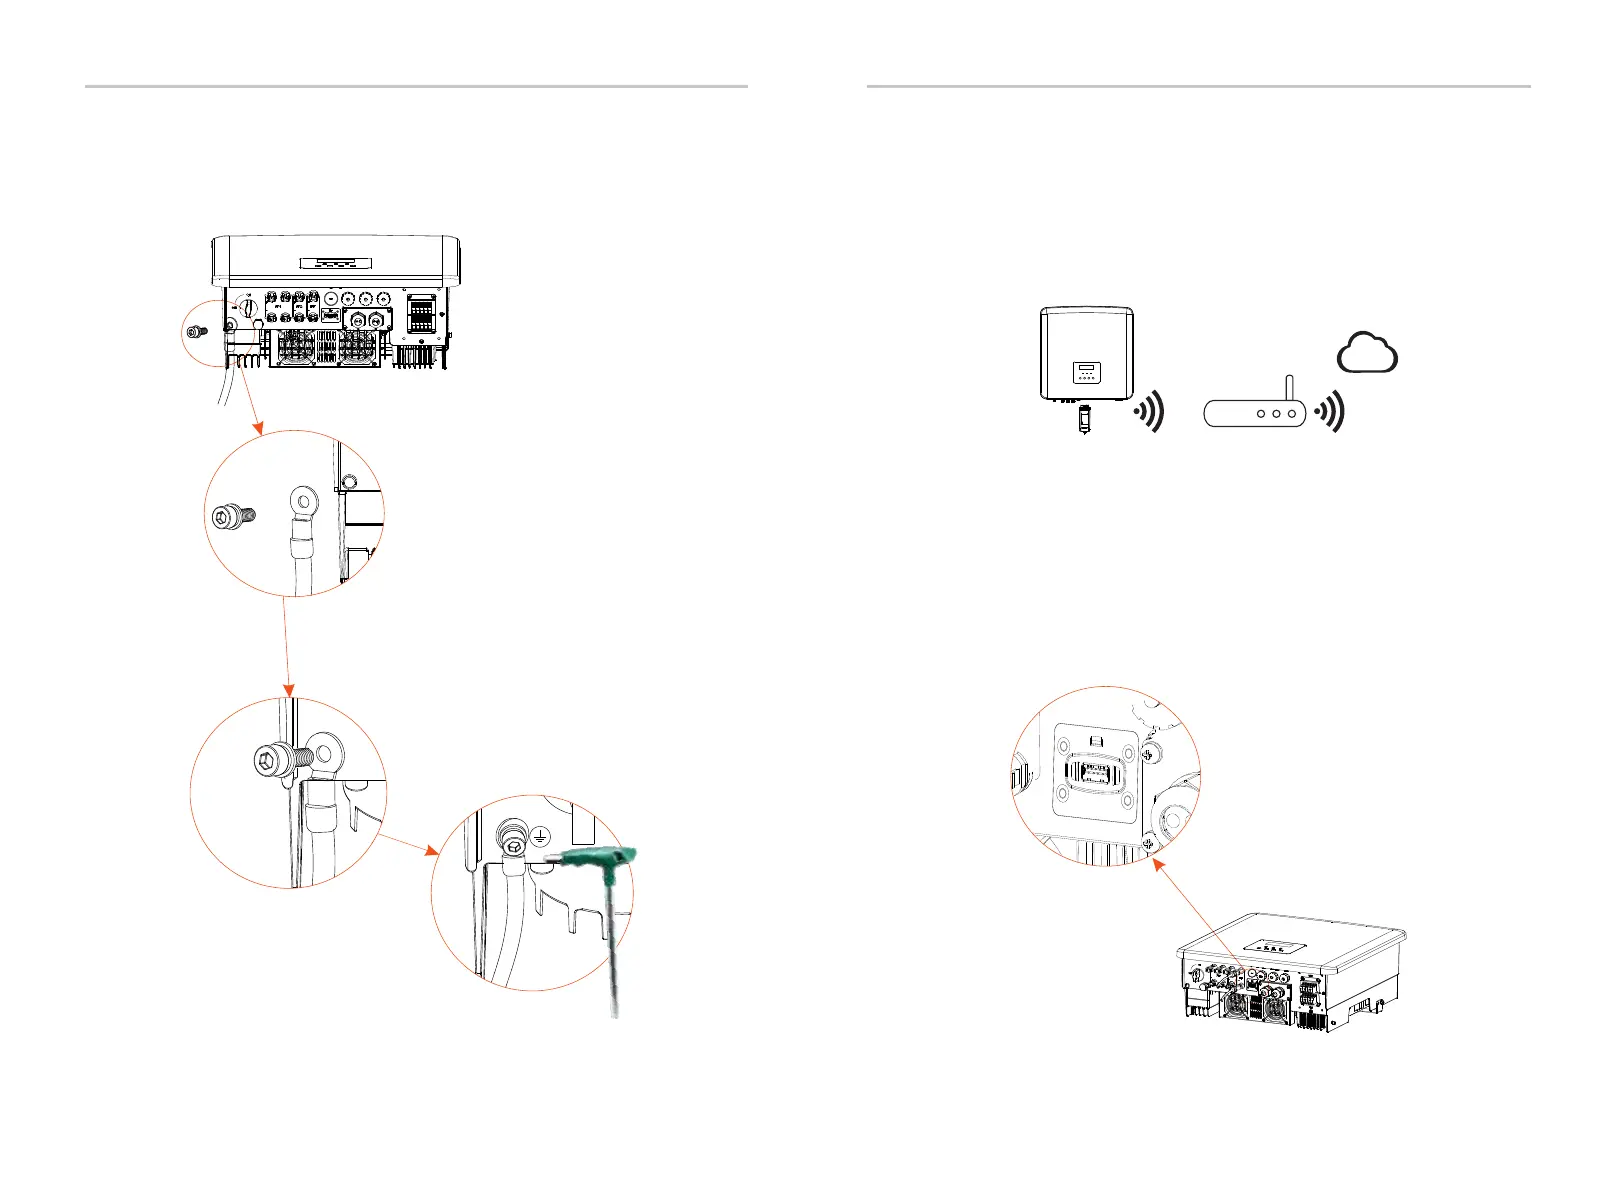
Ø DONGLE connection diagram
Ø Wireless monitoring accessories connection steps
Step 1. First find the DONGLE port of the inverter.
5.7 Monitoring Connection (Accessories)
Gri d
CAN C AN LCD DR M
Gri d
EPS
CAN C AN LCD DR M
Hexagon keys
Torque: 0.8±0.2N·m
Upgr ade/D ongle
D
o
n
g
l
e
/U
pg
ra
d
e
Router
Cloud
DONGLE port connection line of the the M series inverter is on
the X3-Matebox, for specific installation details, please refer to the
X3-Matebox Quick Installation Guide It is necessary to wire the D
series according to the following steps.
The inverter provides a DONGLE port, which can transmit data of the
inverter to the monitoring website via Wifi Dongle, 4G Dongle
and LAN Dongle. (If necessary, purchase products from us.)
Step 4. Find the ground connection port on the inverter, and screw
the ground wire on the inverter with an M5 Hexagon keys.

 Loading...


